Contents
Add a client
Bring a client onto DiscoverWorthy — whether they already have a website or you are building one from scratch — and set what you charge them.
- 1
Check you can add clients yet
Two things have to be in place before DiscoverWorthy will let you add anyone: an active subscription, and Stripe connected so client payments can reach your bank.
On a free trial you can explore the whole workbench, but the Clients page will ask you to subscribe before you add anyone. If your subscription is active but Stripe is not connected, it will tell you that instead.
Both live in Account. Worth sorting before you start, because you will hit them at the point you are trying to onboard someone real.
This is the one place the product genuinely blocks you rather than warning you. If the Add buttons are missing, it is almost always one of these two.
- 2
Clients is where they live, not where they start
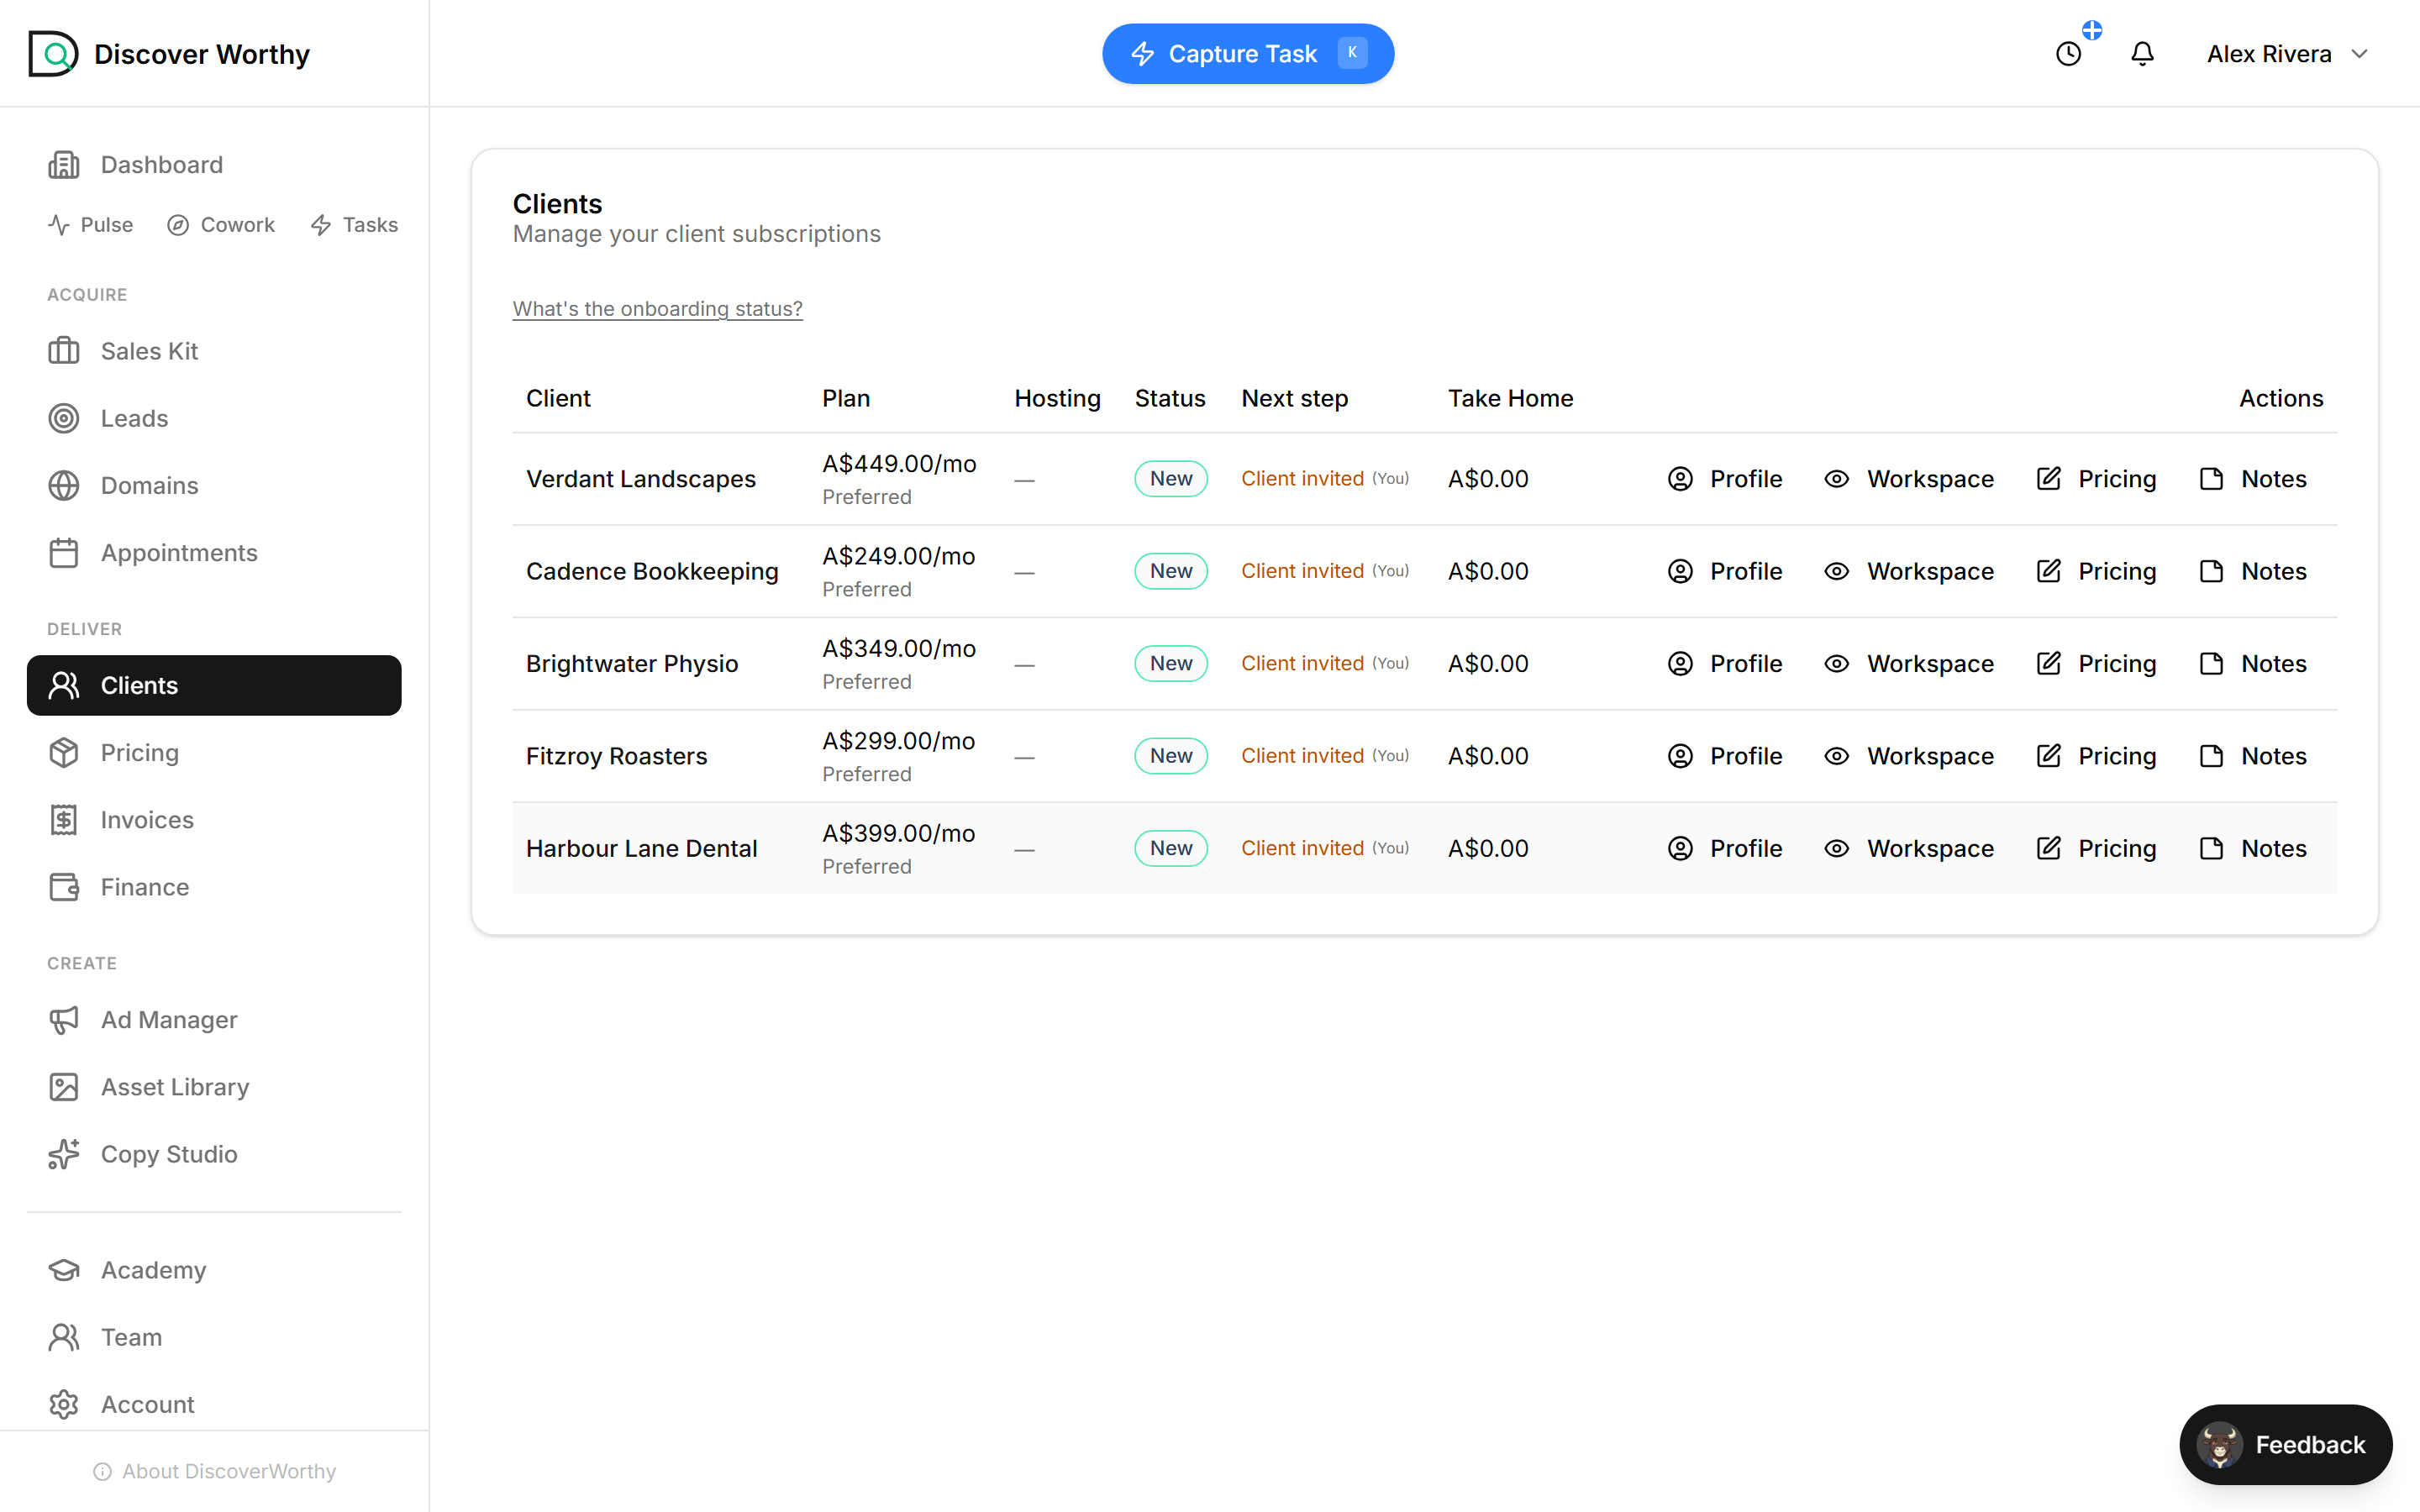
This is the page you will spend time on once clients are running: what each one pays, which plan they are on, where their onboarding is up to, and what you take home.
There is no "add client" button here, and that trips most people up. A client is always created from somewhere else — a domain, a lead, or a site you build for them — and then appears on this list.
Take Home is what reaches you after the DiscoverWorthy plan is paid for. It reads zero until a client is actually being billed, which is correct rather than broken.
- 3
Start from Domains
Domains is the working list of businesses you are actively engaged with. Leads graduate here once you start doing something with them, and clients are created from here.
Three ways in, top right: add a client who already has a website, build one with Rigg for a client who does not, or manage the funnel stages themselves.
Open Domains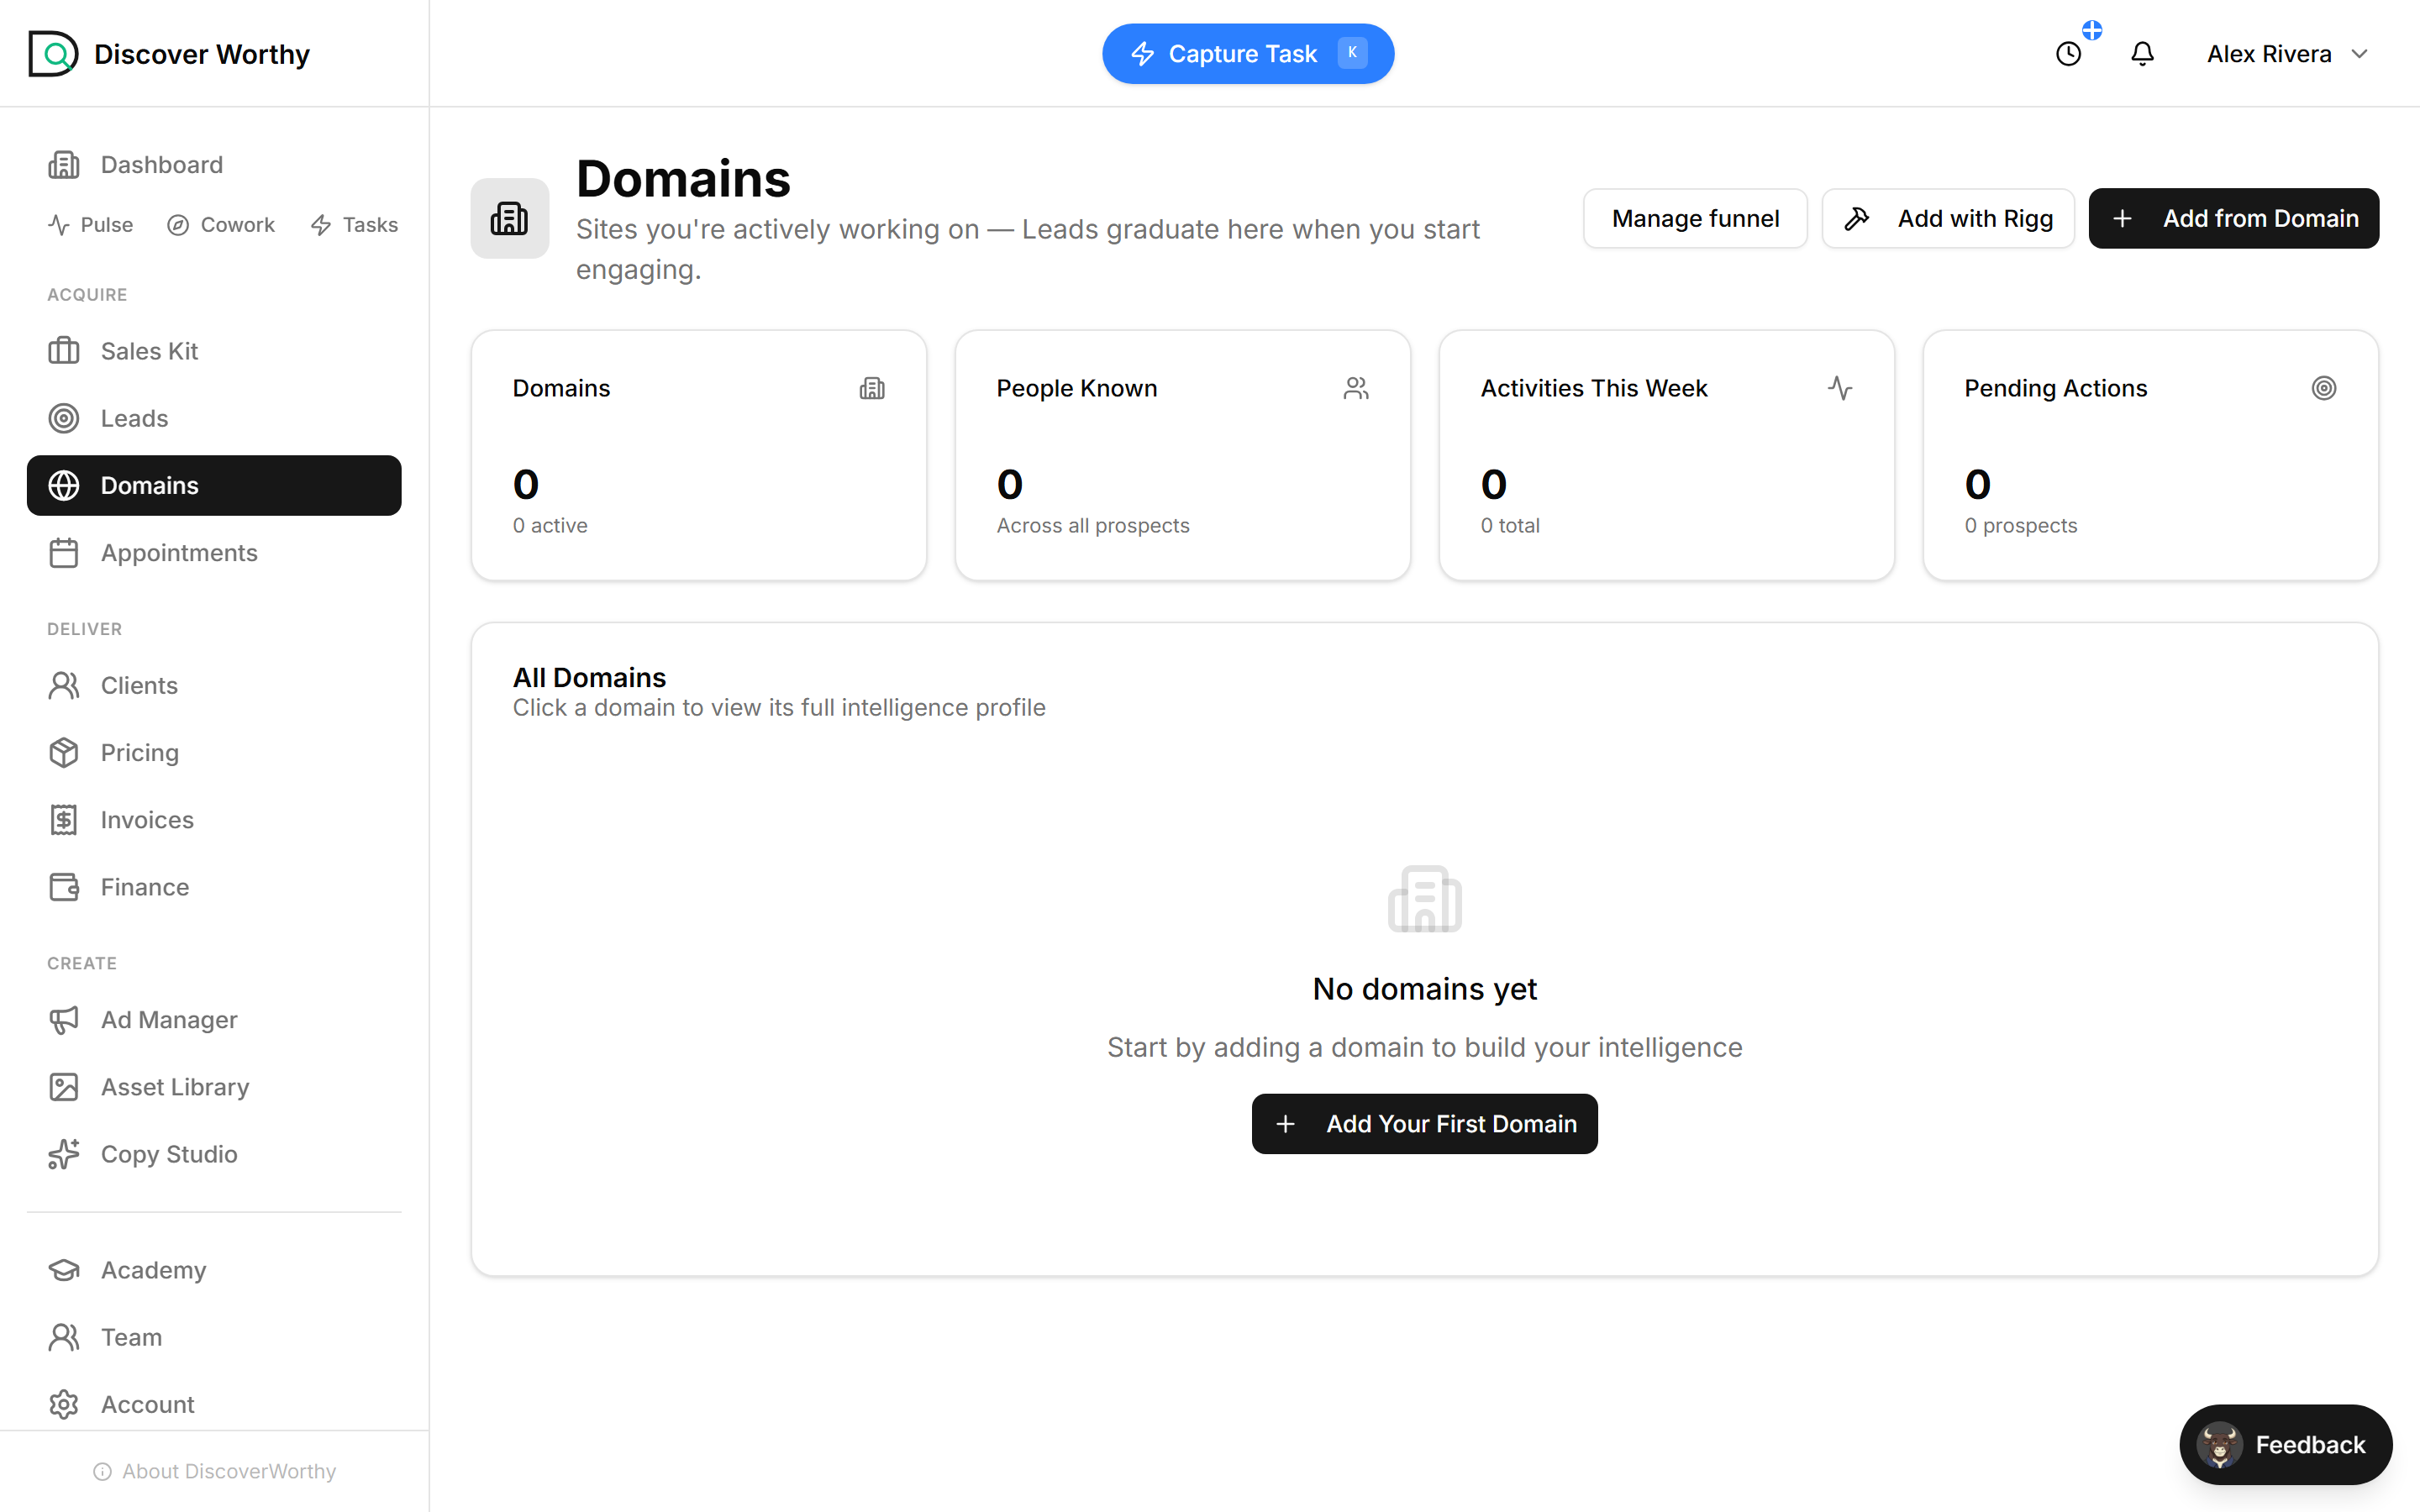
- 4
If your client already has a website
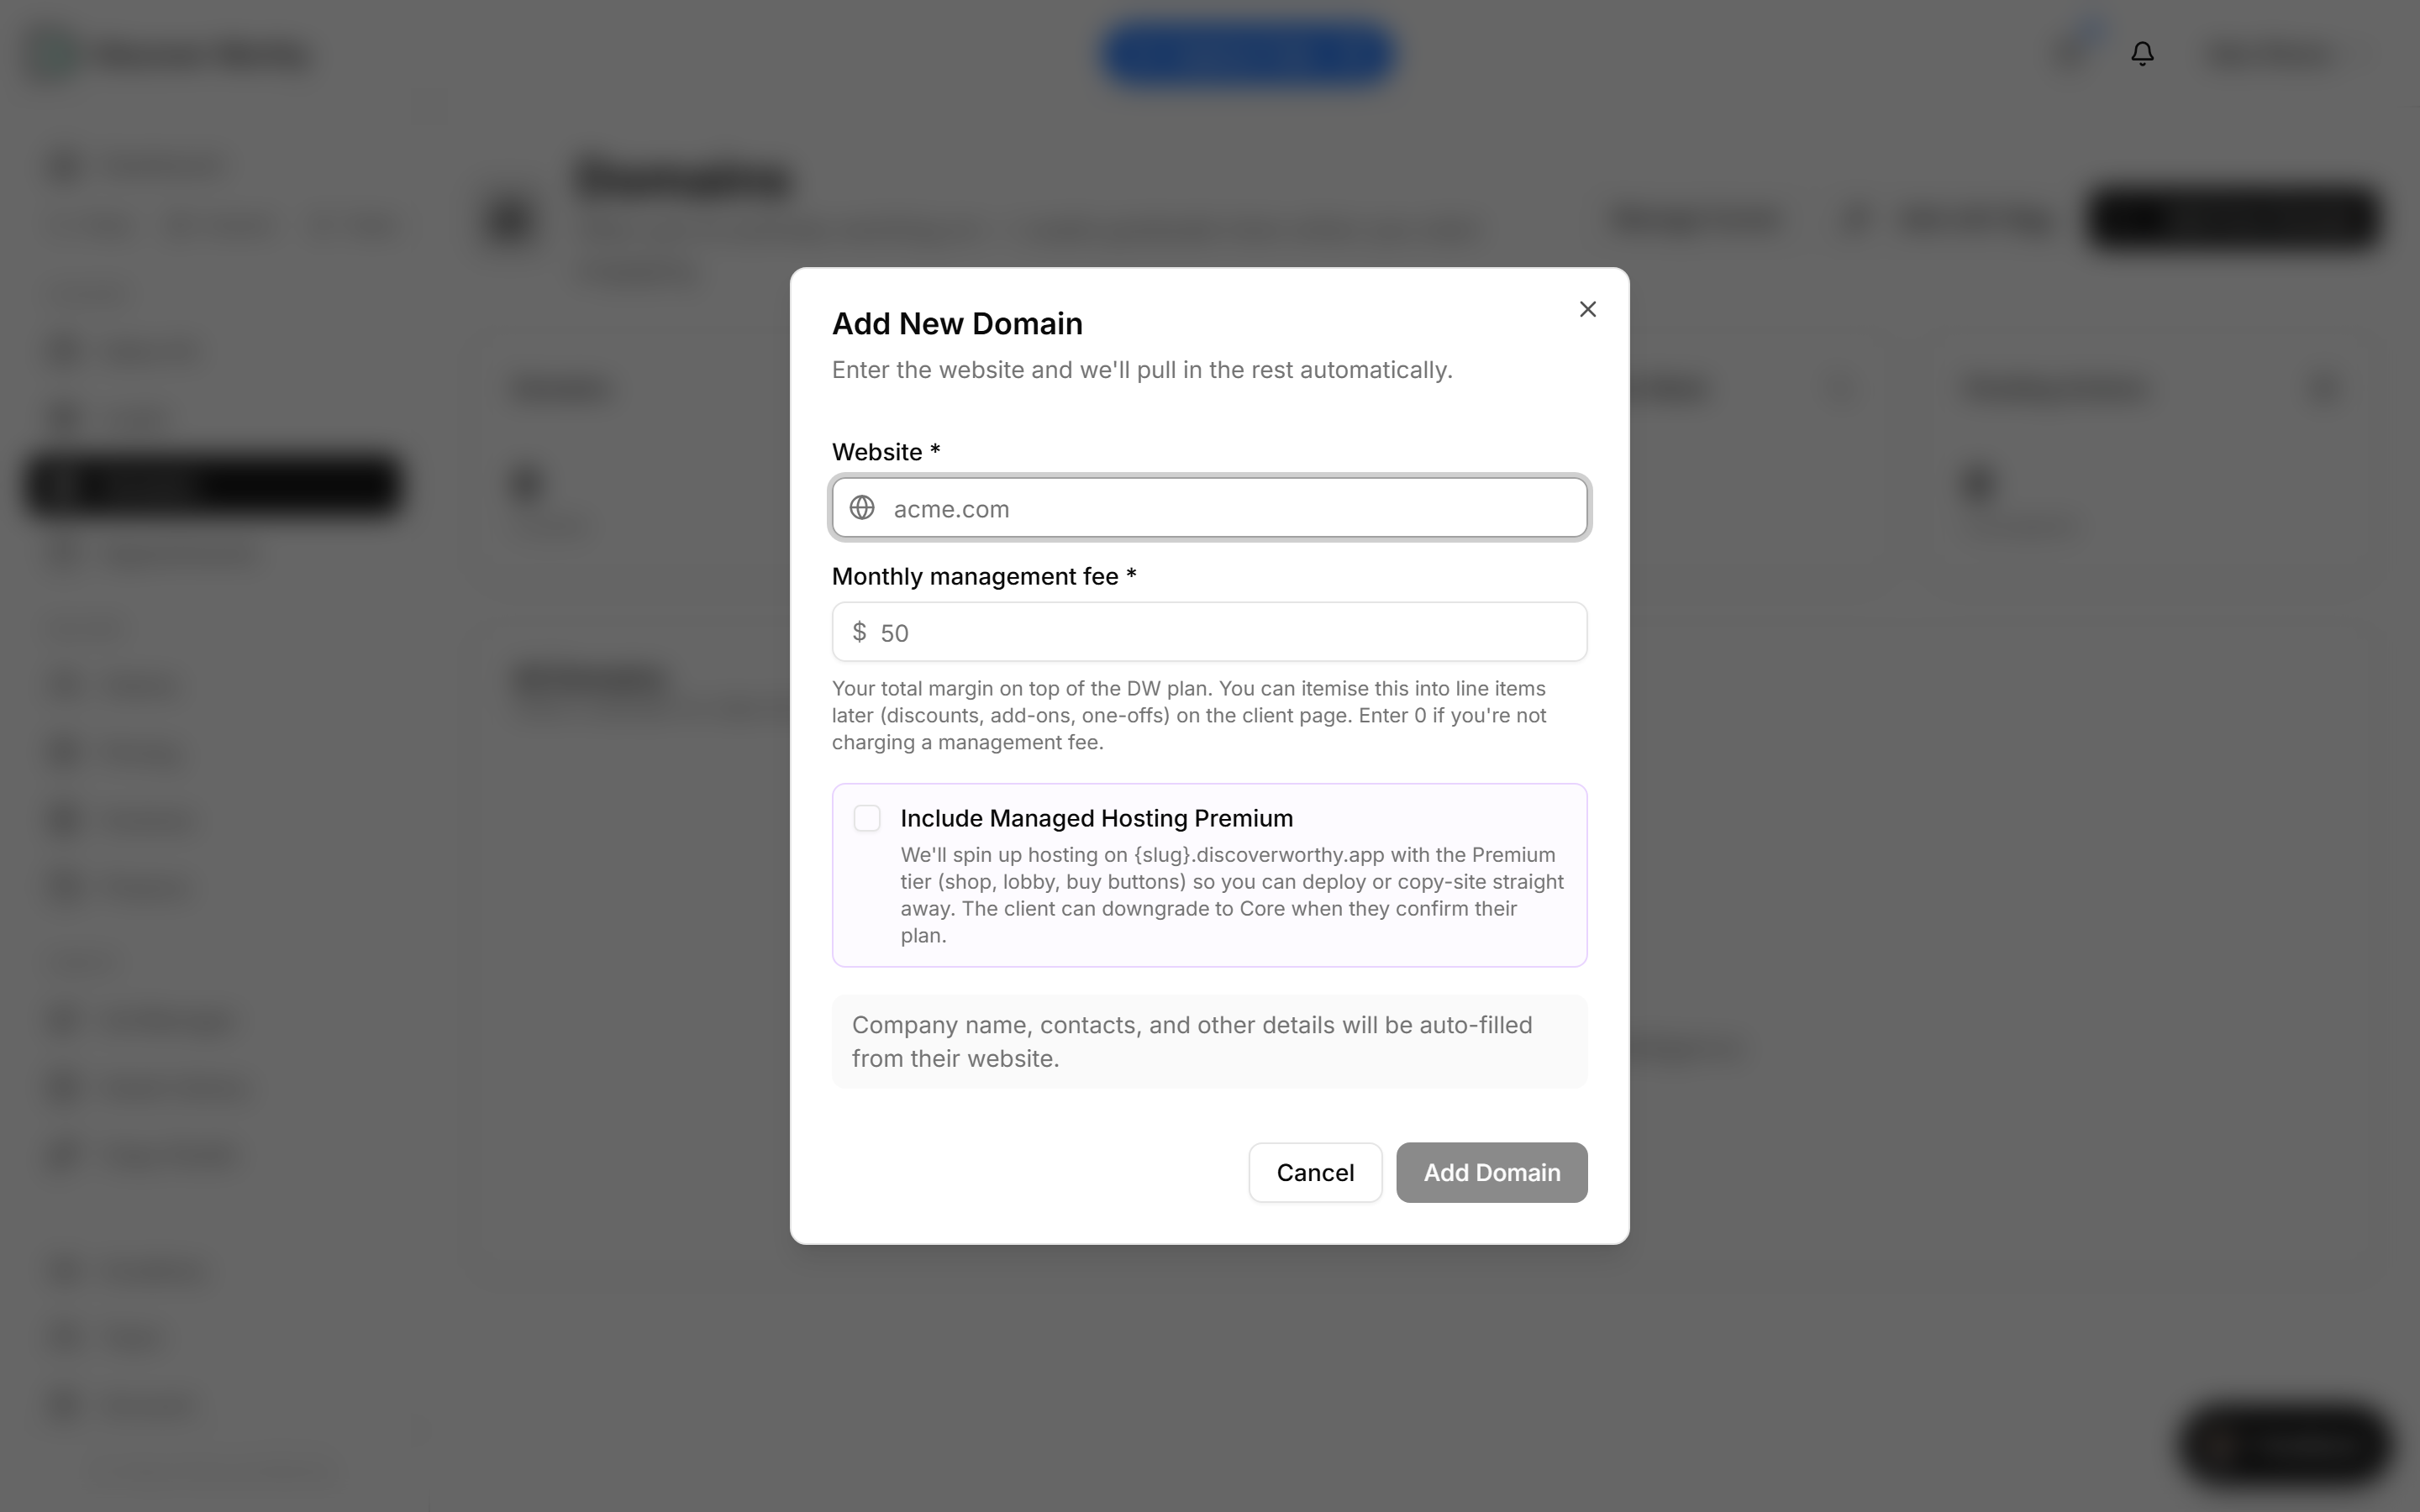
Choose Add from Domain and enter their website. That is genuinely all the detail you need to type — the company name, contacts and other details get filled in from the site itself.
The one number you do have to decide is the monthly management fee. That is your margin, on top of what DiscoverWorthy charges for the plan. Put 0 if you are not charging a management fee; you can break it into line items later on the client page.
There is also an option to include Managed Hosting Premium, which spins up hosting straight away so you can deploy or copy a site without waiting. The client can move down to Core later if they do not need it.
The website has to resolve, and it cannot already belong to an active DiscoverWorthy workspace — if it does, the button stays disabled and tells you which business already has it.
- 5
If they have no website yet
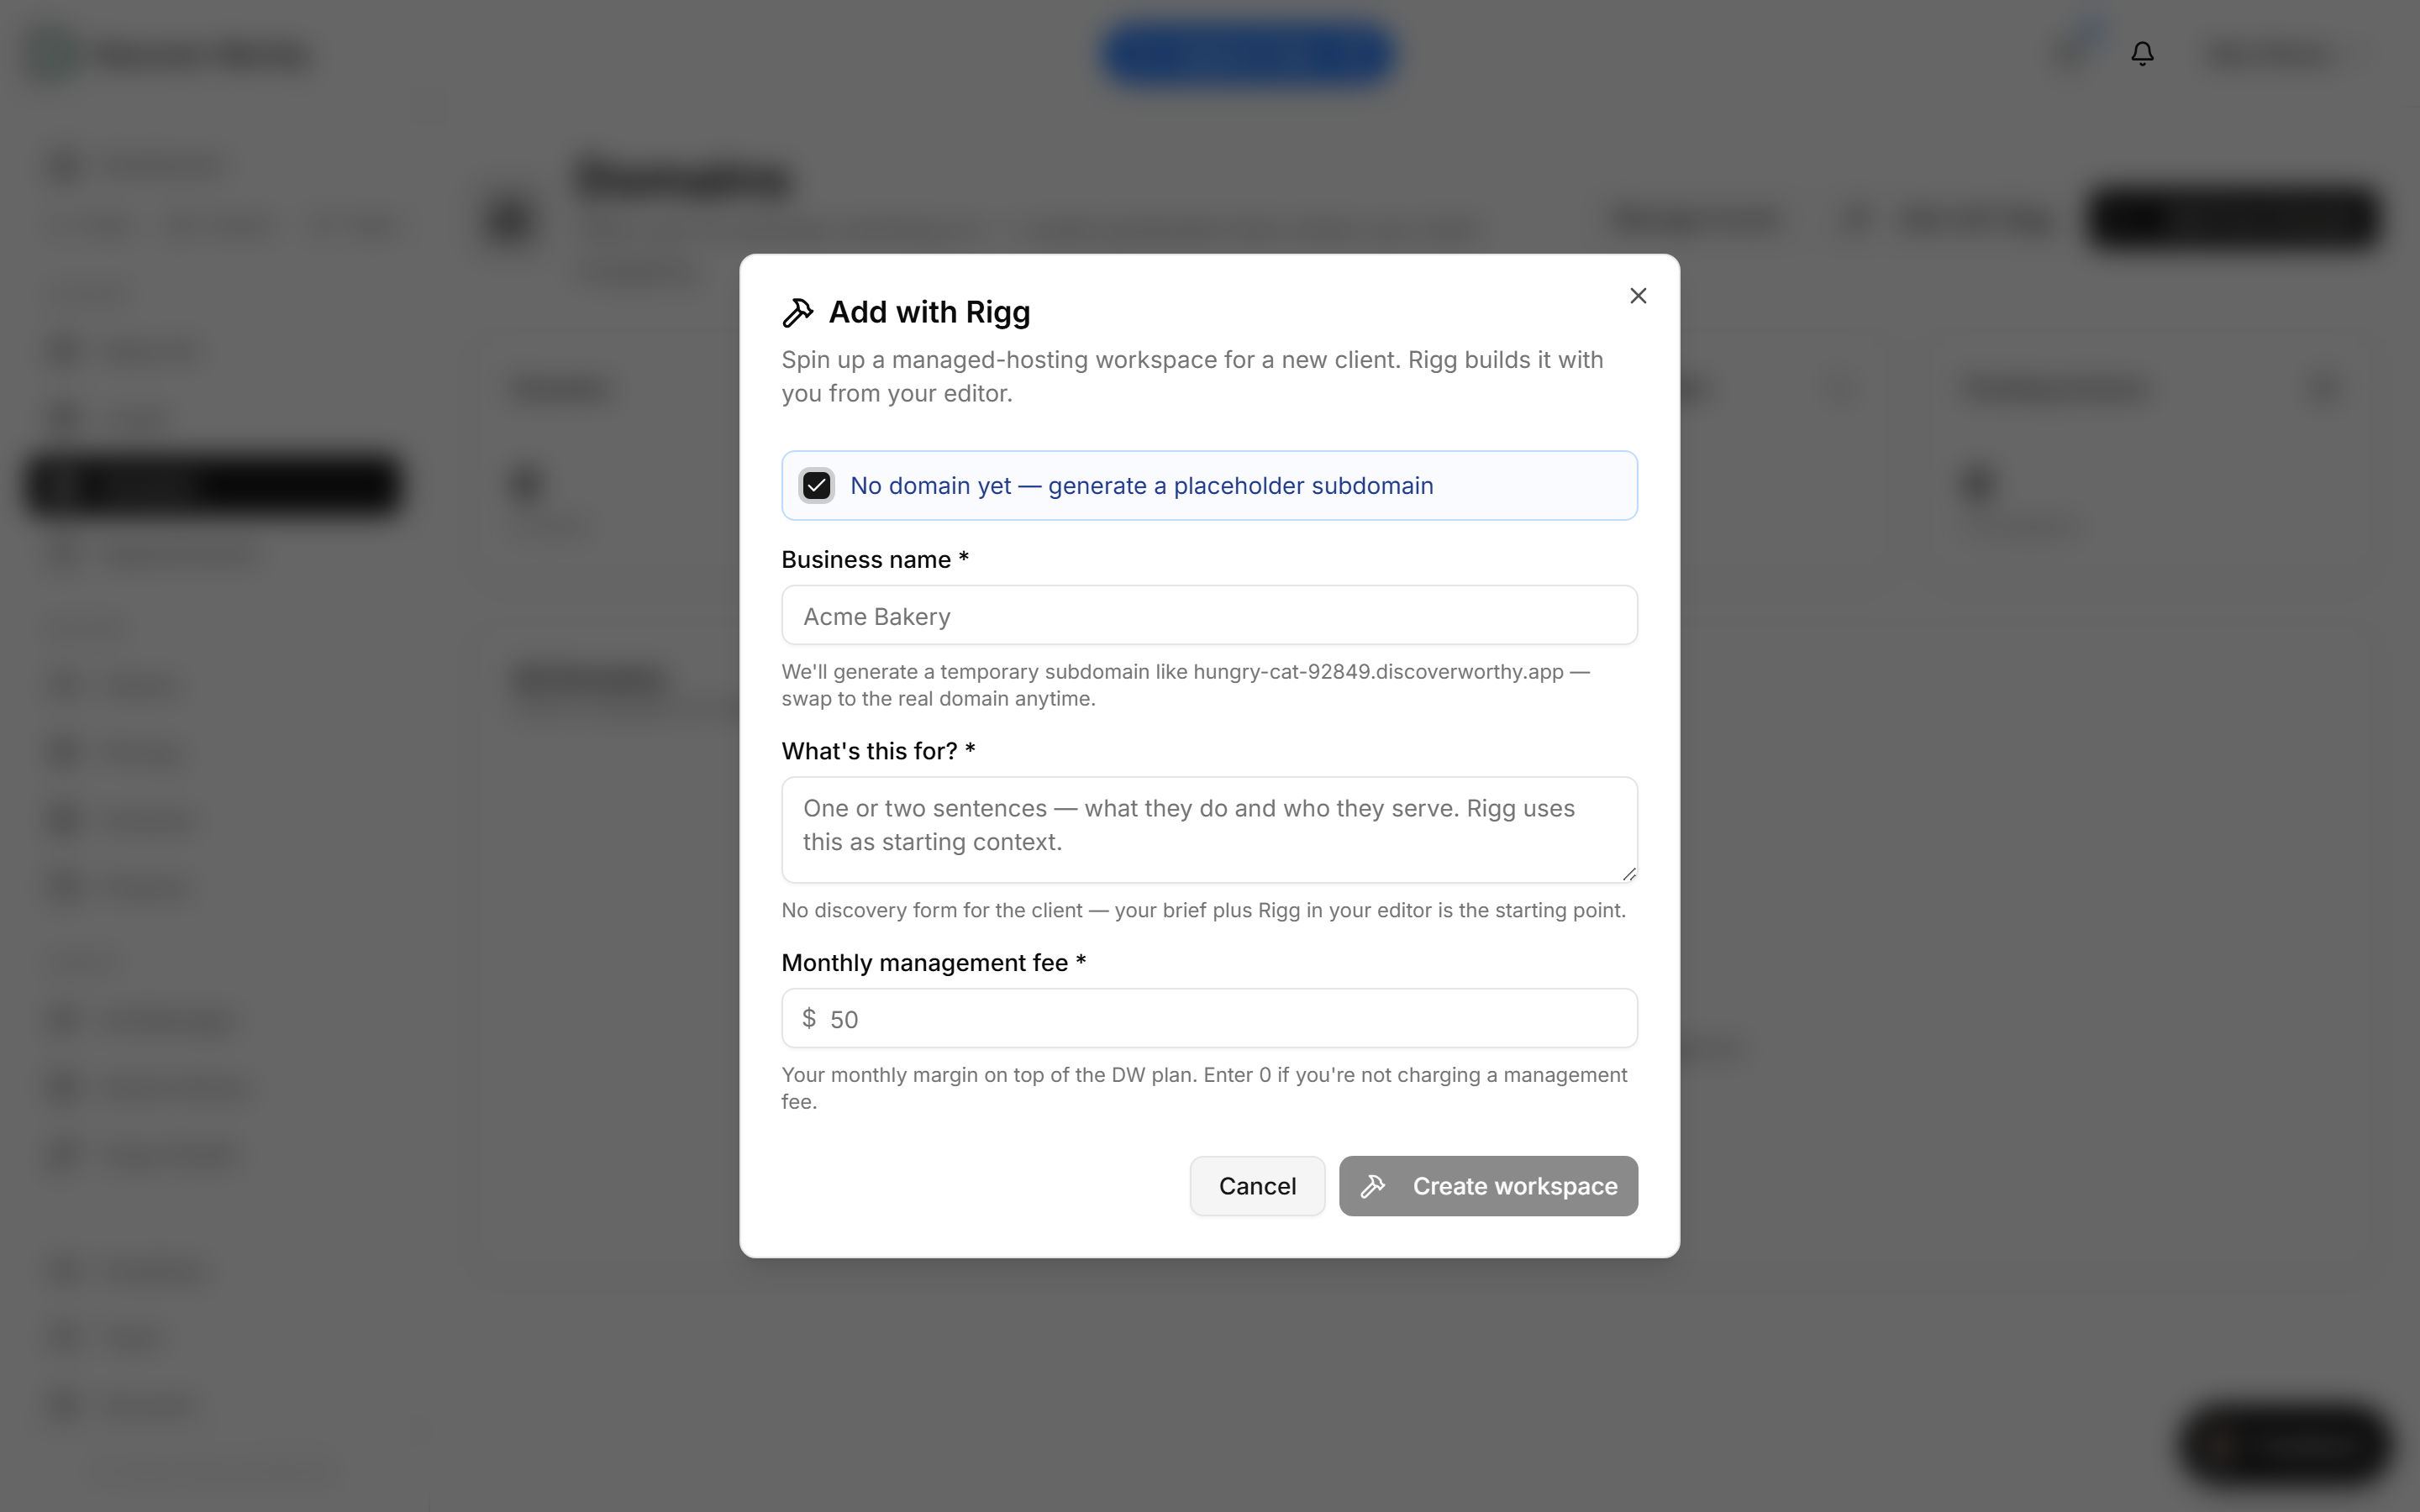
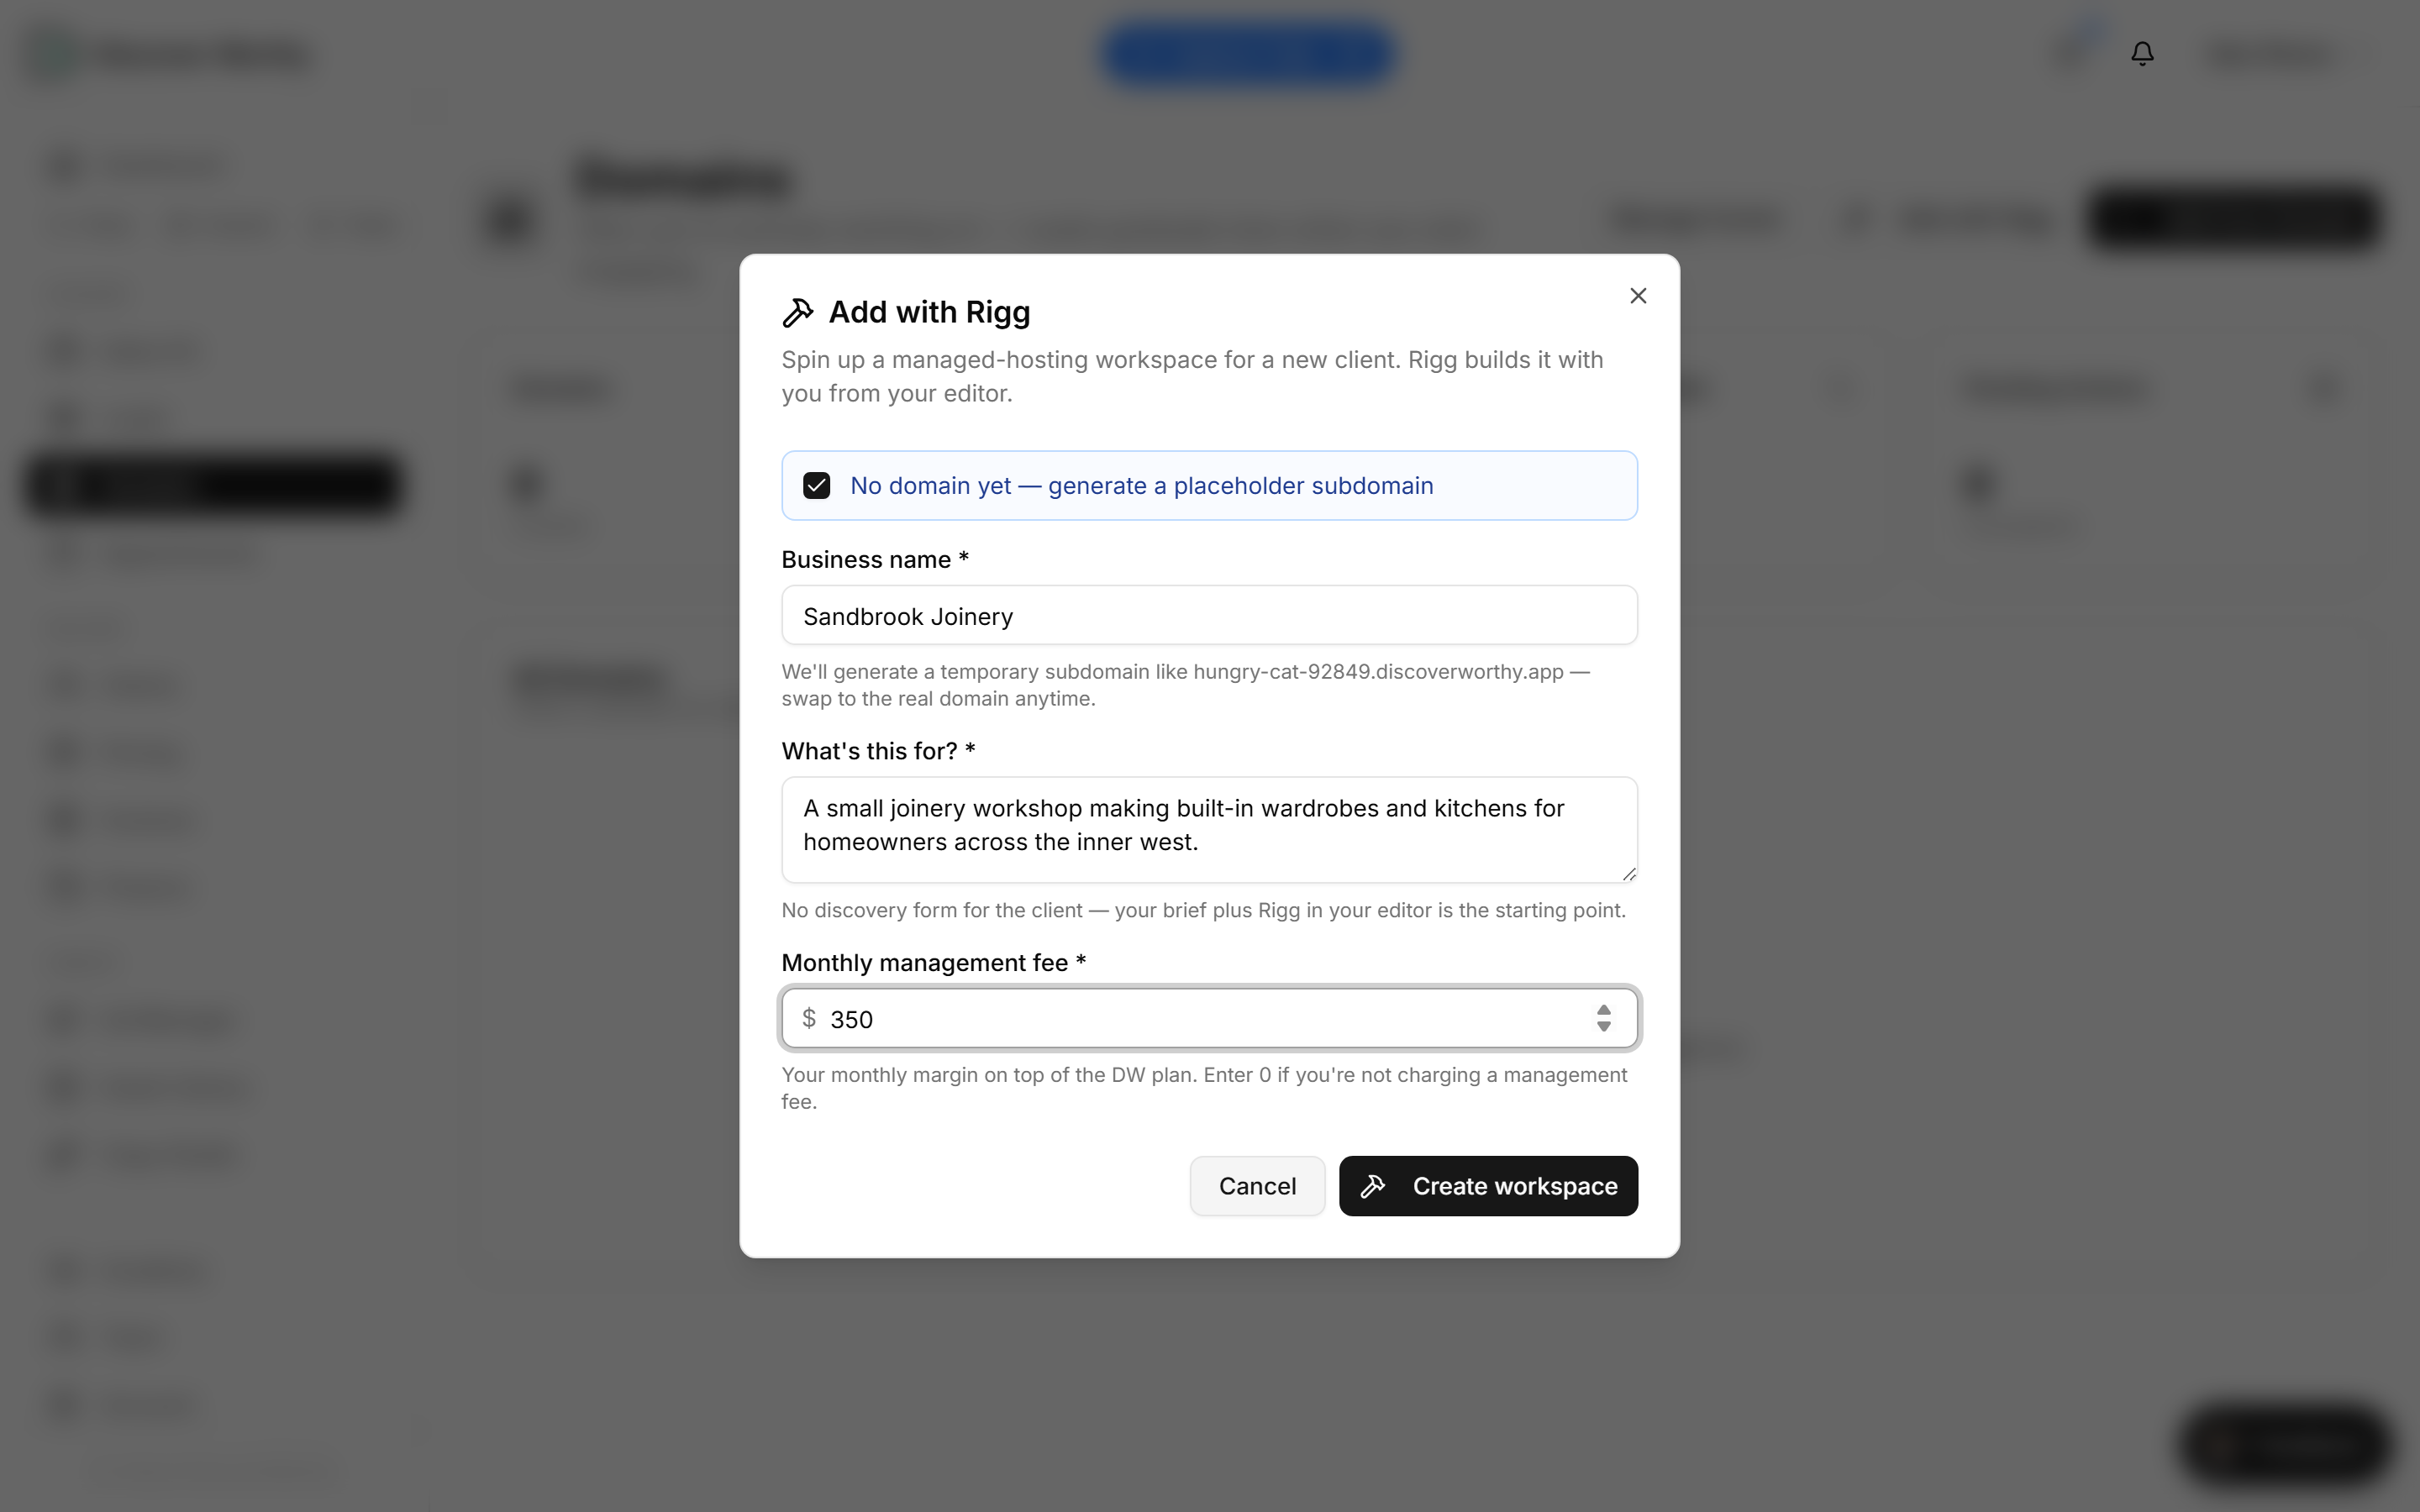
Choose Add with Rigg instead. This is the path for a client you are building from scratch, and it does not ask for a domain at all.
You get a placeholder address straight away — something like hungry-cat-92849.discoverworthy.app — so there is a real, working site to build against from minute one. You swap it for their proper domain whenever it is ready, from Hosting.
- 6
Describe the business in a sentence
The brief is what Rigg starts from, so it is worth a proper sentence rather than three words. What they do, and who they serve, is enough.
There is no discovery form sent to the client here. Your brief plus Rigg in your editor is the starting point, which is the trade-off of this path: faster to start, more of the thinking is yours.
Set your management fee the same way as the other path — your margin, on top of the plan.
- 7
The workspace is created
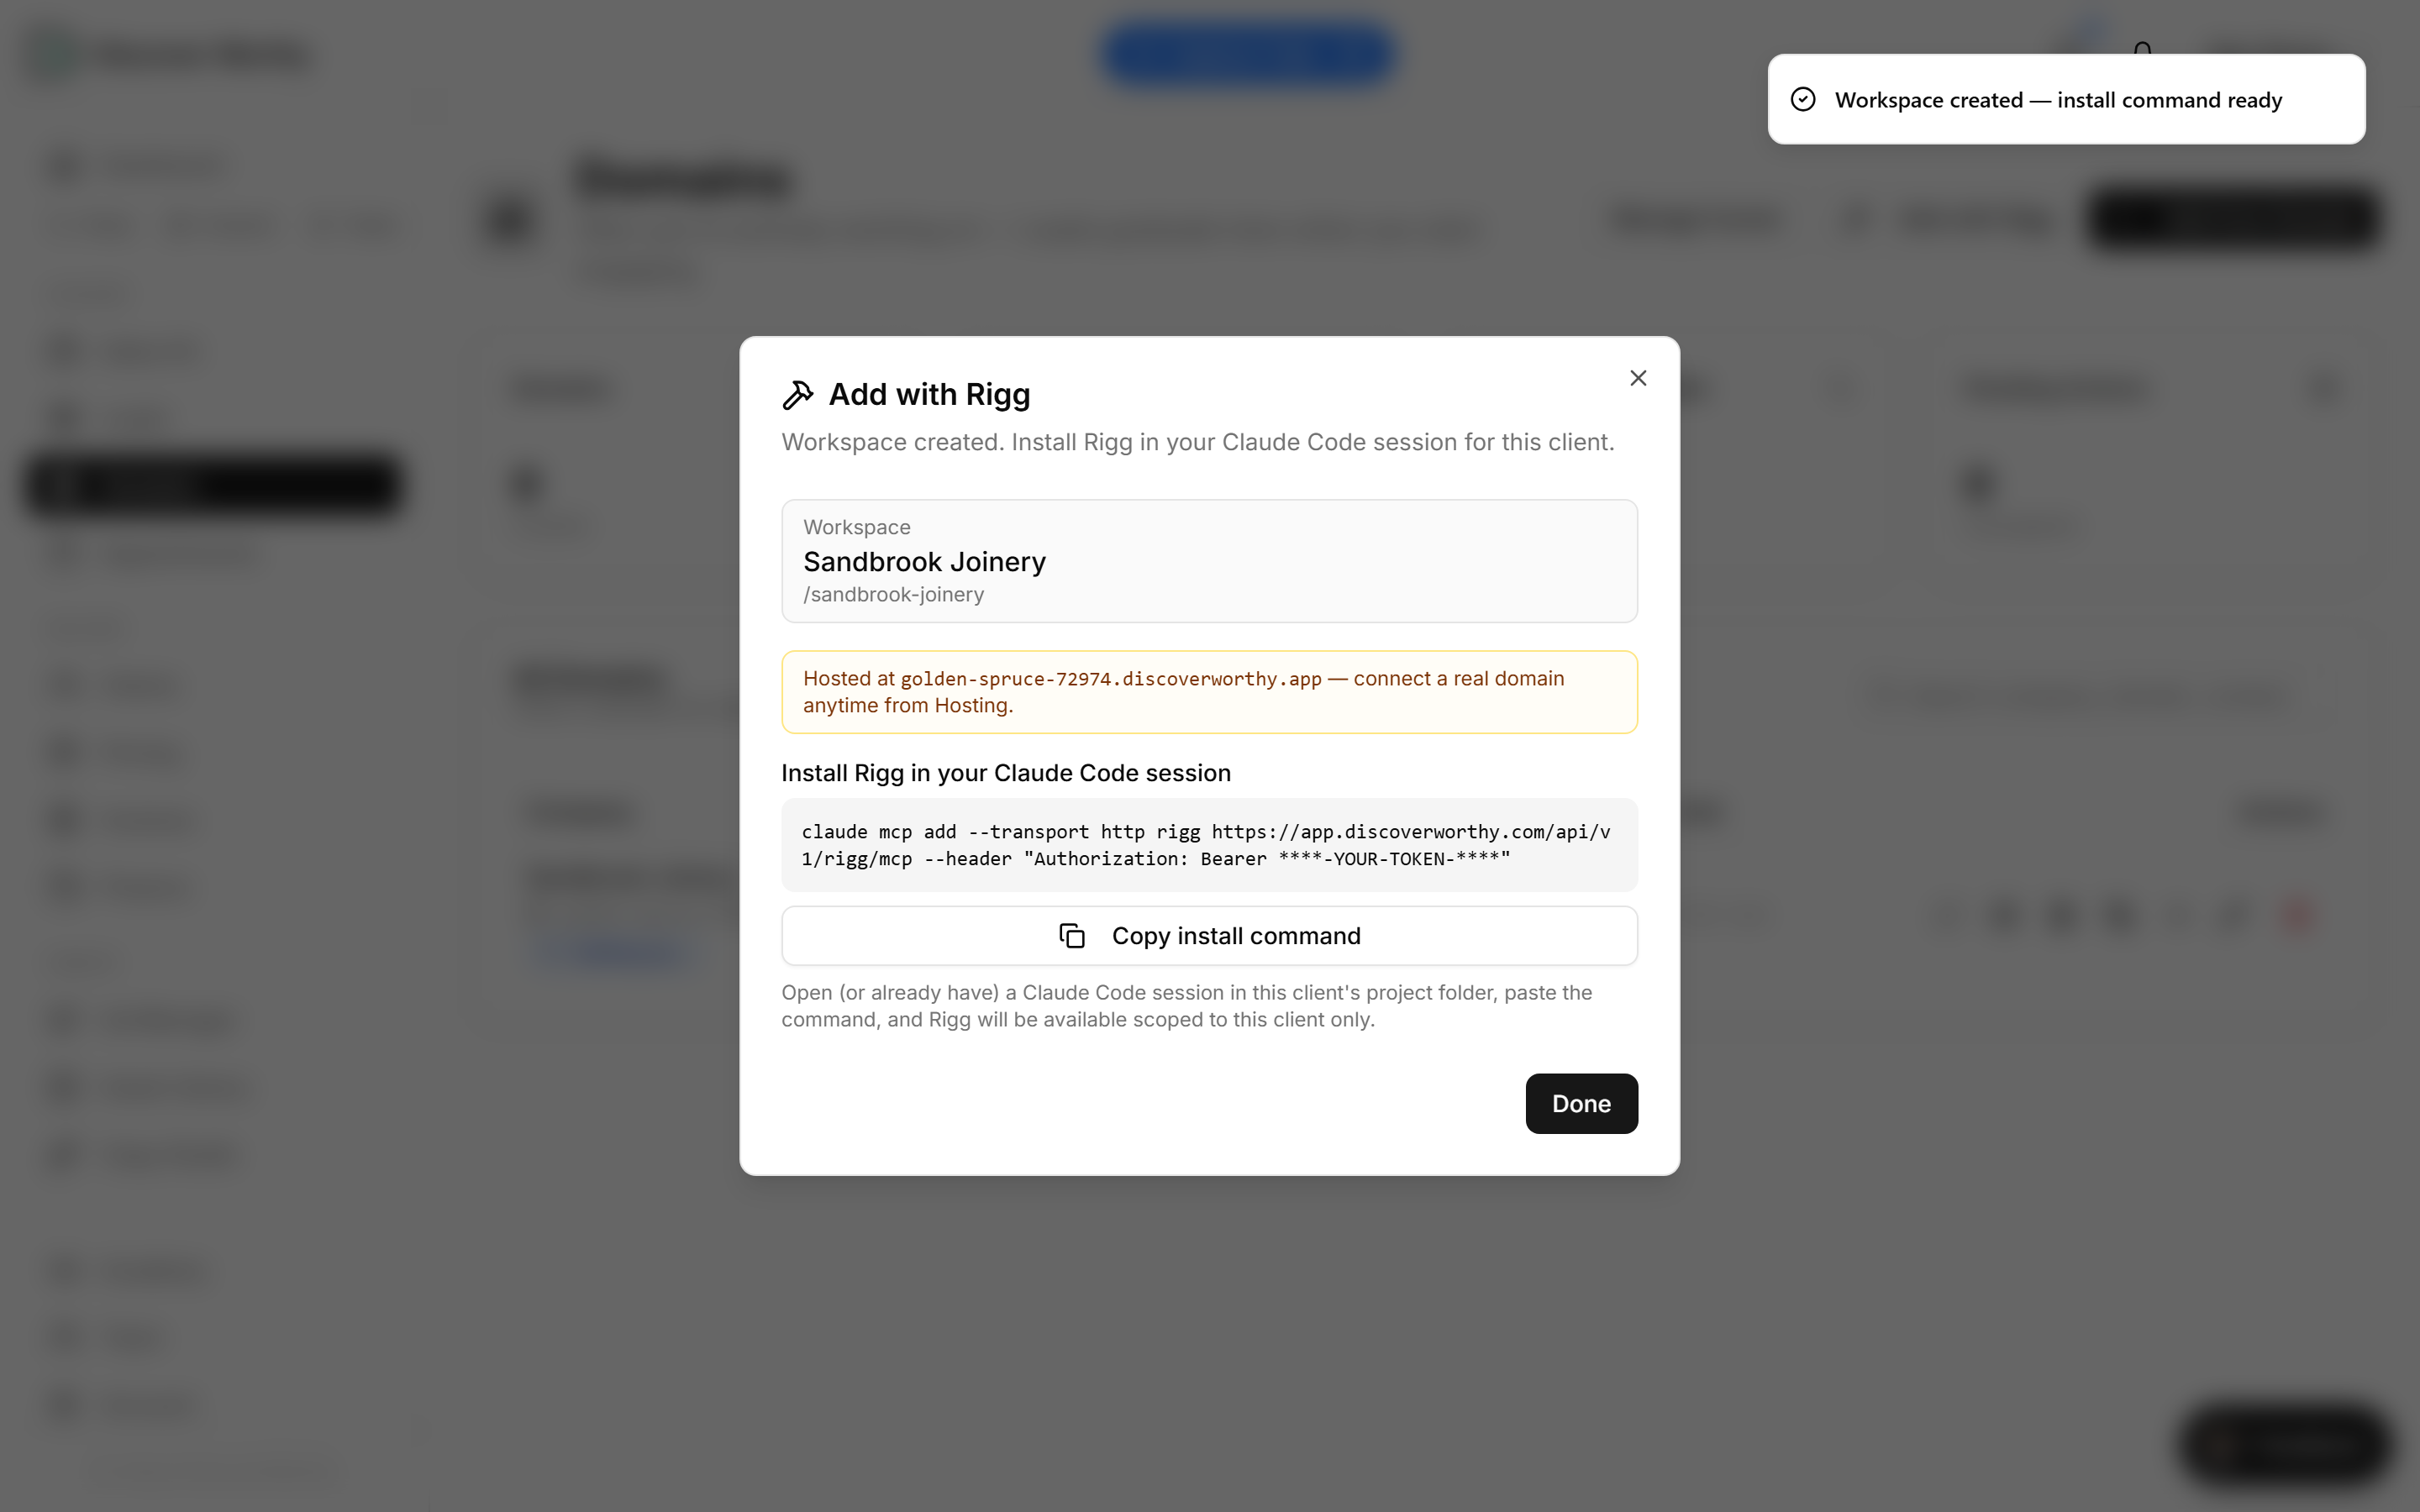
You get the workspace, its placeholder address, and a command that installs Rigg into a Claude Code session scoped to just this client.
Copy it, open a Claude Code session in that client's project folder, and paste. From then on Rigg can see and build that client and no other.
That command contains a token that acts as a key to this client's workspace. Treat it like a password — do not paste it into a shared channel or a screenshot.
- 8
Where the new client goes
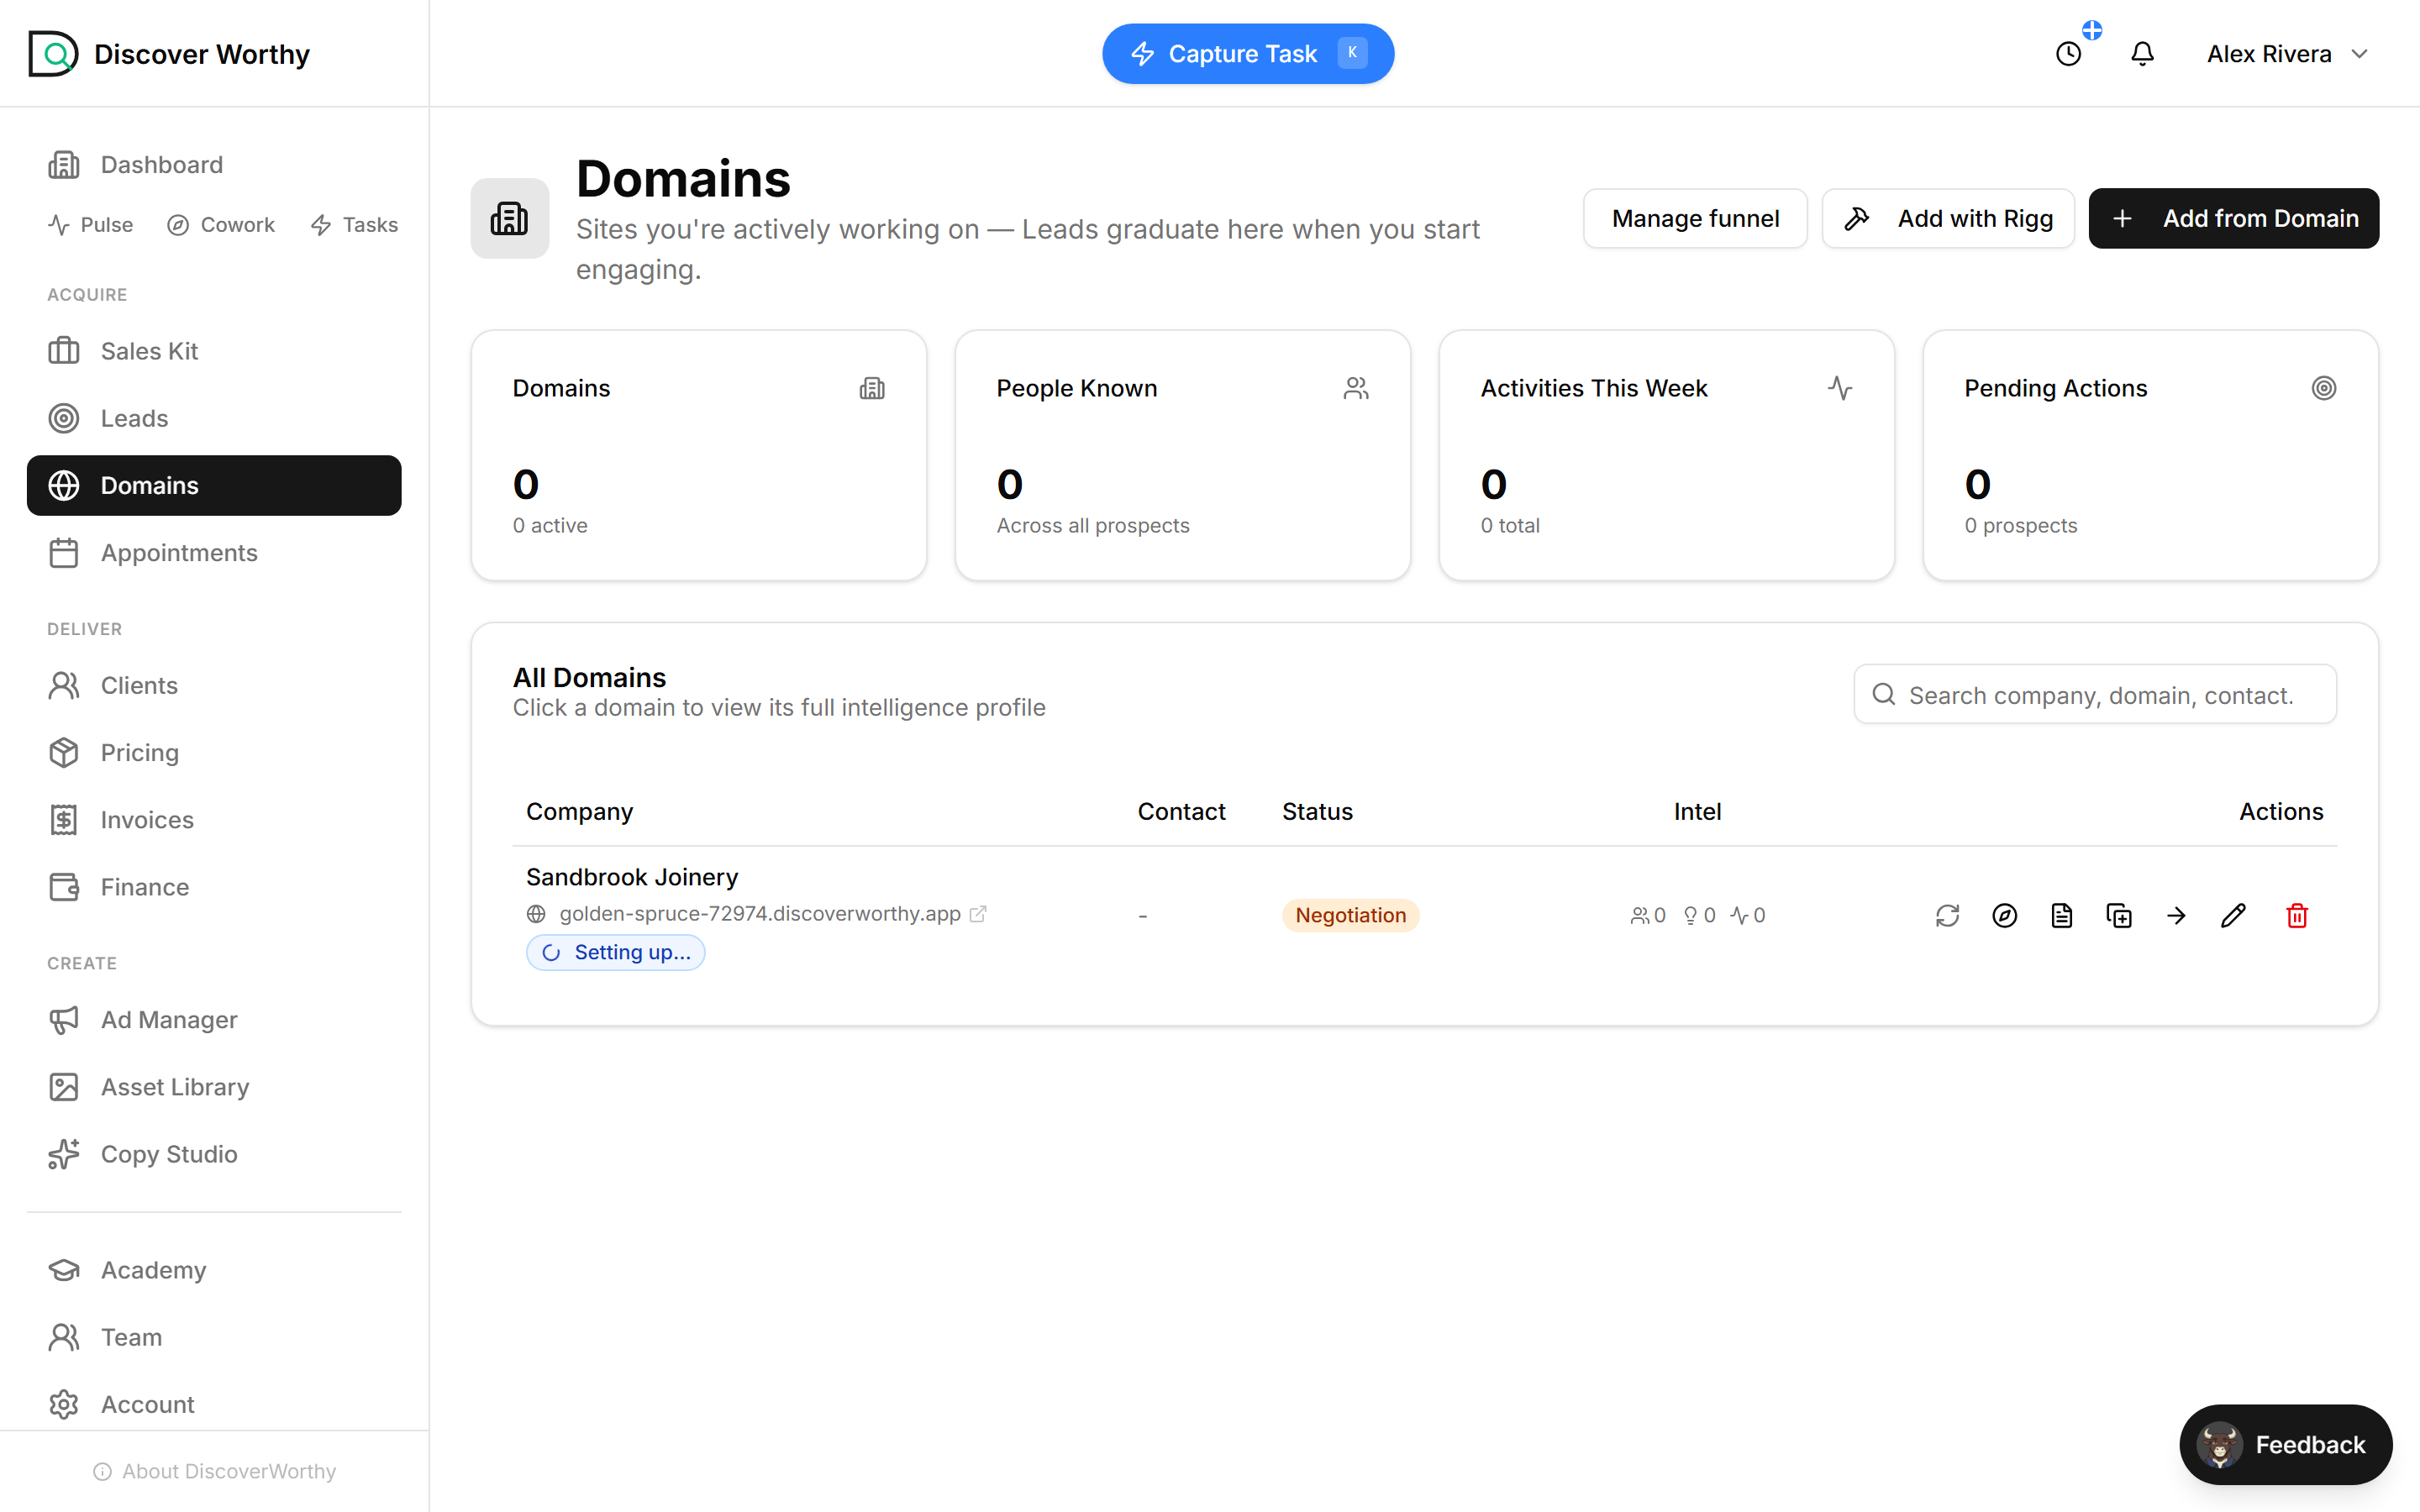
Back on Domains, not Clients. This surprises people, and it is worth understanding rather than hunting for.
A brand-new workspace sits in your funnel while it is being set up and before any billing has started. Once the client accepts and billing begins, they move onto the Clients list and start appearing in your take-home.
Setting up means the site is still being provisioned. It clears on its own.
So if you have just added a client and the Clients page still looks empty, nothing has gone wrong — look on Domains.
Next up
The B.R.A.N.D method
How DiscoverWorthy freelancers take a client from "needs a website" to a finished, found, client-run one — Build, Release, Architect, Nail, Deliver. The method itself lives in Roost.
Ready to start?
Create your freelancer account and follow along.