Contents
Hand the workspace to your client
Share the workspace you built, let the client take ownership with their own email, and watch them move onto your Clients list.
- 1
Understand what you are handing over
There is no invitation to send and no account to create for them. You share a link, they open it, and they take the workspace with their own email address. That is the whole mechanism.
It works this way because the workspace is already real before they ever see it. The site is built, the brand voice is learnt, the topics are there. They are not being asked to sign up for an empty product — they are being handed something finished and asked to keep it.
Do the work first. A half-built workspace shared early is a much weaker moment than a finished one shared late.
Configure & Invite on the Clients page is a different, optional path — it exists for when a lead converts and you already have their address. You do not need it for this.
- 2
Check whether it is already theirs
Before you send anything, check whether this workspace has already been claimed. A workspace can only be claimed once, and a client who took it weeks ago is already the owner — there is nothing left to hand over, and sending the link again only invites confusion about who owns what.
Your Clients list is the answer. A workspace that has been claimed shows the client as Provisioned there, with their plan and your fee against the name. One still sitting on Domains has not been taken yet.
If you work through Rigg, ask it directly — It reads the record rather than the checklist, so it will also tell you when a workspace looks handed over but nobody actually holds it.
Handing over is not the same as transferring the source code. Those are two separate moves with two separate answers — this guide is about the workspace: the account, the billing, and the data.
- 3
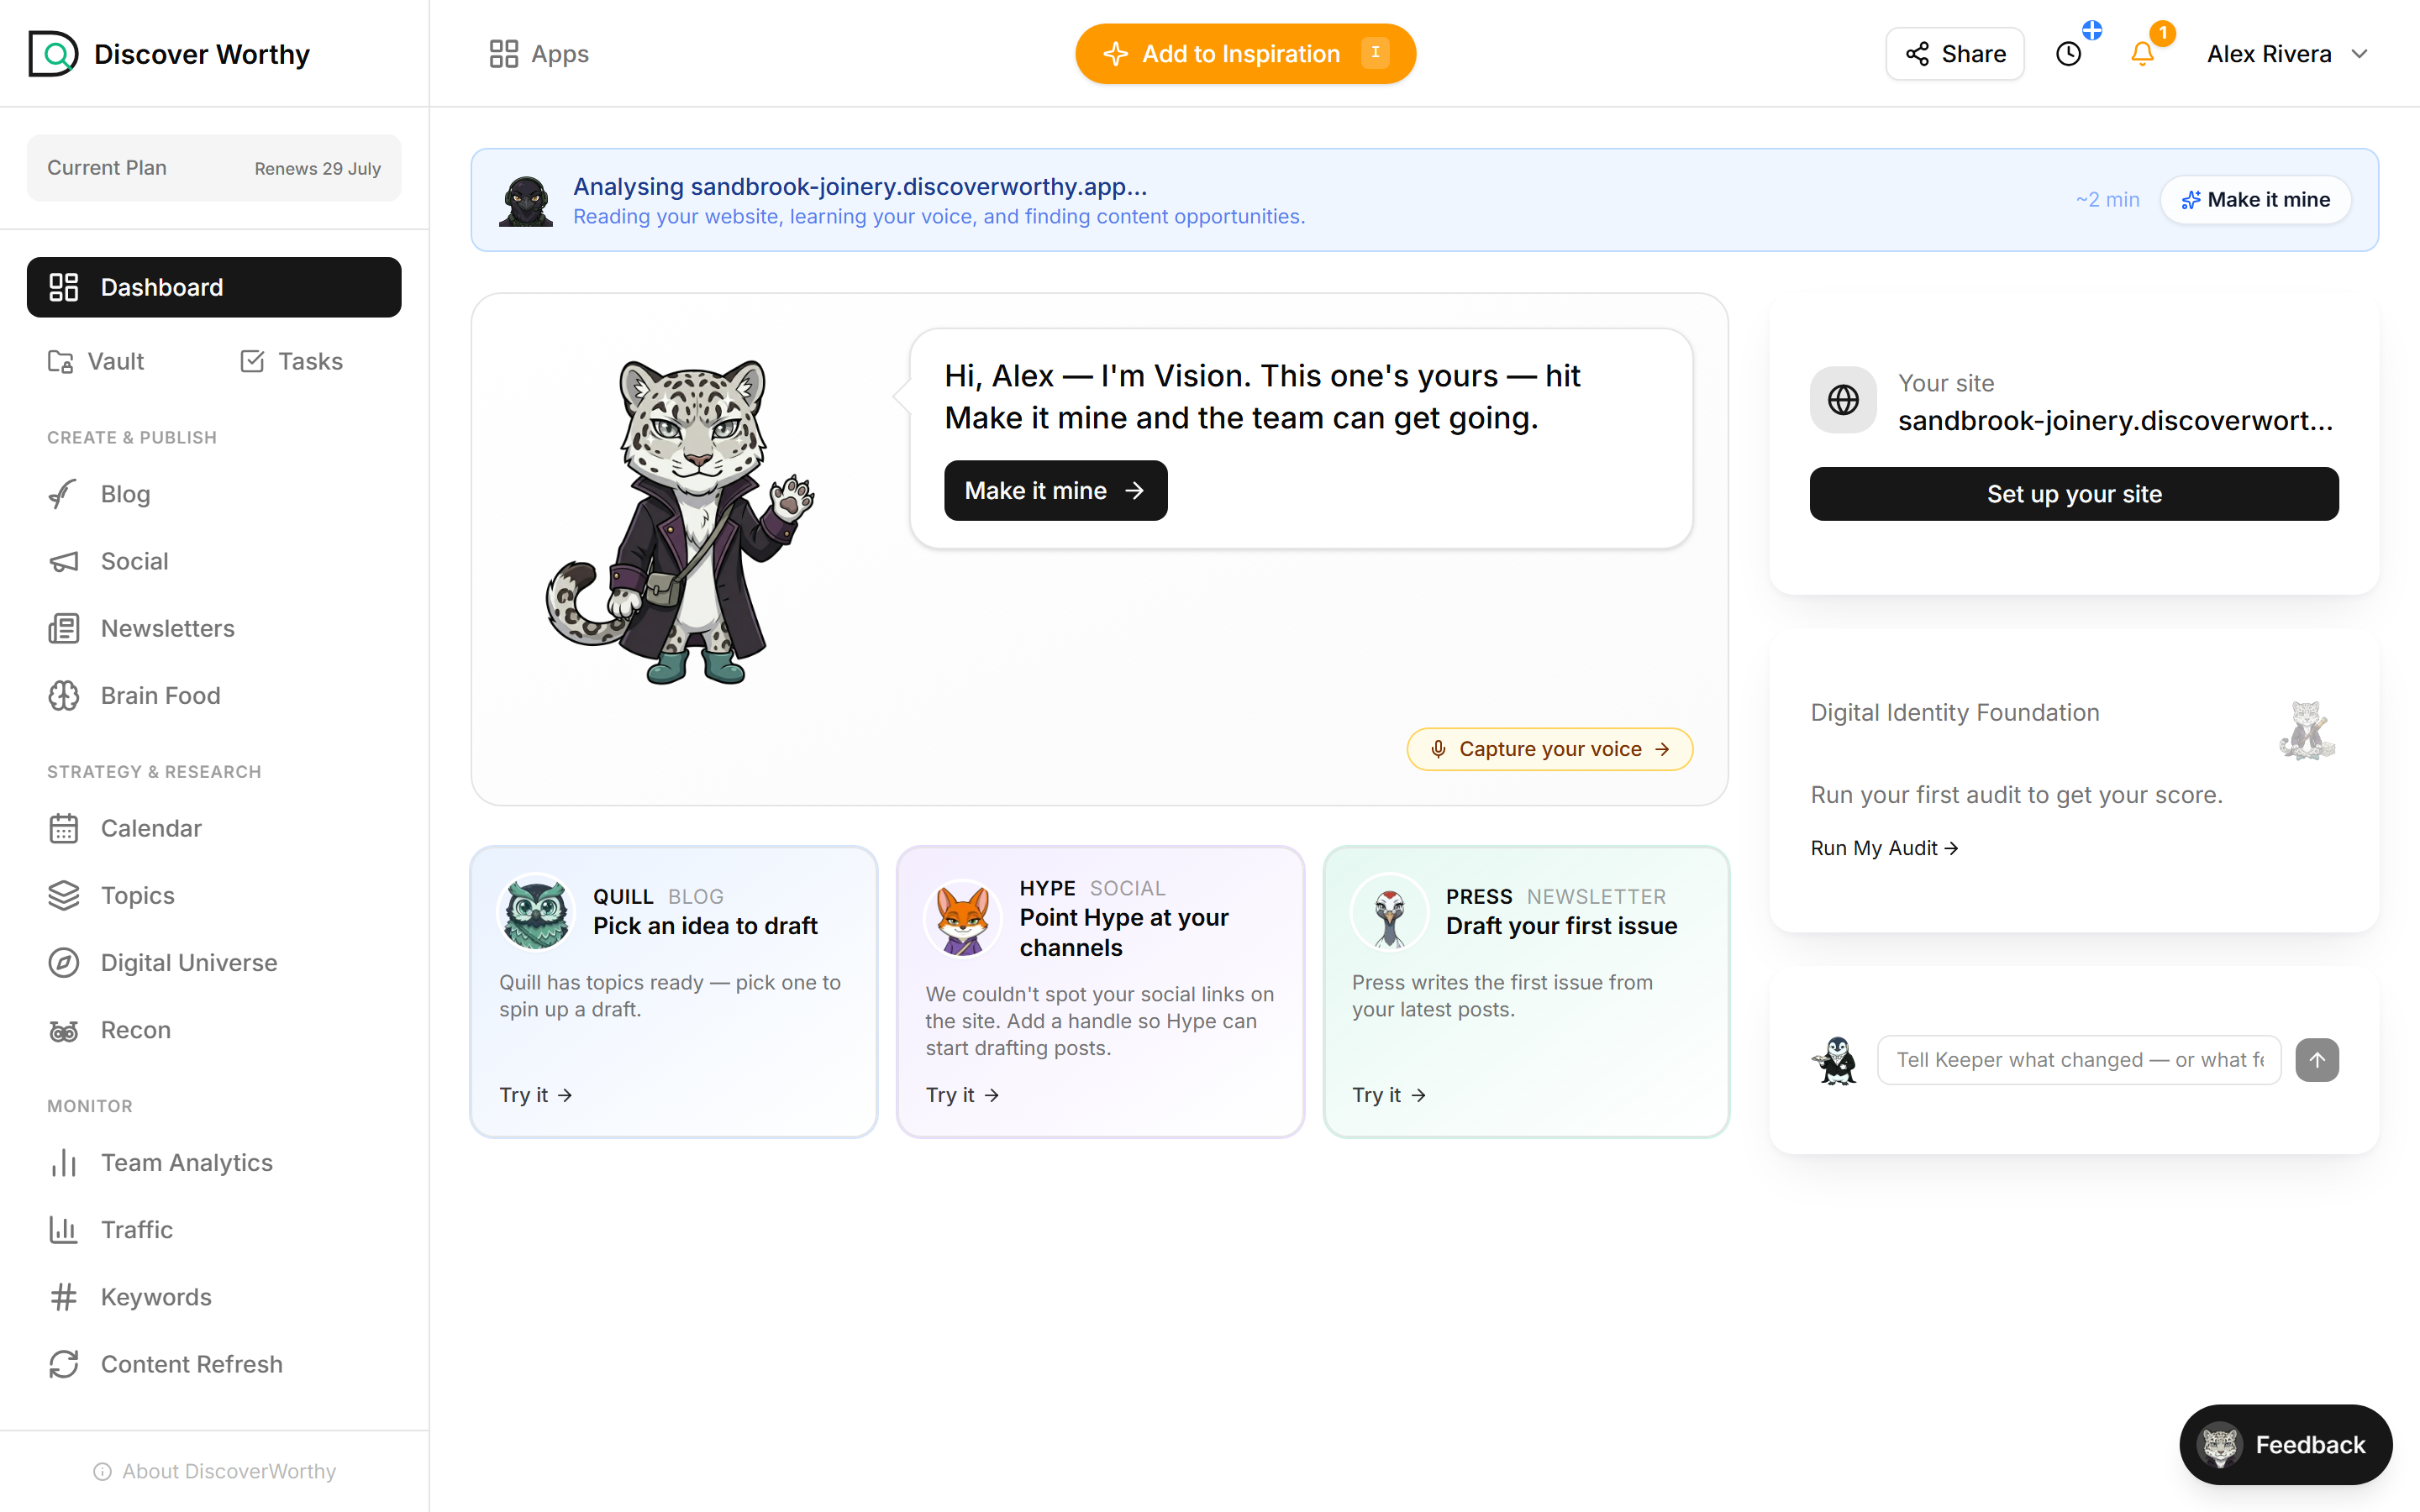
Open the client workspace
From Domains or Clients, open the workspace itself. You are now looking at exactly what your client will look at, because it is the same workspace — not a preview of one.
Take a minute here before you share. Whatever is on this screen is their first impression of your work.
- 4
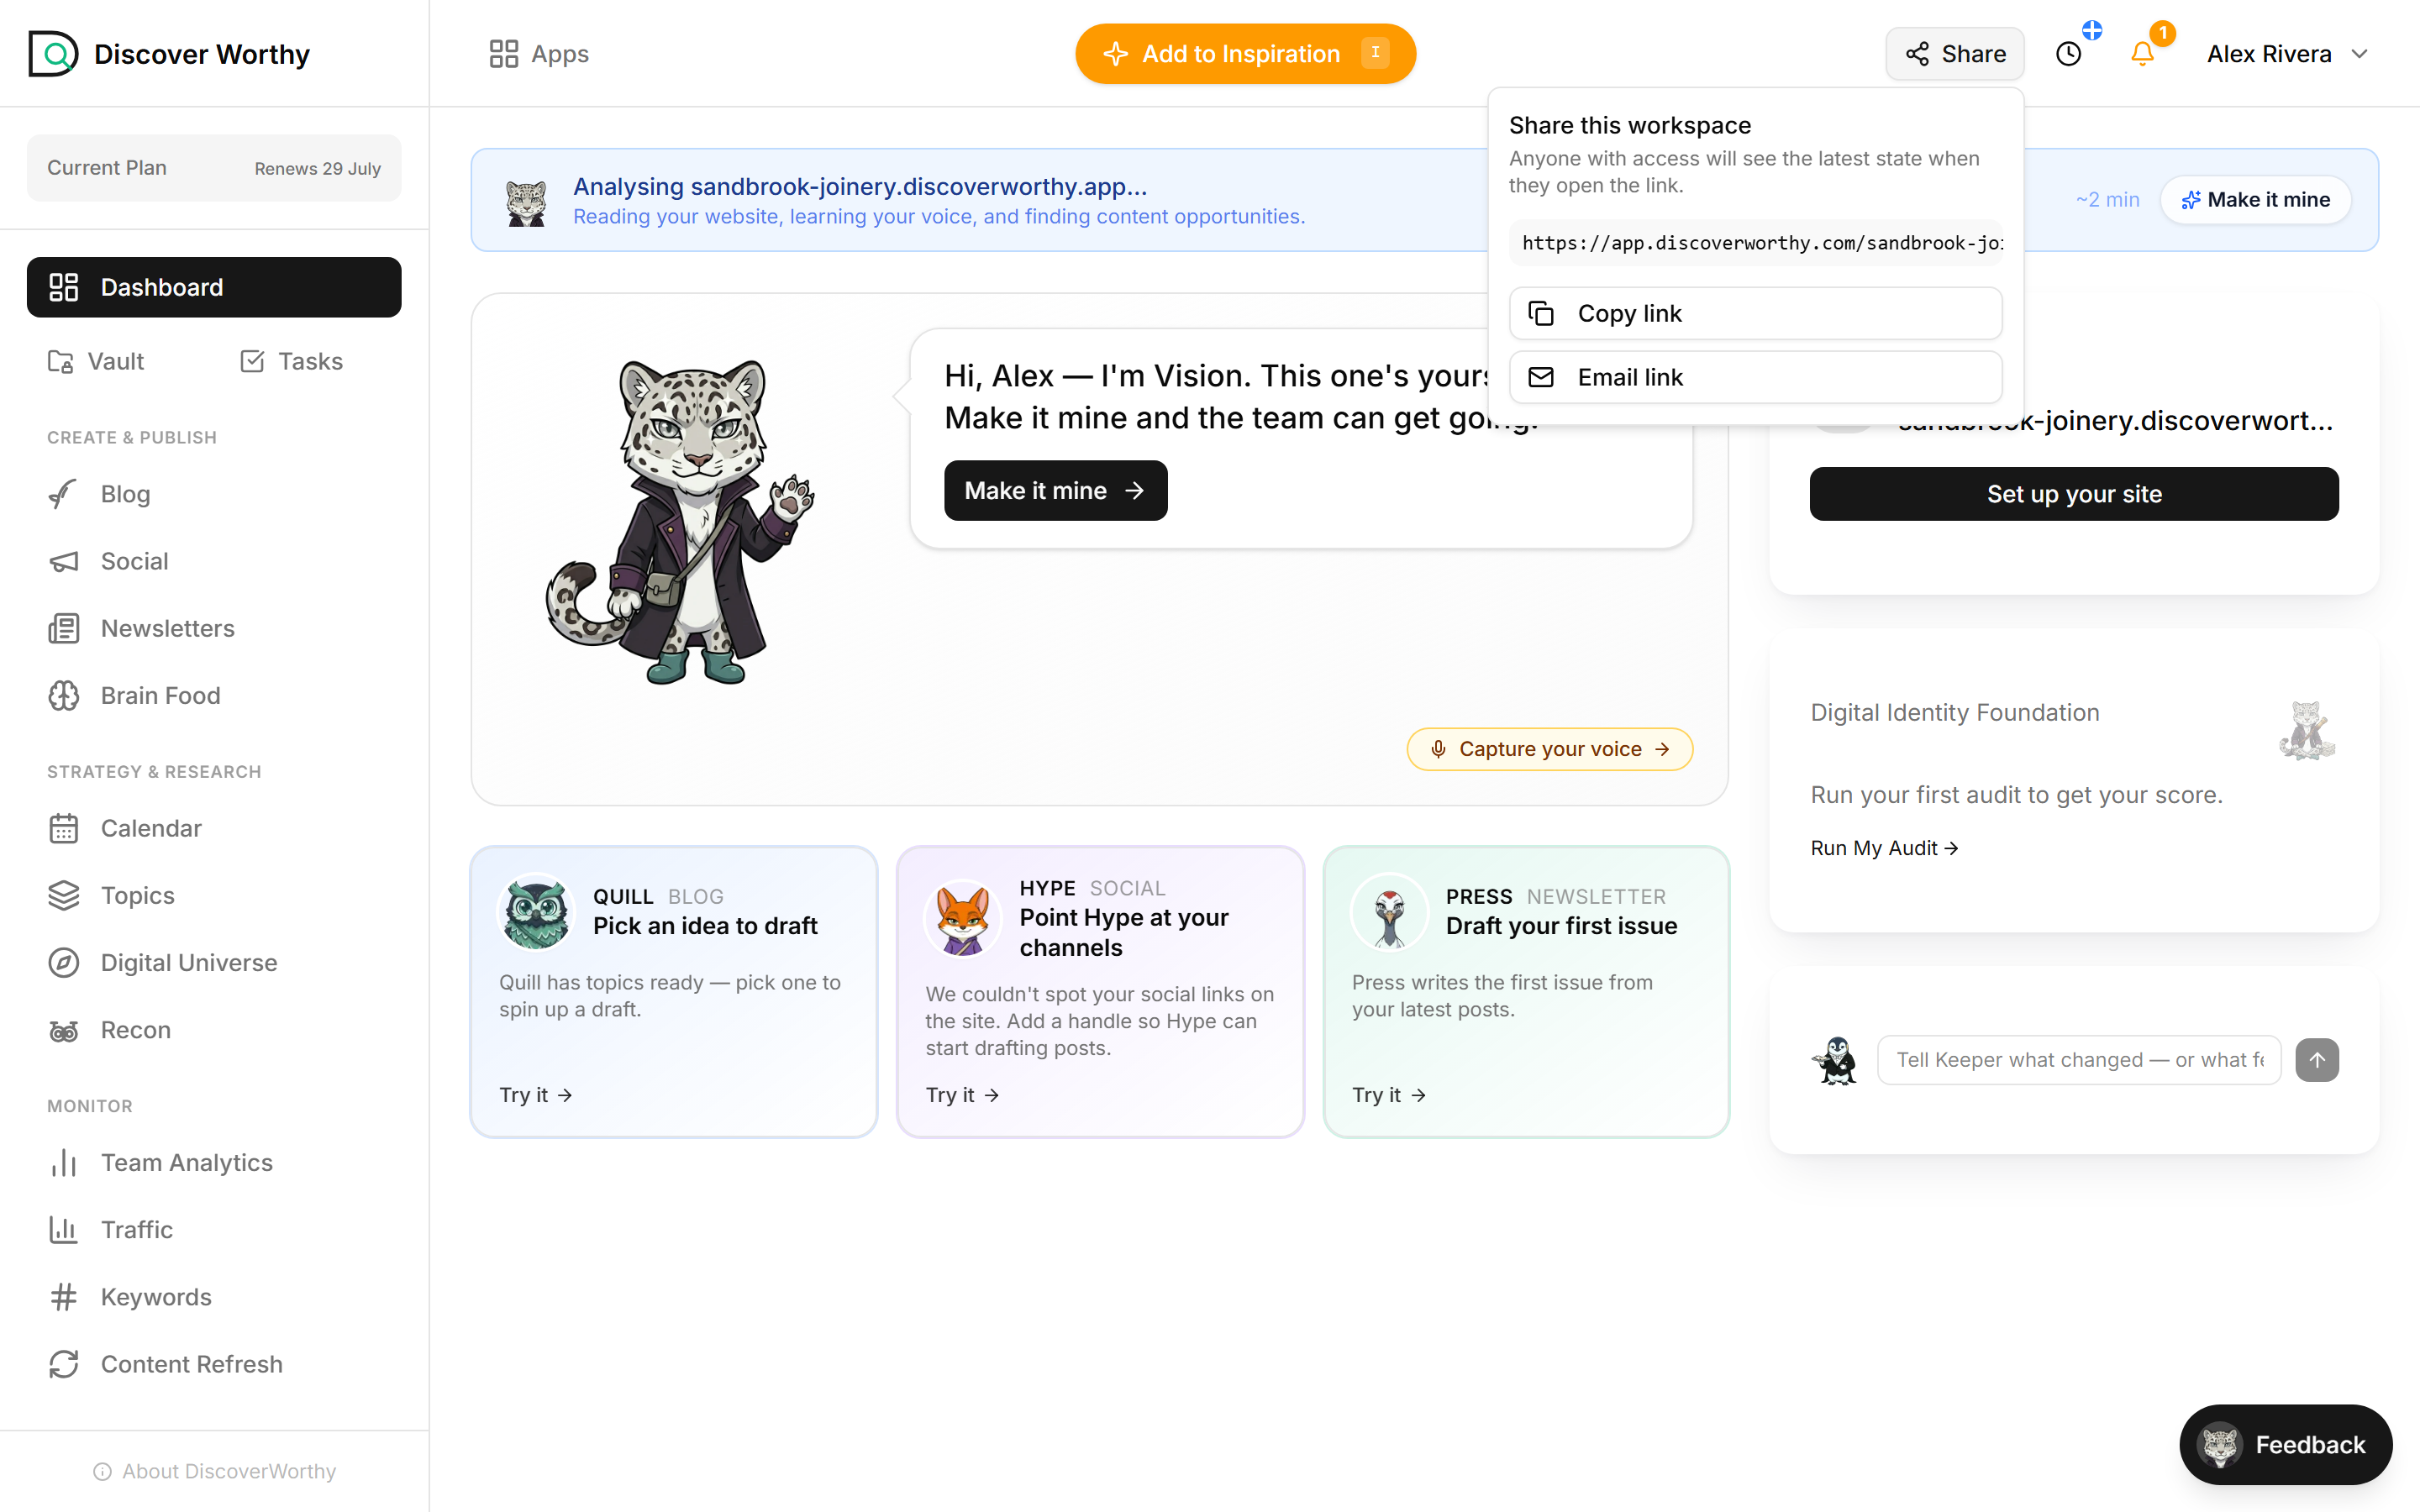
Copy the share link
Share is in the top right. It gives you the workspace address, a copy button, and an option to email the link straight from here if you would rather not paste it yourself.
The link is not a one-time token or a temporary preview. It is the workspace address, and it keeps working — whoever opens it sees the current state, not a snapshot of today.
Anyone with the link can take the workspace, and the first person to do it becomes the owner. Send it to your client directly rather than into a shared channel.
- 5
What your client sees
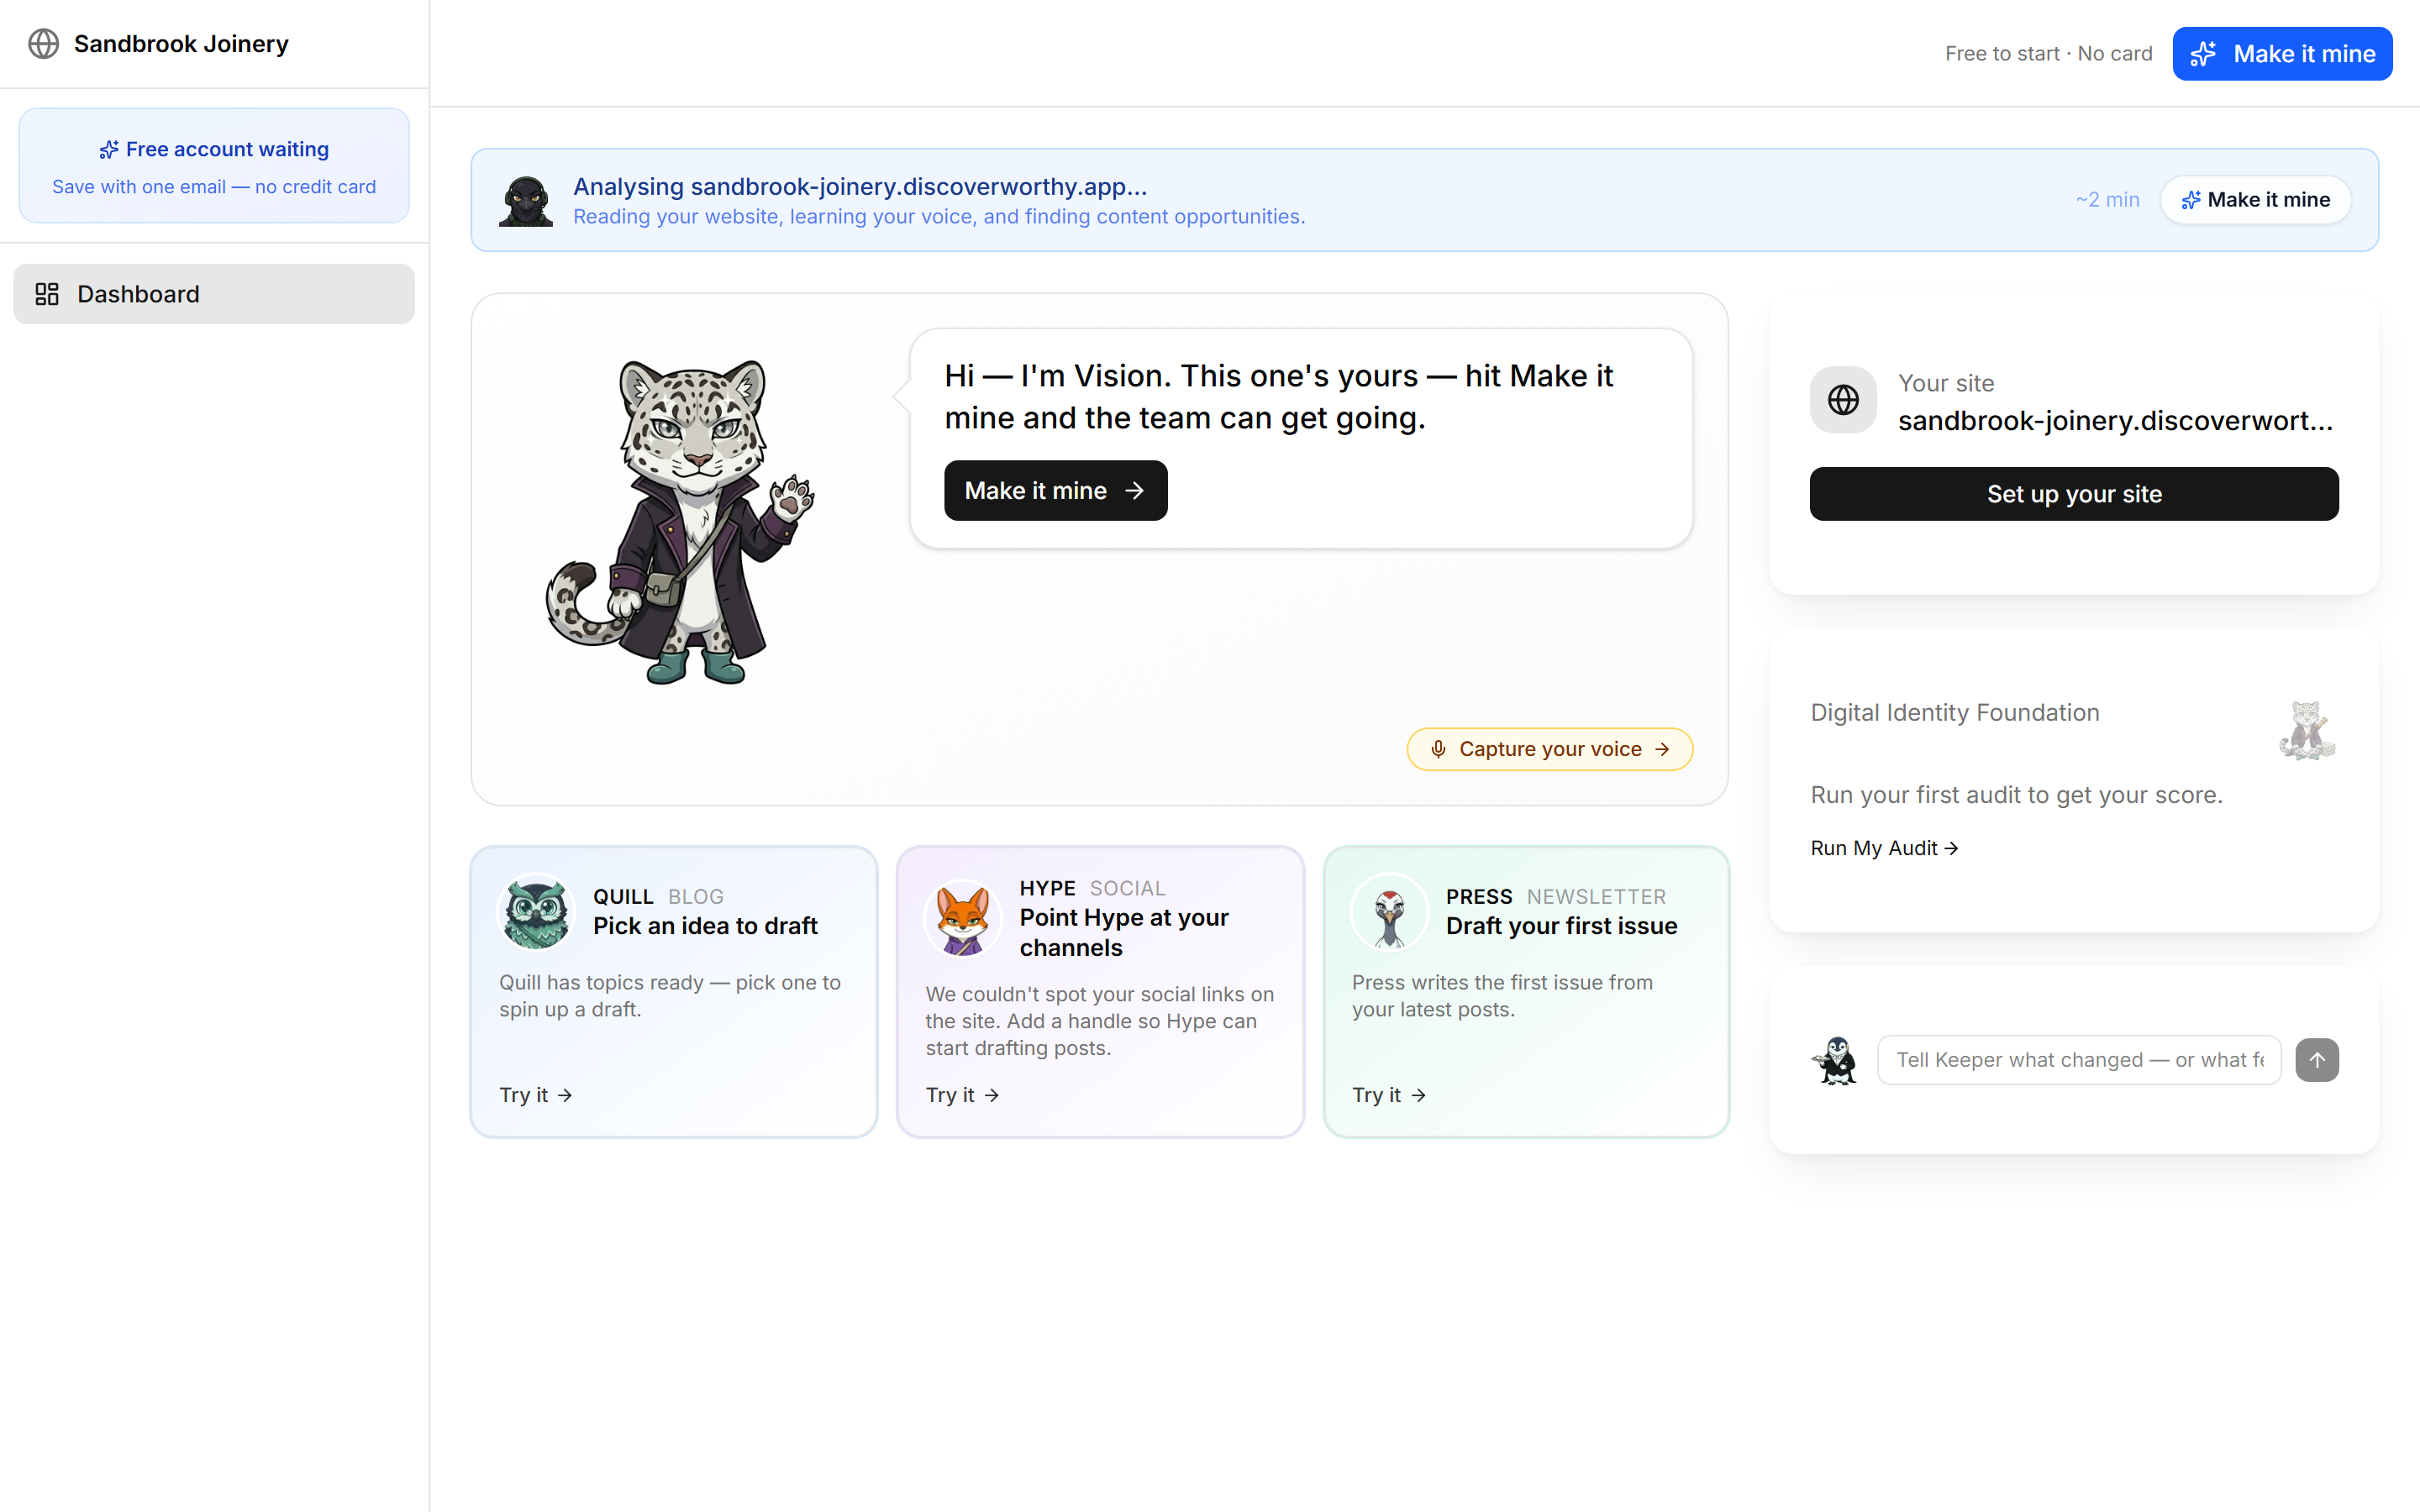
They open the link with no account and no login, and land in their own branded workspace with their content already in it. Nothing is blurred out or held back.
The only thing that changes is the framing: a free account waiting for them, and a Make it mine button in the corner. The sidebar is trimmed back to the dashboard until they take it.
This is the part worth setting up in your covering message. Tell them to open the link and hit Make it mine — not to "sign up", which sounds like work they have not agreed to yet.
- 6
They enter their own email
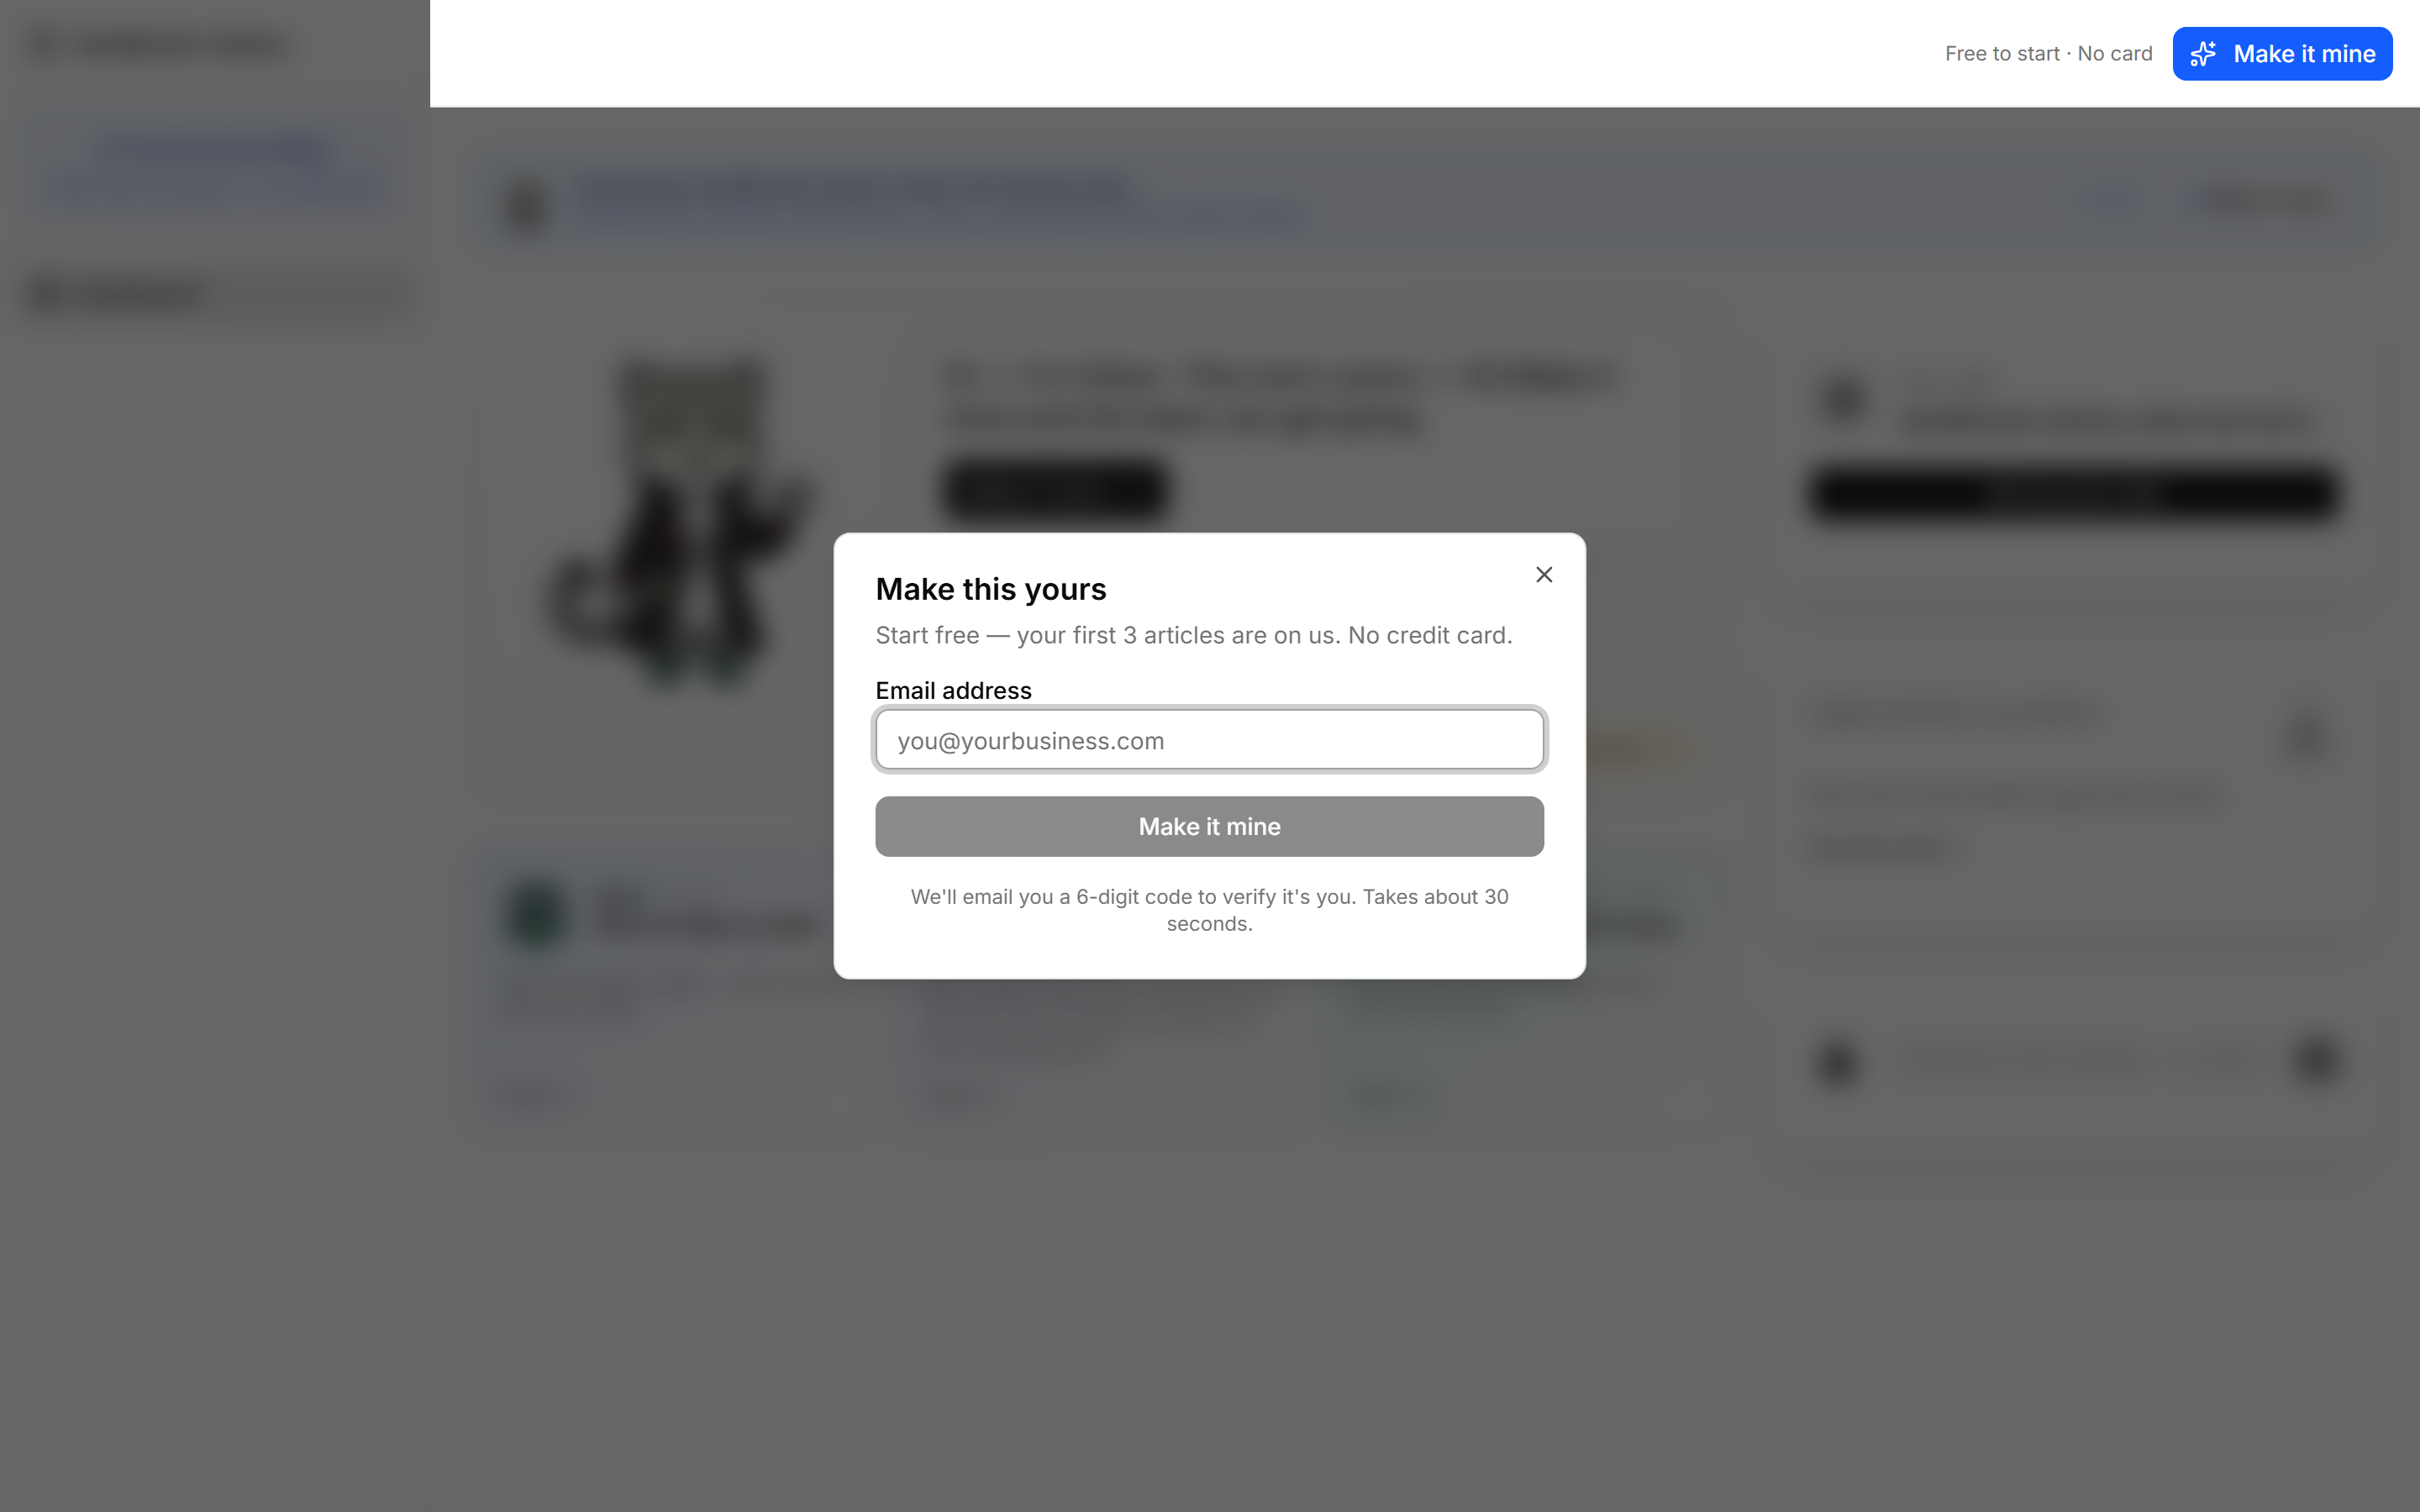
Make it mine asks for one thing: an email address. Theirs, not yours — this is the address that becomes the owner of the workspace, and it is what they will log in with from then on.
No password, no card, no form. The same short-code login you used to sign up.
If they use an address you already have on file for them, everything still lines up. If they use a different one, that address becomes the owner — worth being explicit about which one you want them to use.
- 7
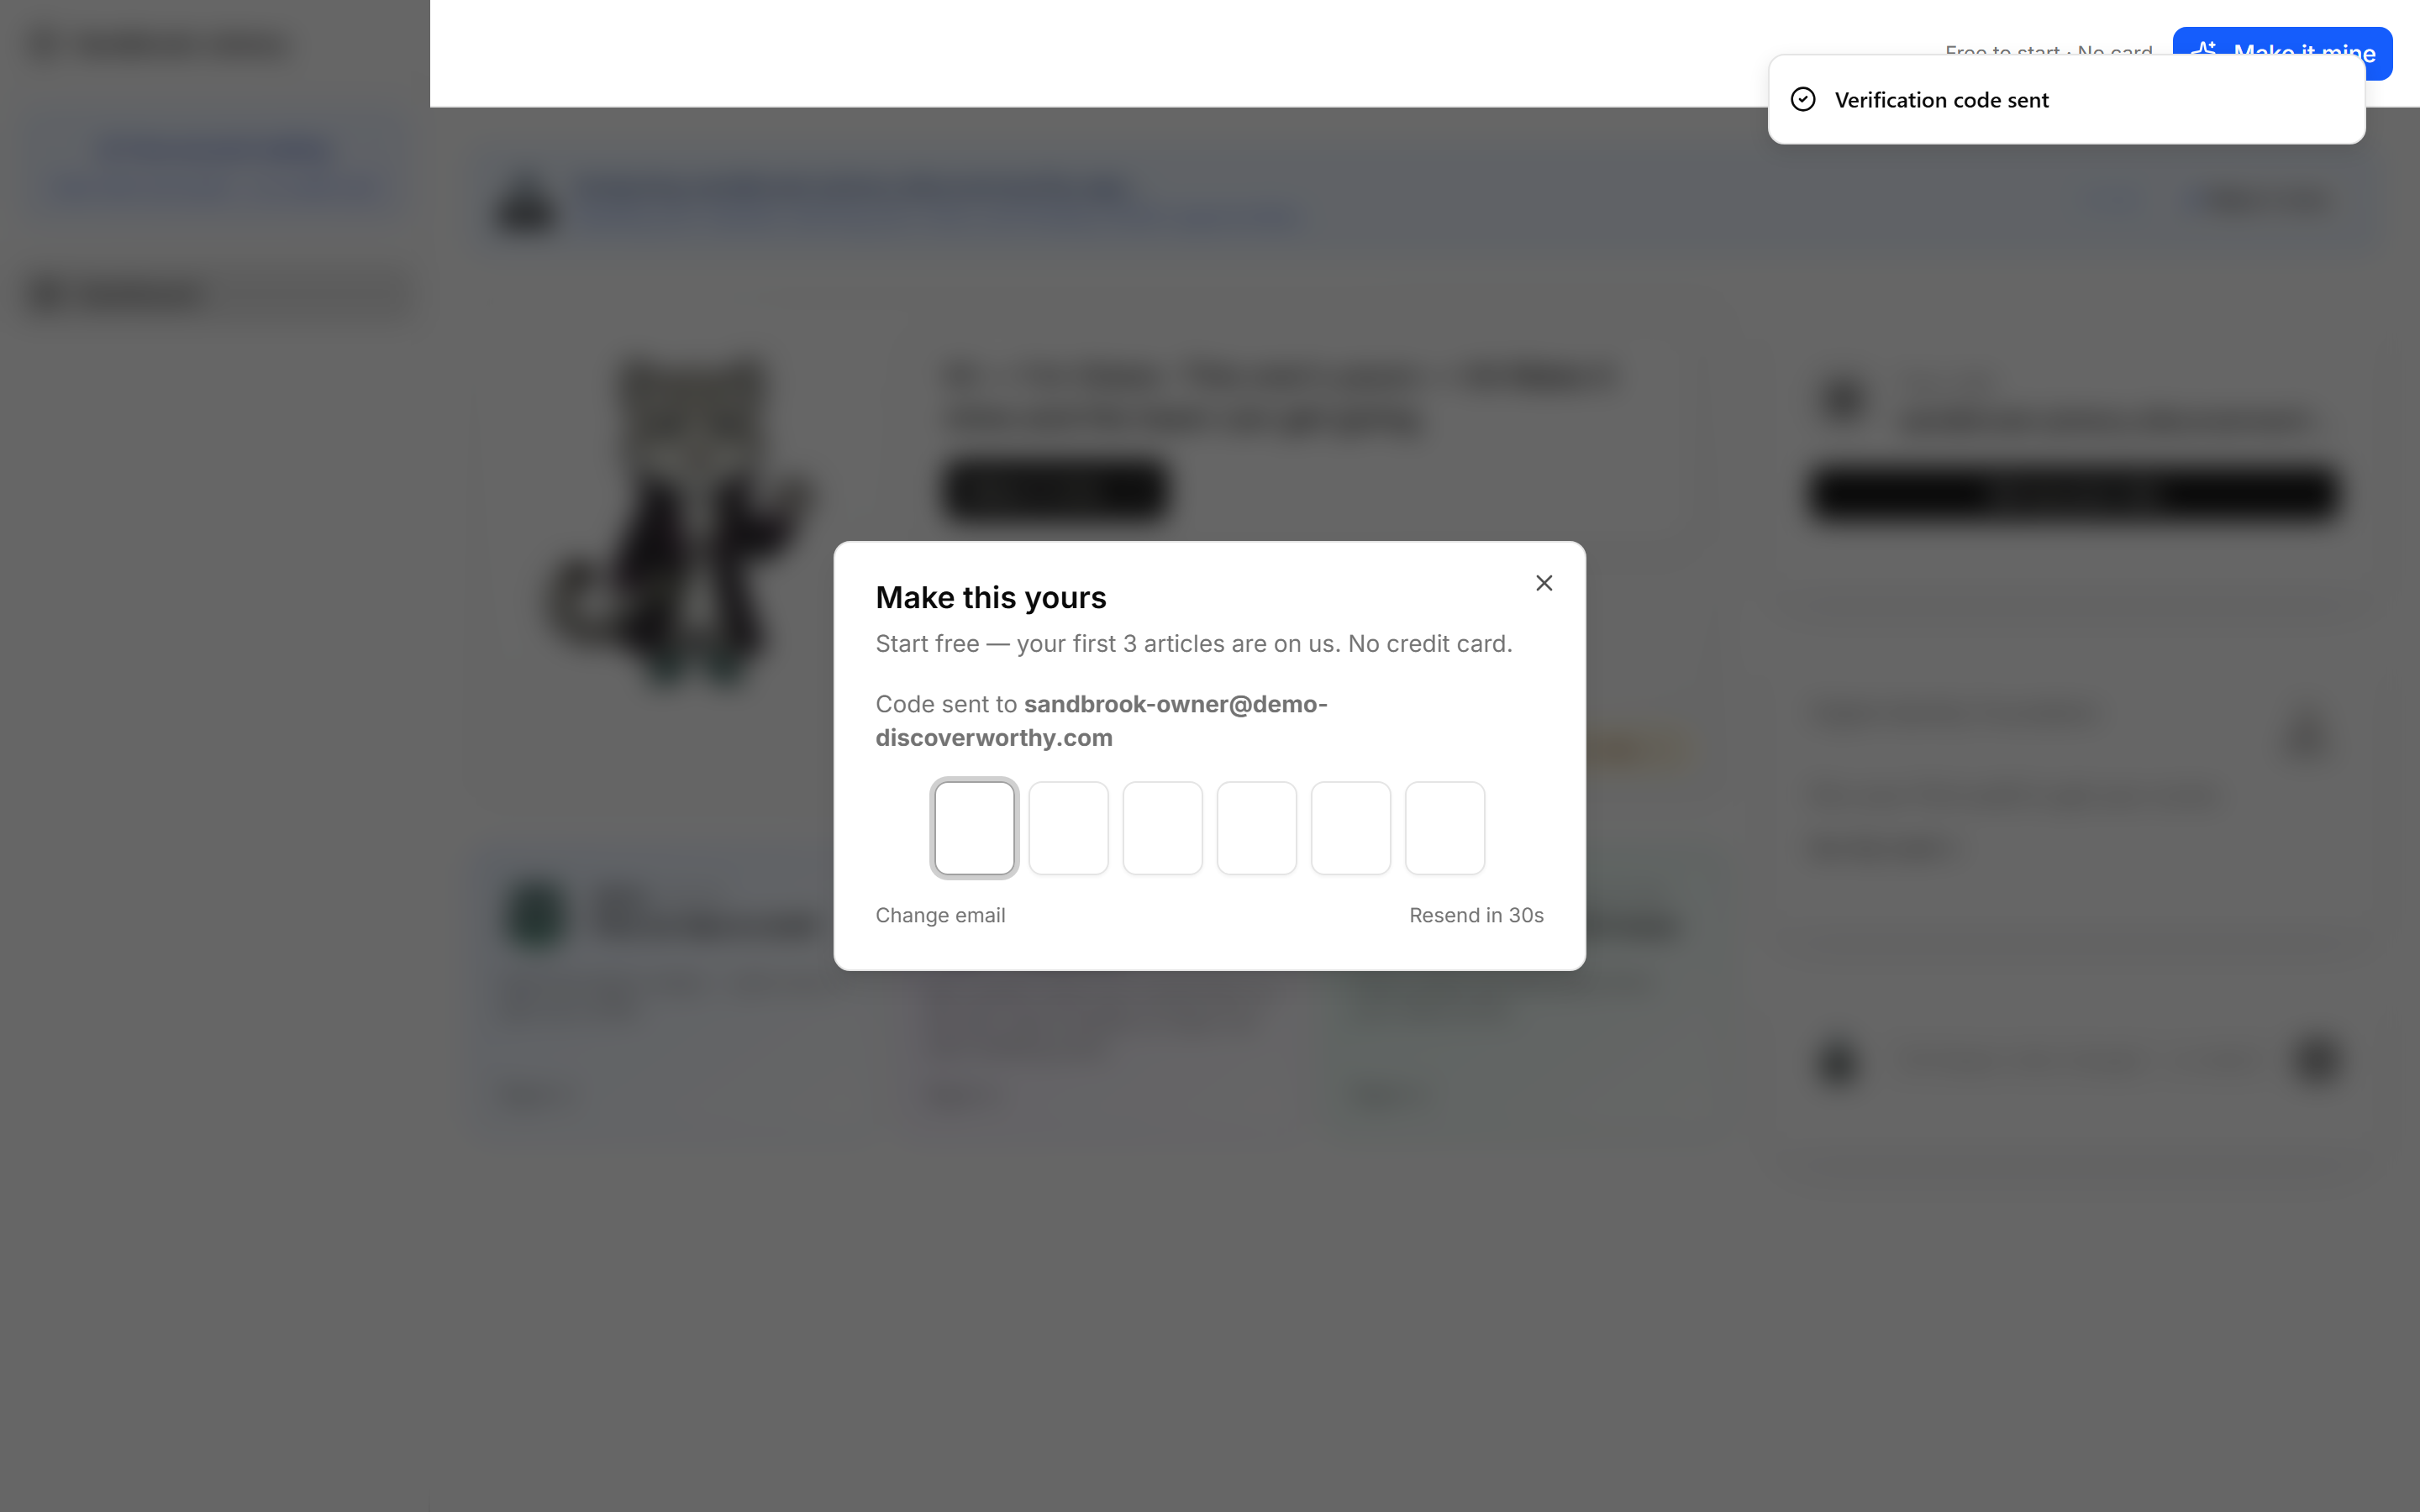
They confirm with a code
A six-digit code goes to the address they entered. They type it in and the workspace is theirs.
Behind that, three things happen at once: the workspace changes hands, their plan starts, and your management fee attaches to it. Nothing else needs doing by you.
- 8
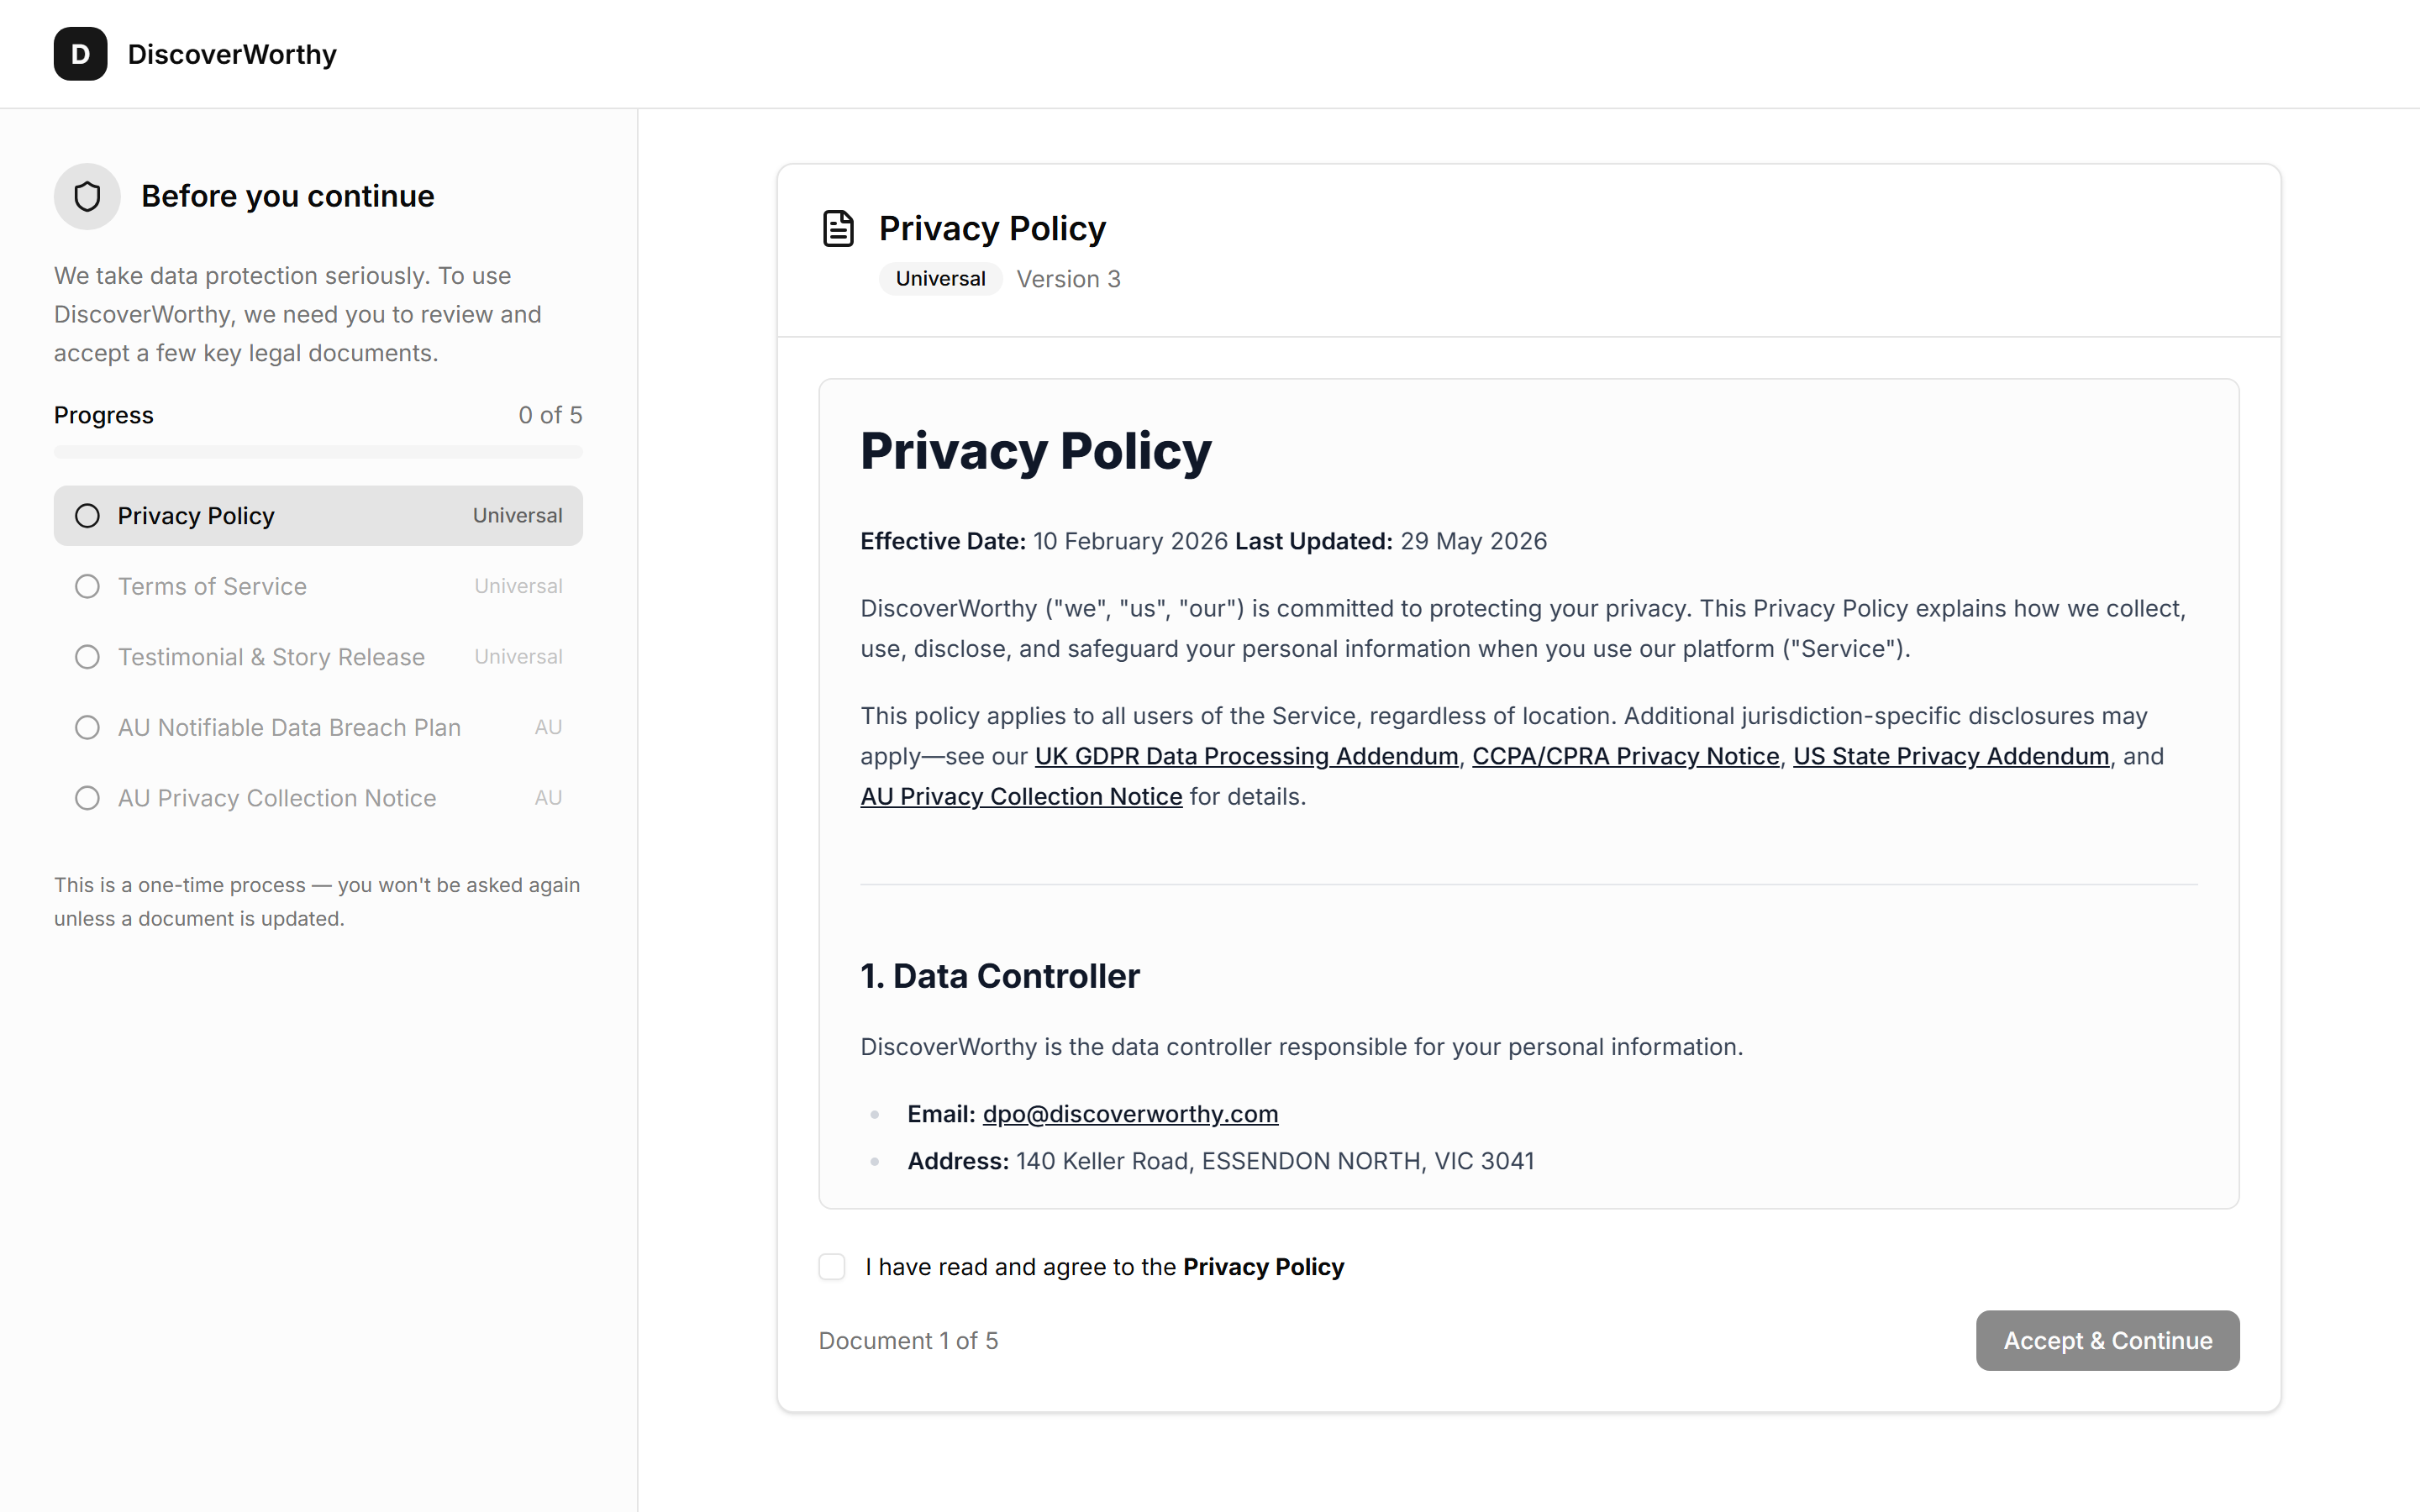
They accept the legal documents
Your client is a brand-new account, so the one-time legal gate stands between them and their workspace — privacy policy, terms, and the region-specific documents that apply to them.
It is a real read for a few minutes and it only happens once. Worth a sentence of warning in your message so it does not feel like a wall they were not expecting.
- 9
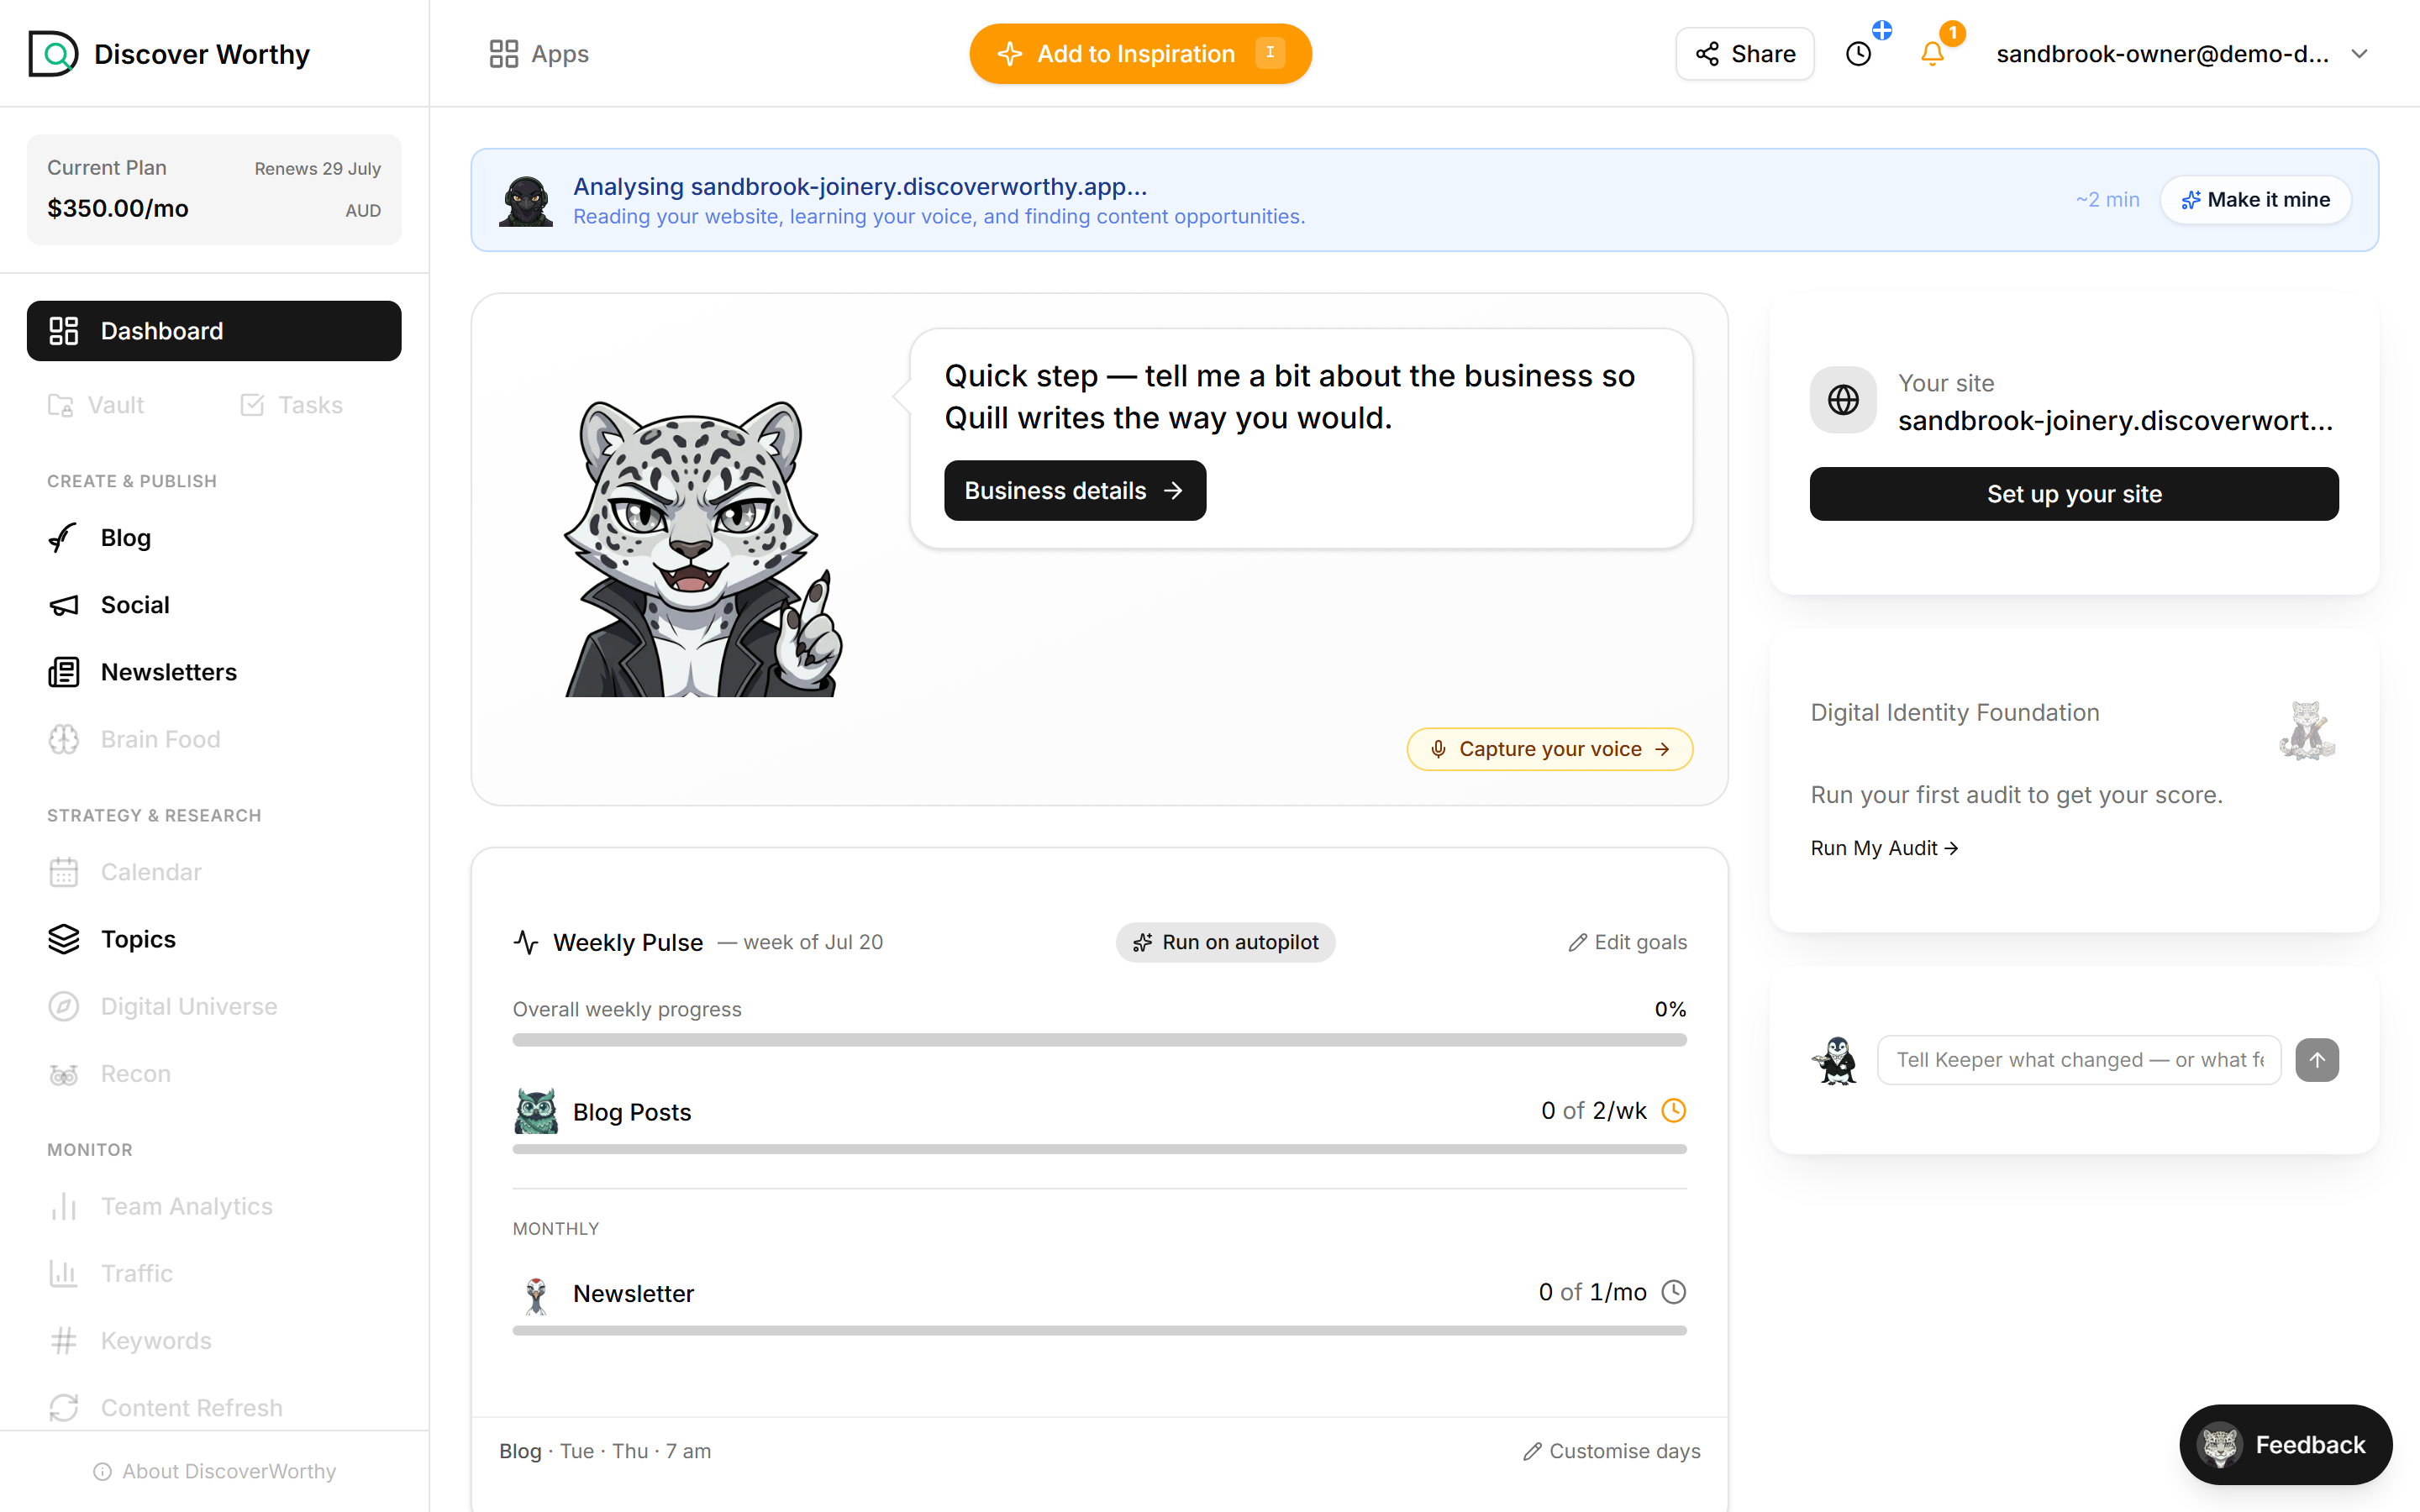
They are in
Straight through to the full workspace: the whole sidebar, their plan and renewal date in the corner, and the content agents ready to run.
They can invite their own team from here, and Vision picks up where the setup left off — business details, goals, and the rest.
- 10
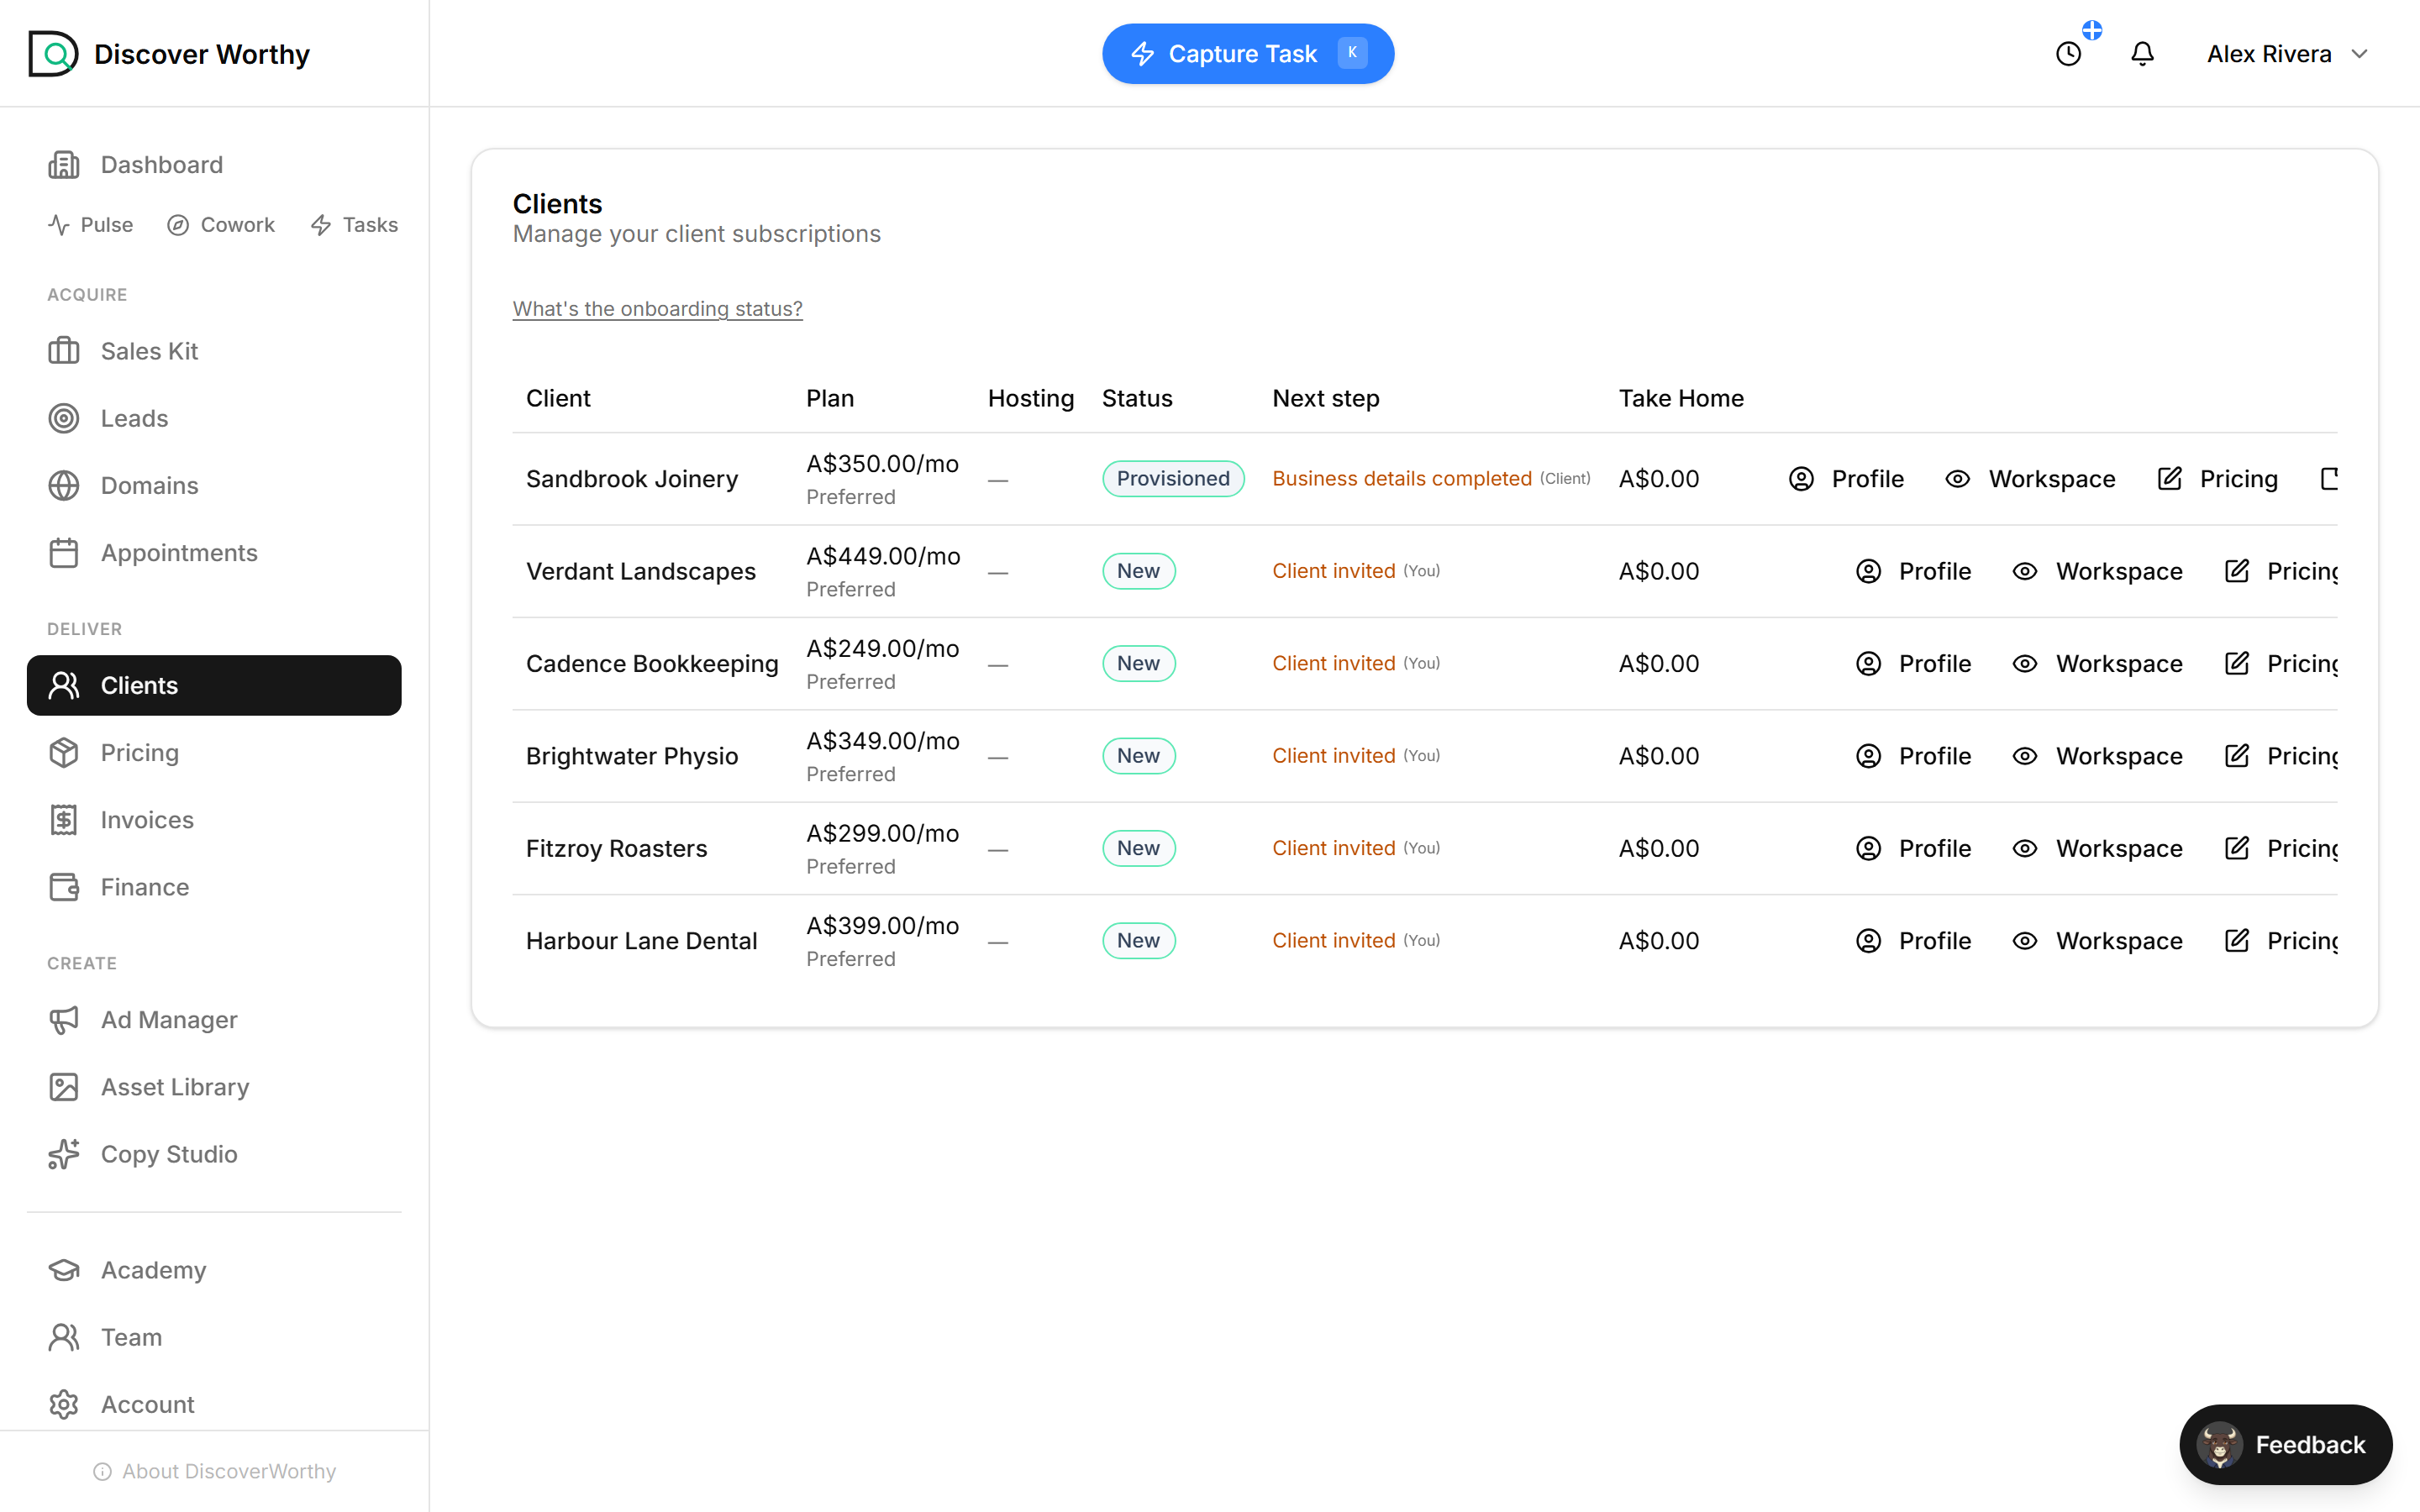
They move onto your Clients list
Back on your side, they leave Domains and appear on Clients as Provisioned, with the plan, your fee and your take-home against their name.
That move is the signal that the handover actually completed. If they are still sitting on Domains, they have not taken the workspace yet — the link went unopened, or they stopped at the code. A sent link is not a handover, so check the list rather than assuming.
Open ClientsNext step on the row tells you where they are up to and who it is waiting on — you or them.
Next up
Know a client is on track
Read whether a client is genuinely set up for success — two finish lines and five gates, all worked out from live signals rather than a checklist you tick.
Ready to start?
Create your freelancer account and follow along.