Contents
Set your pricing
Build the reusable items and packages you charge clients, and understand how your fee sits on top of what DiscoverWorthy charges.
- 1
Pricing is your catalogue, set once
Everything you charge a client is built here, on the Pricing page, and reused rather than retyped. You are not pricing a specific client on this screen — you are building the menu you price them from.
Two things live here: line items, which are single charges, and packages, which are named bundles of line items. Start with the items; packages are just collections of them.
It opens empty, and that is the honest starting point. Nothing is required before you can add a client — you can price as you go — but a few items set up now saves retyping them on every invitation.
Open Pricing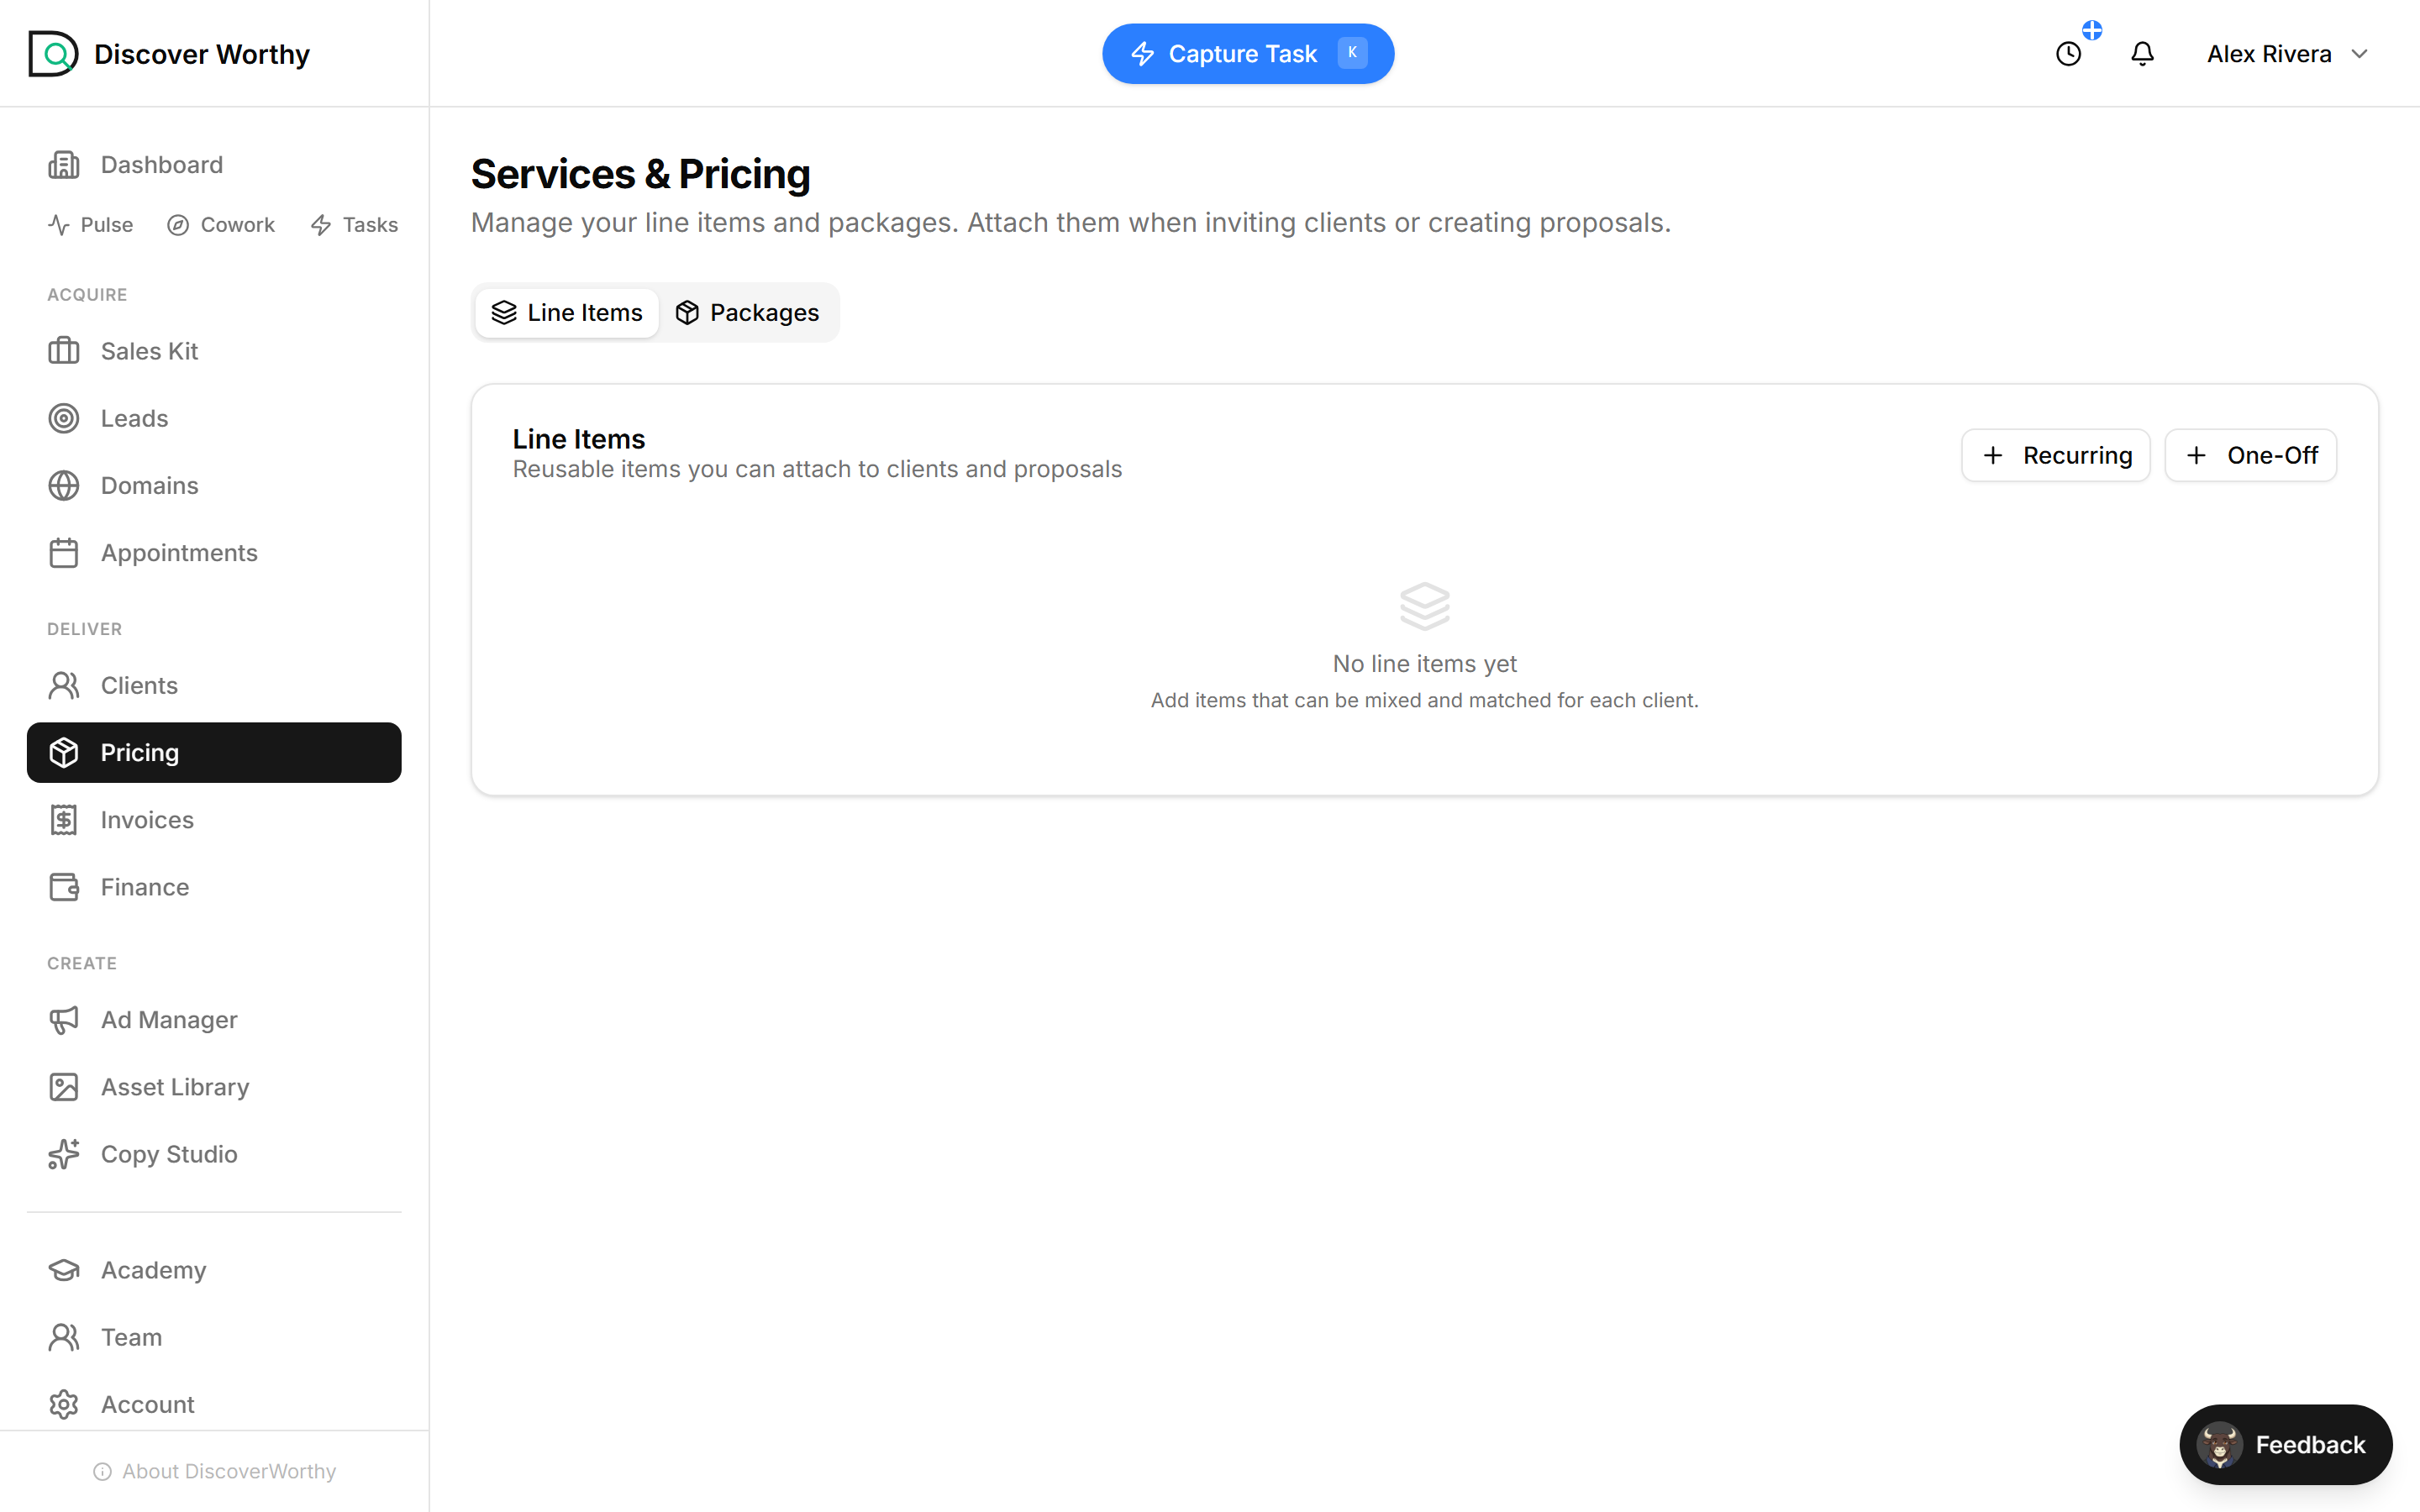
- 2
Add a recurring item
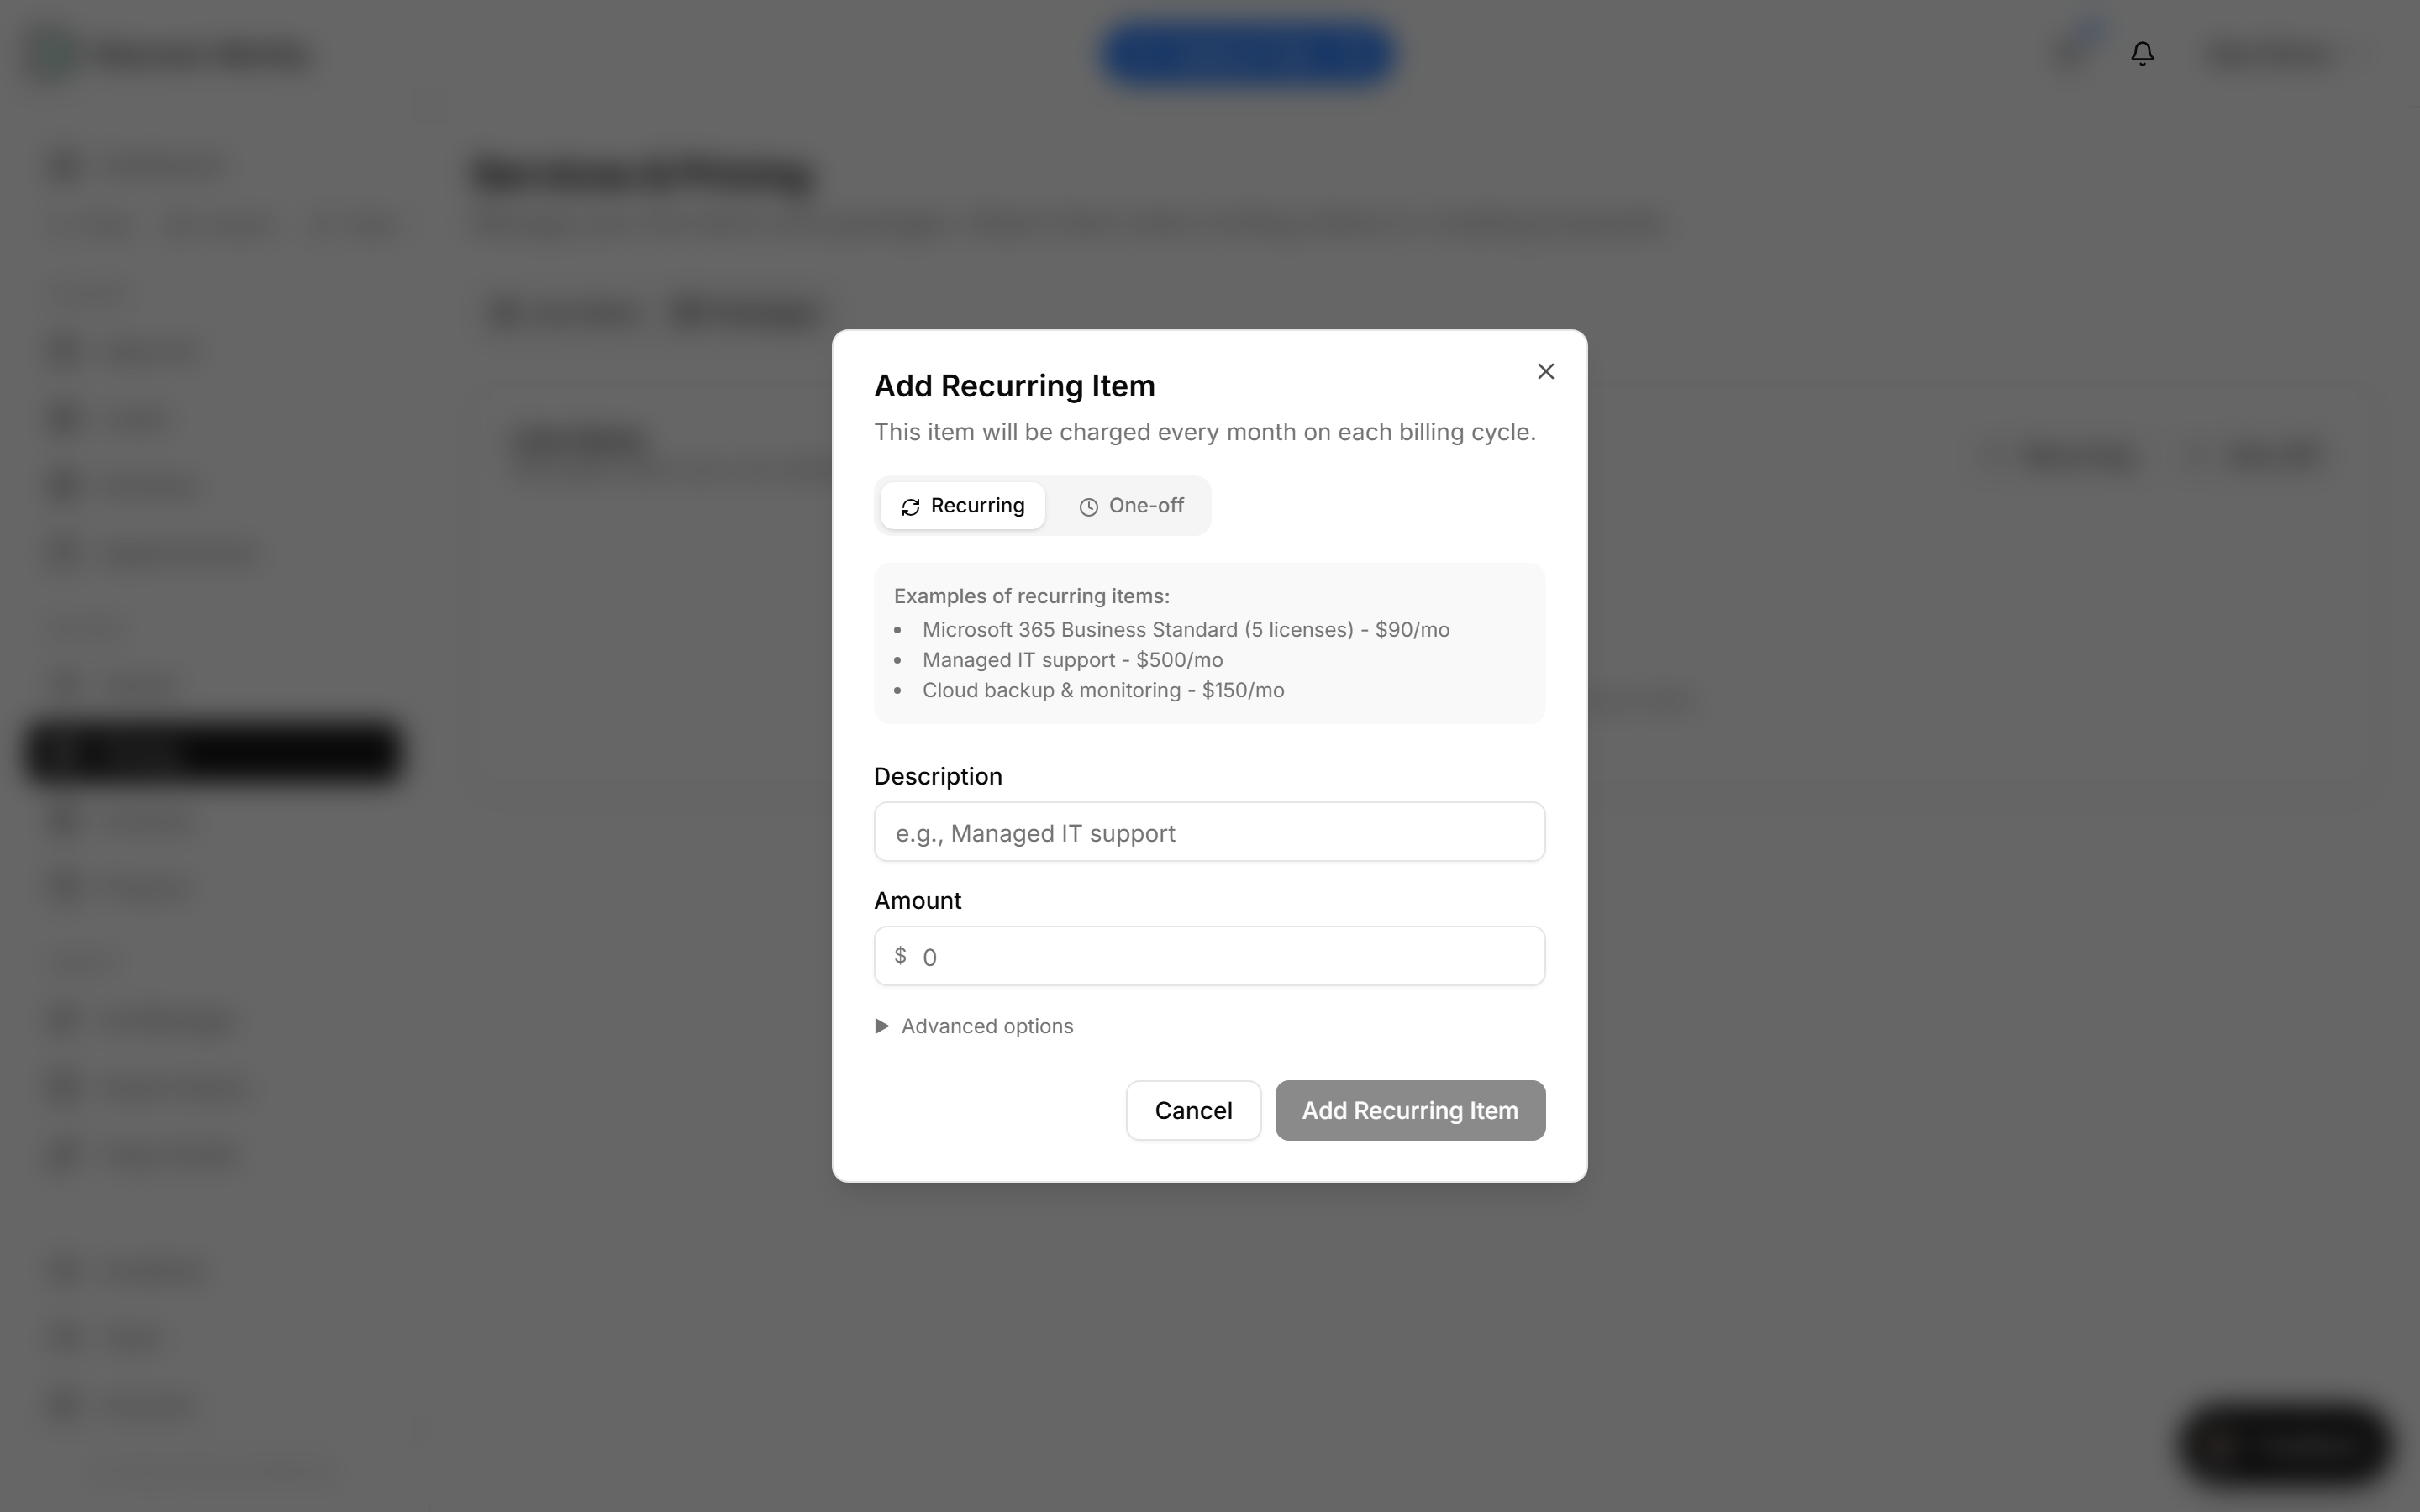
Recurring is for anything billed every month — a management retainer, a subscription you pass through, an ongoing service. It is charged again on each billing cycle for as long as the client is with you.
The dialog shows a few examples to anchor the idea. Give it a plain description and a monthly amount; that is all it needs.
- 3
Name it, price it, tag it
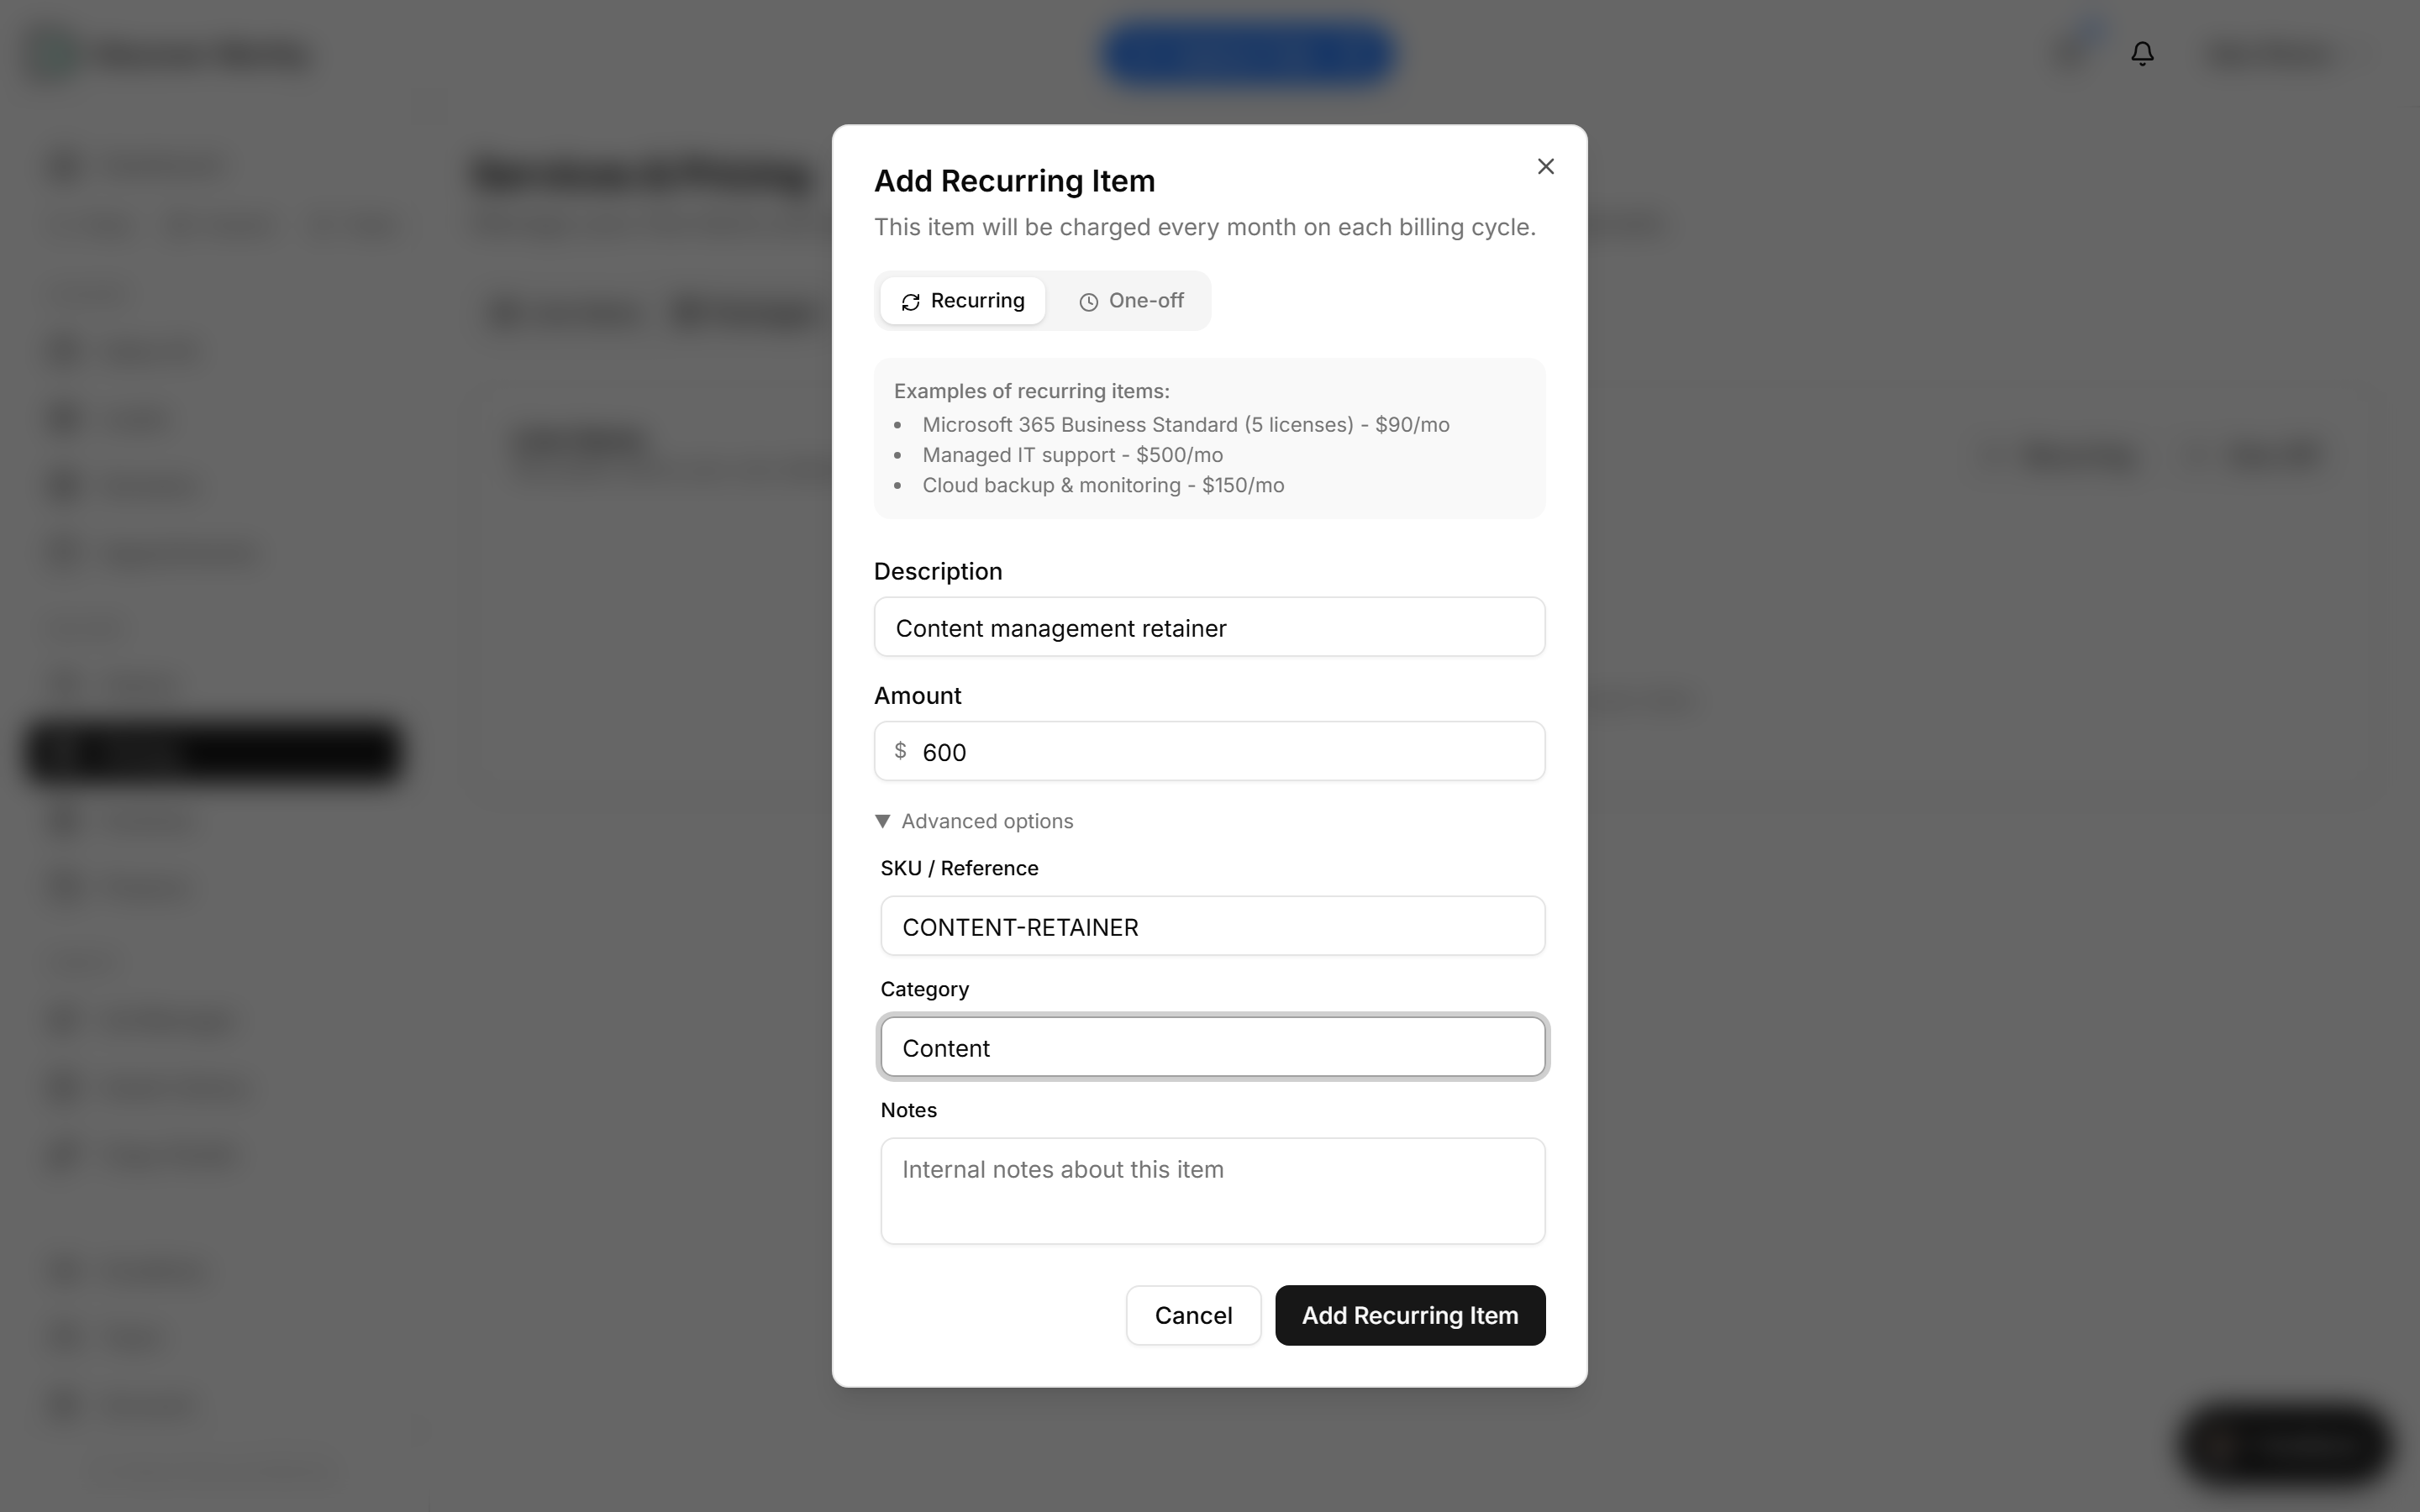
Description and amount are the whole requirement. Advanced options adds a SKU and a category if you want them — the SKU is your own reference code, and the category is what the filter at the top of the list groups by once you have a few items.
Neither is needed to save. They earn their keep once your catalogue grows enough that you want to find things in it.
- 4
One-off items, for the things that happen once
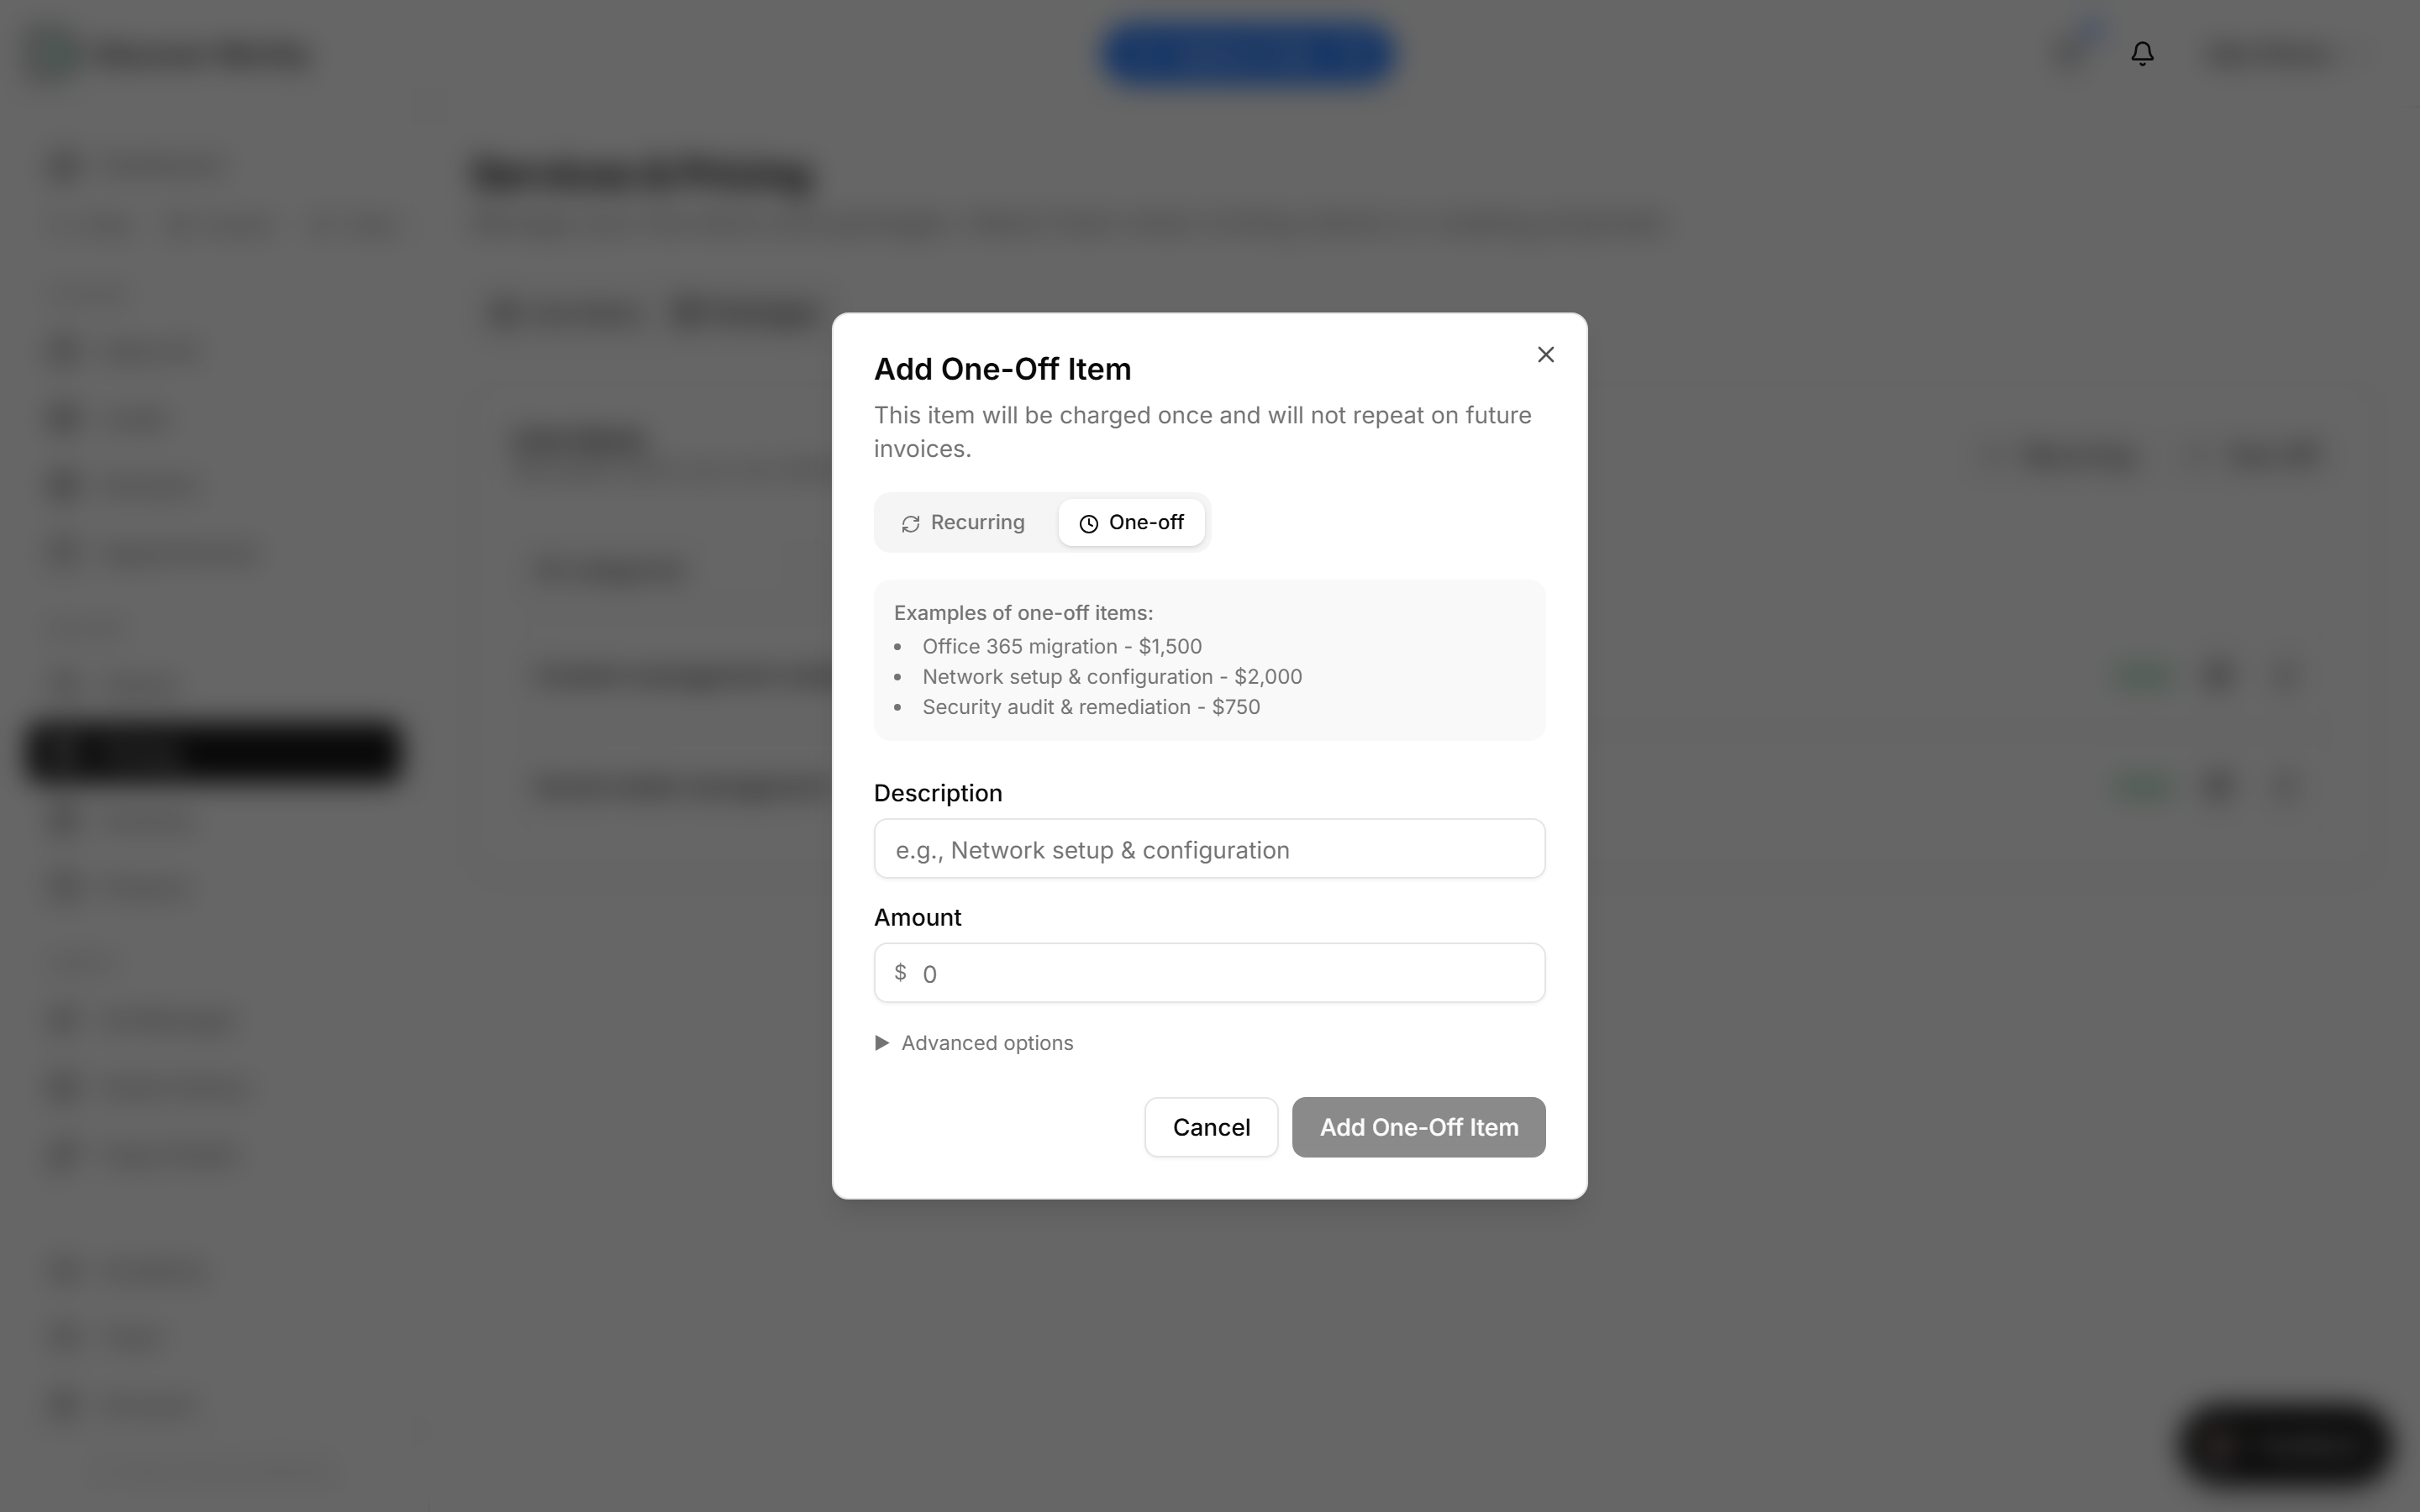
Same dialog, other mode. A one-off is charged a single time and never repeats — a setup fee, a migration, an audit, a piece of project work.
The distinction matters because it decides what happens next month. A recurring item keeps billing; a one-off bills once and is done. Pick the mode that matches how you actually charge for the thing.
- 5
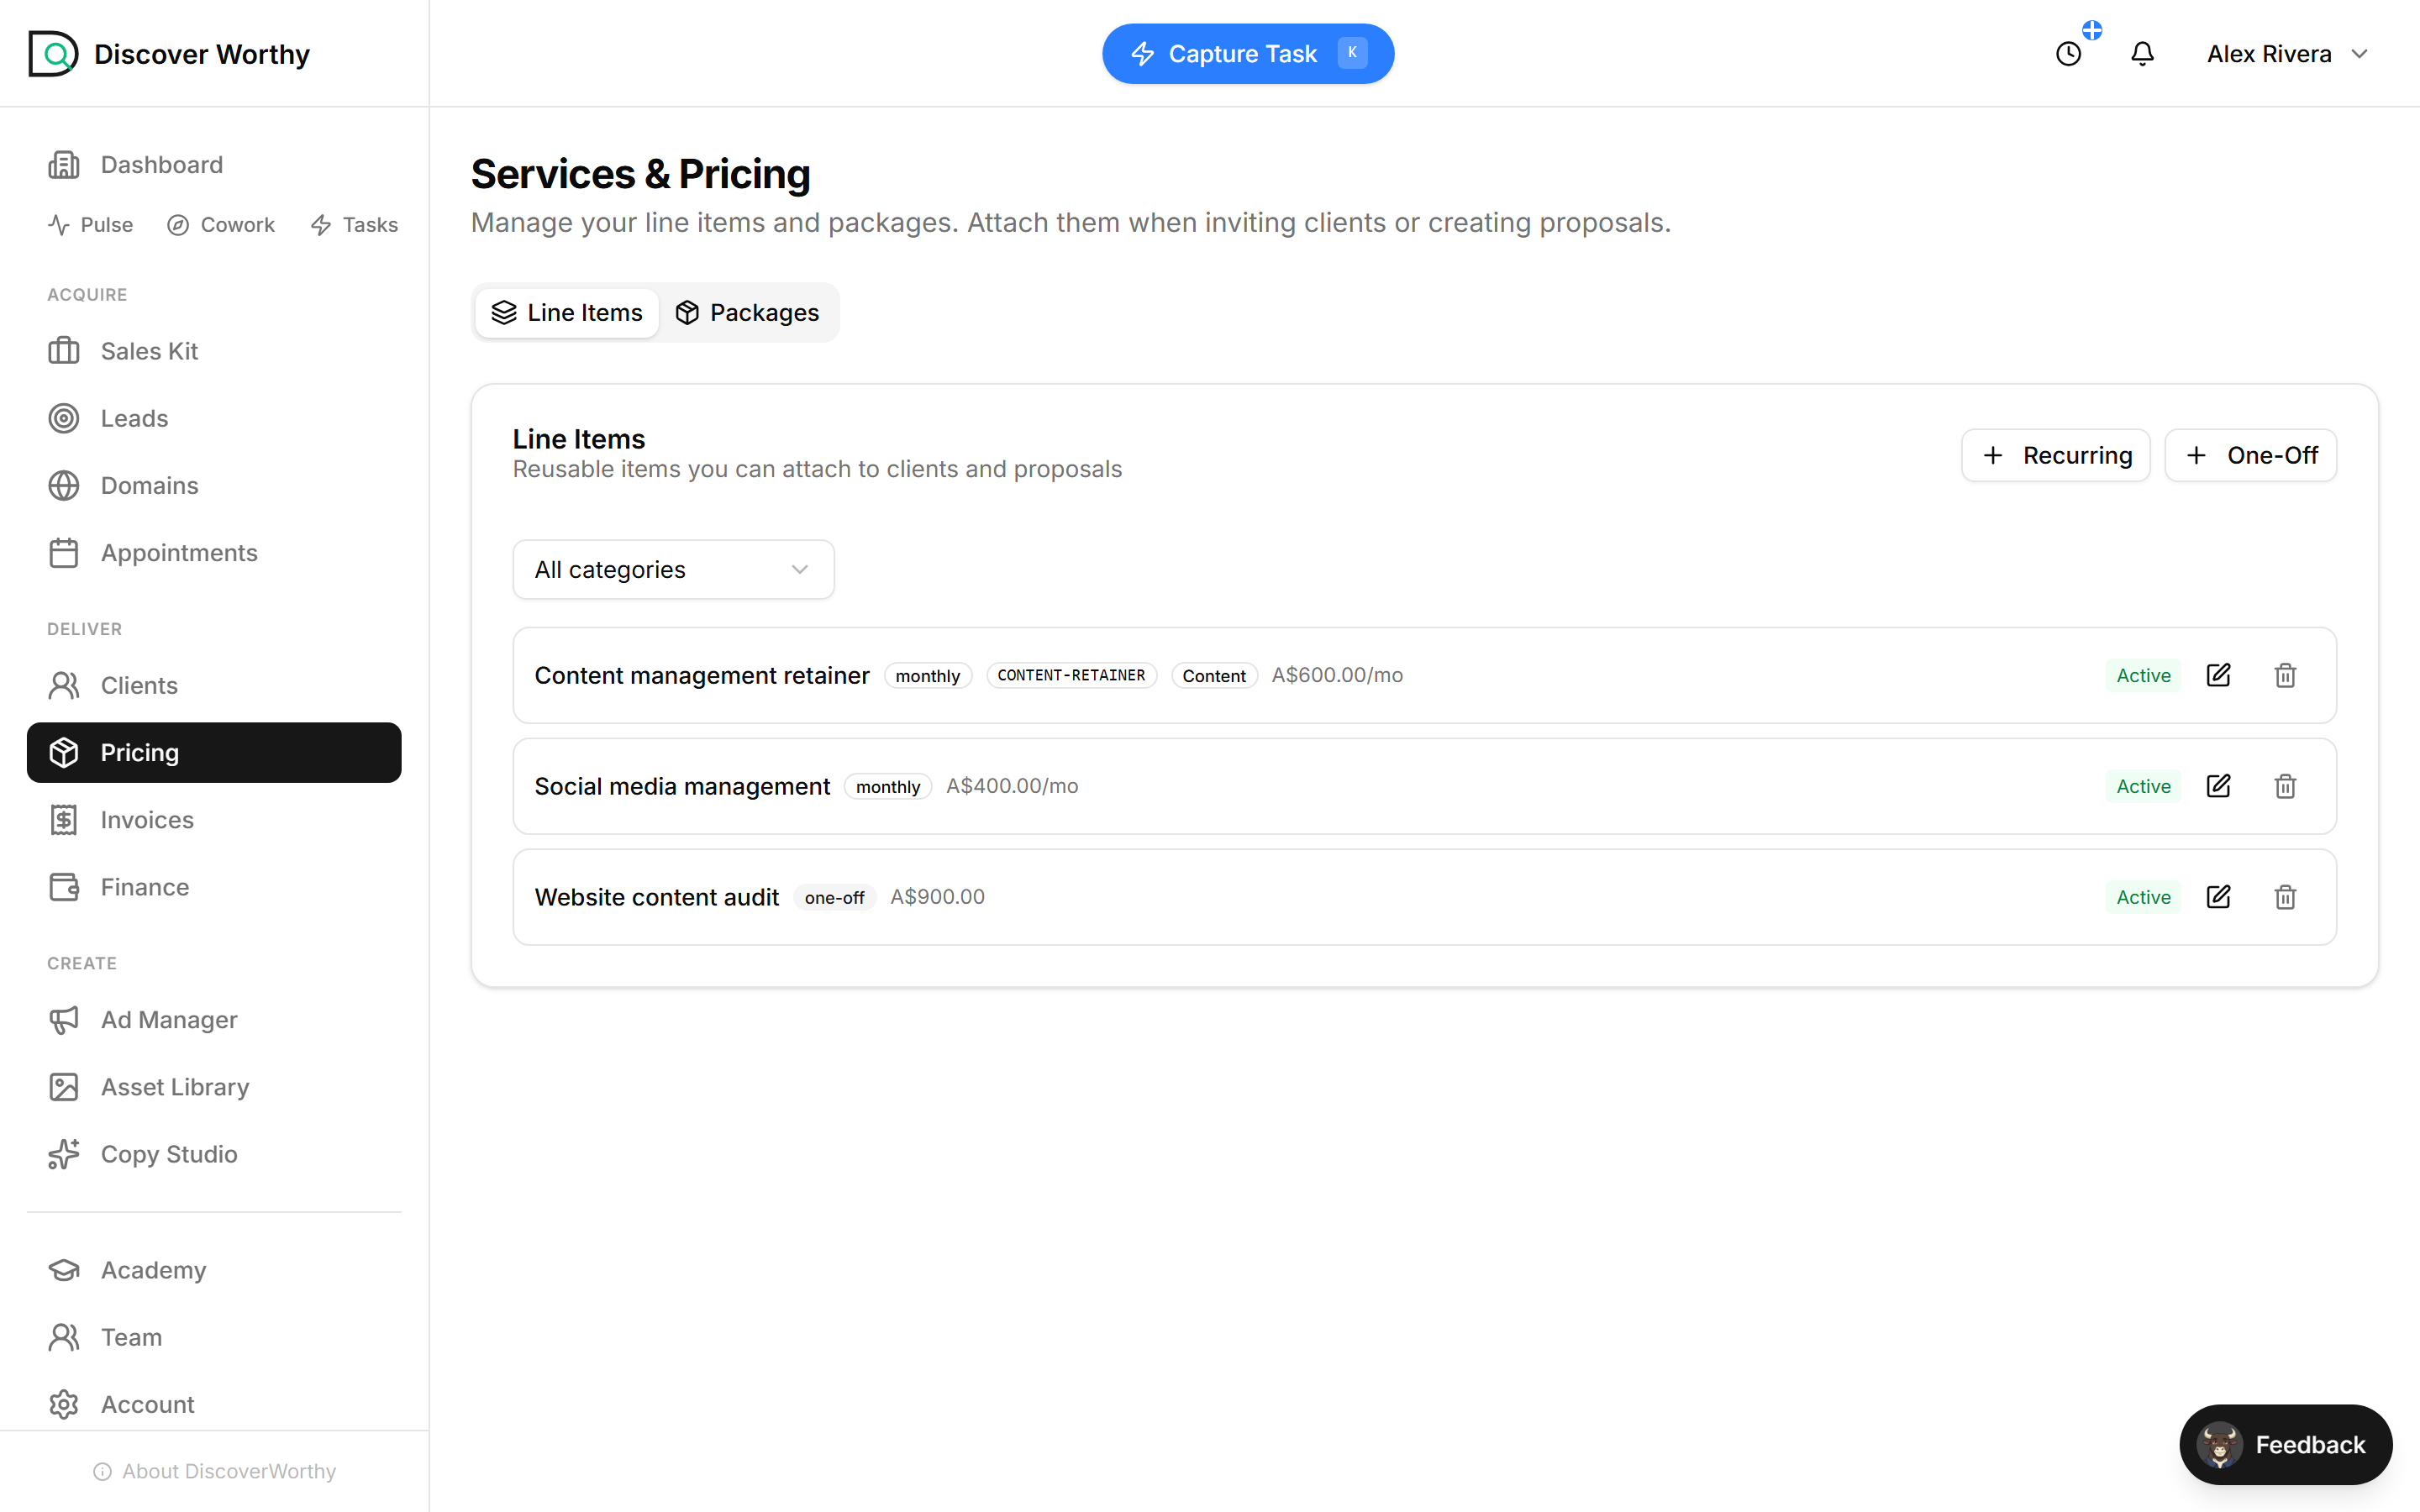
Your line items
They stack up as a simple list — monthly and one-off marked with a badge, the amount alongside, your SKU and category if you added them.
You can switch an item to Inactive rather than deleting it, which keeps it out of new invitations without losing the record of it. Edit and delete are on each row.
- 6
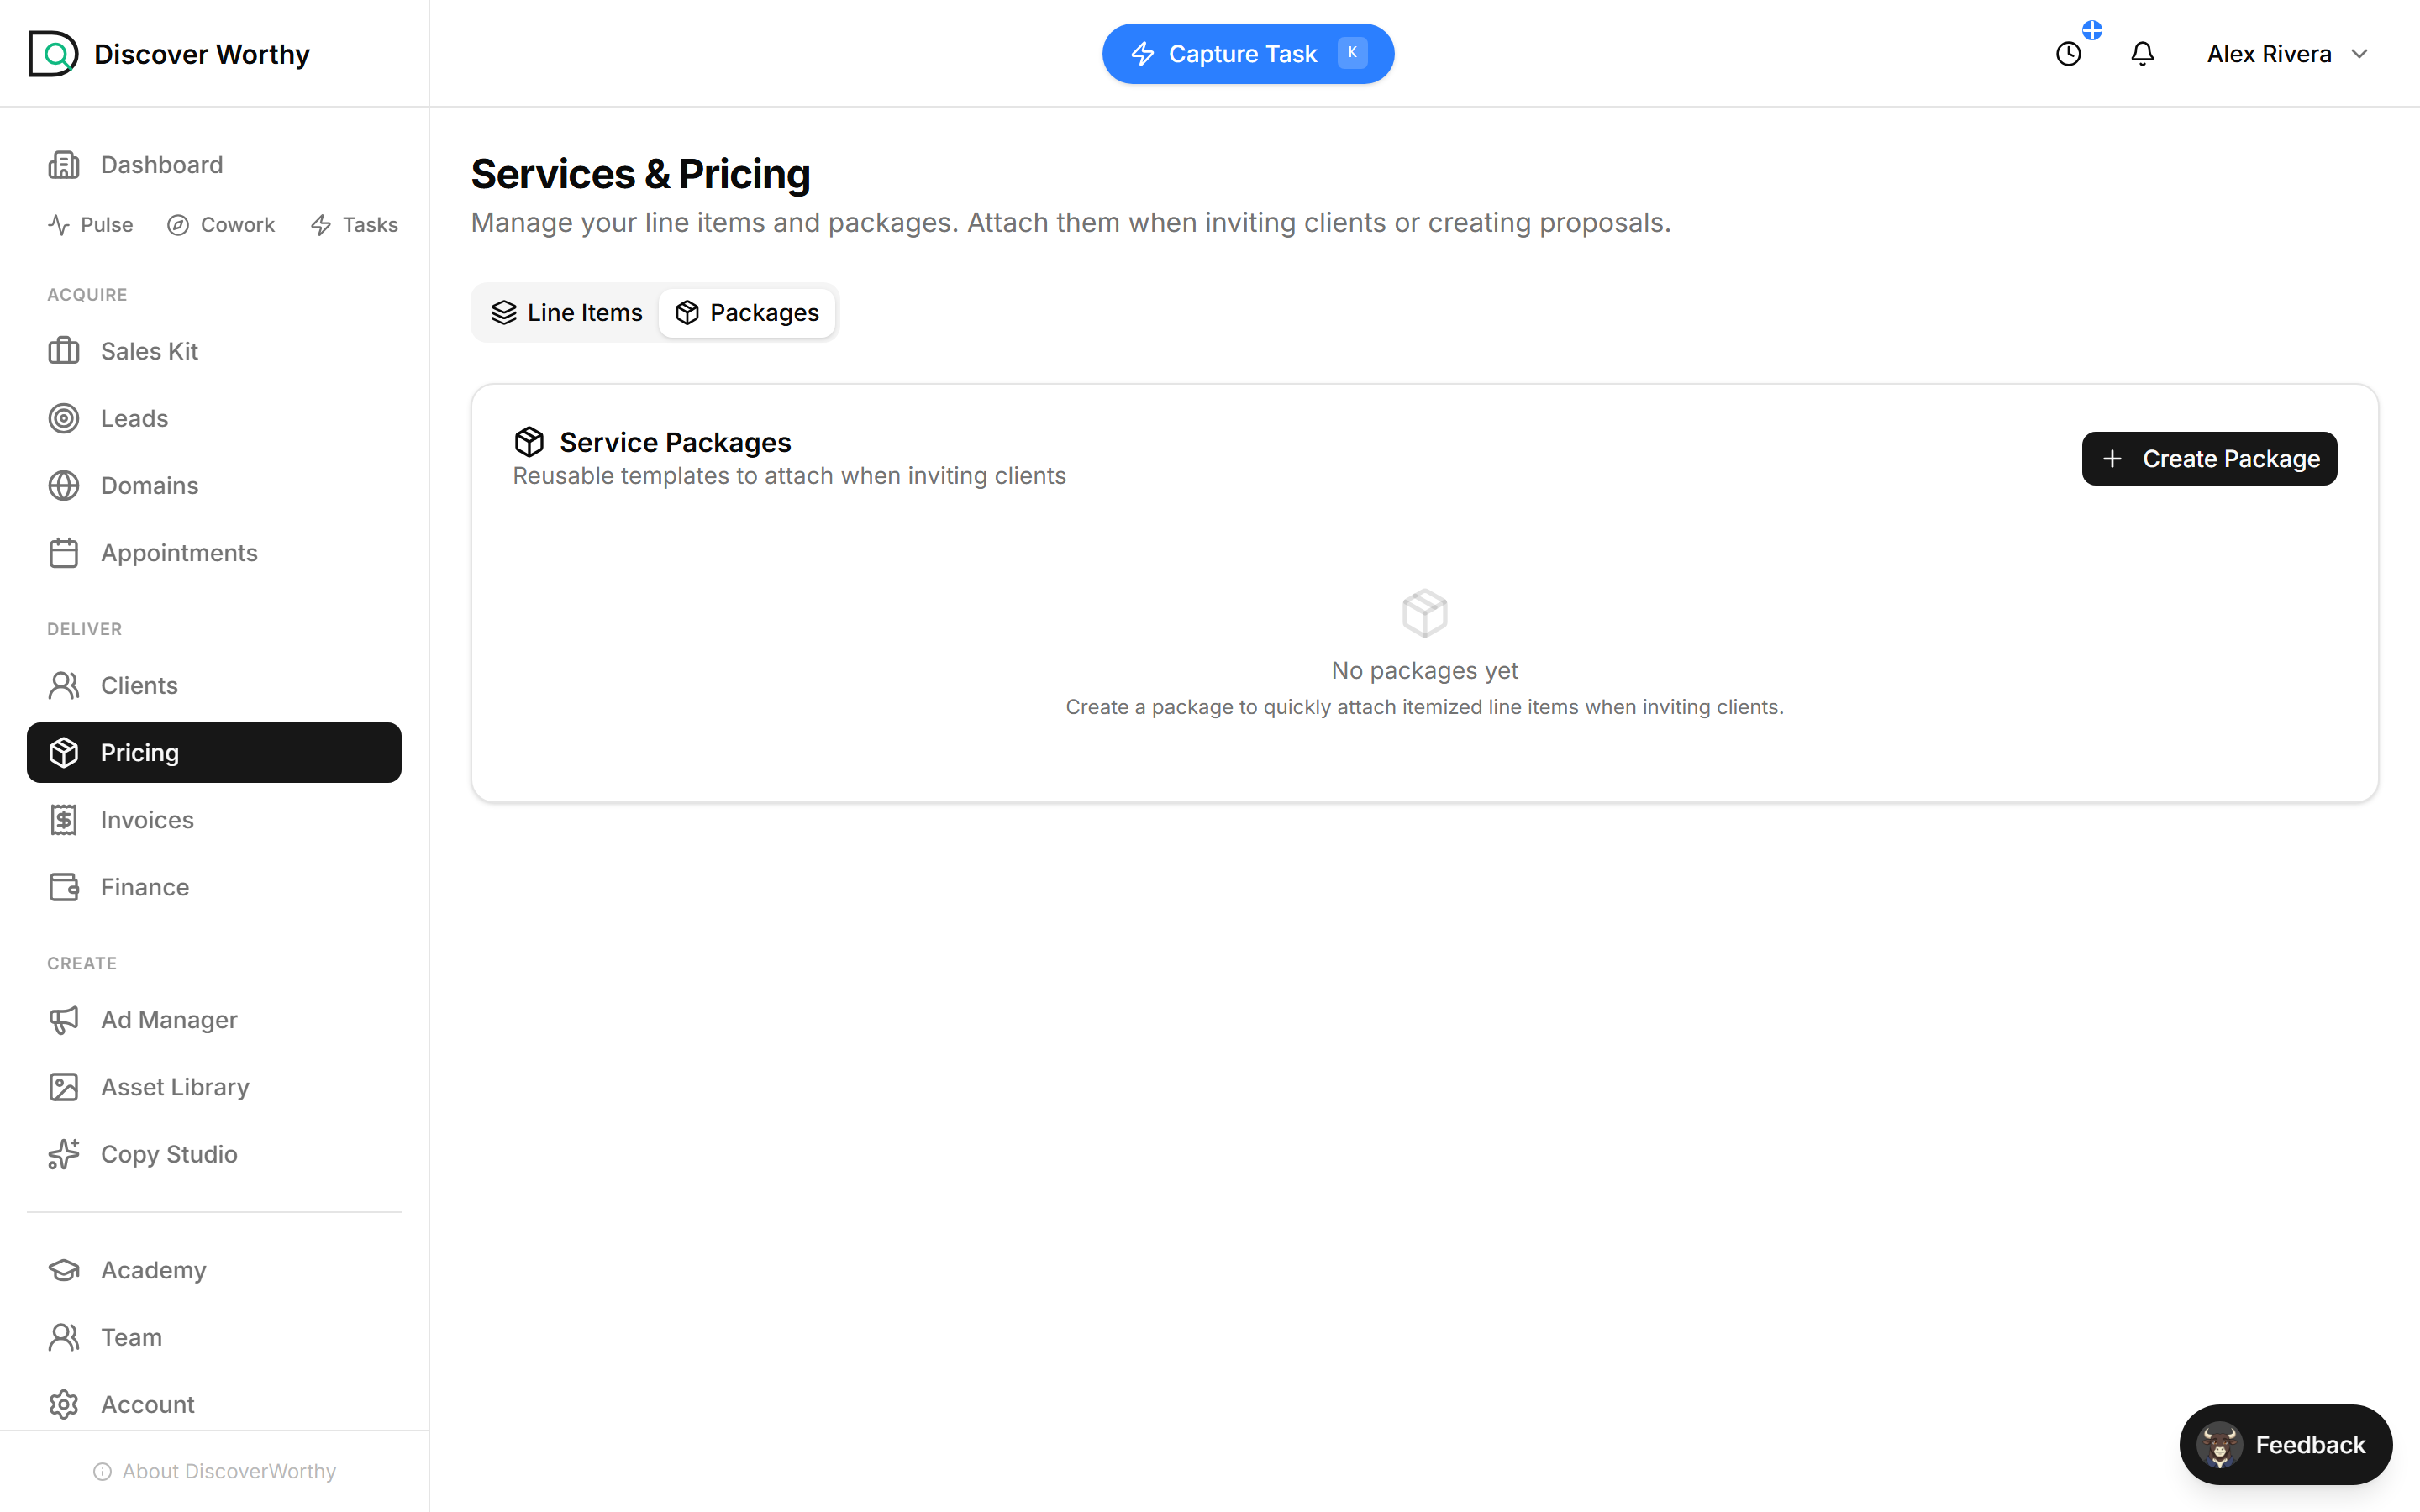
Packages bundle the items
A package is a named set of line items you attach in one go — so instead of adding three items to every new client, you add "Growth Plan" once and they all come with it.
This is the tab most freelancers end up living in. Build the two or three packages that match how you actually sell, and onboarding a client becomes a single choice.
- 7
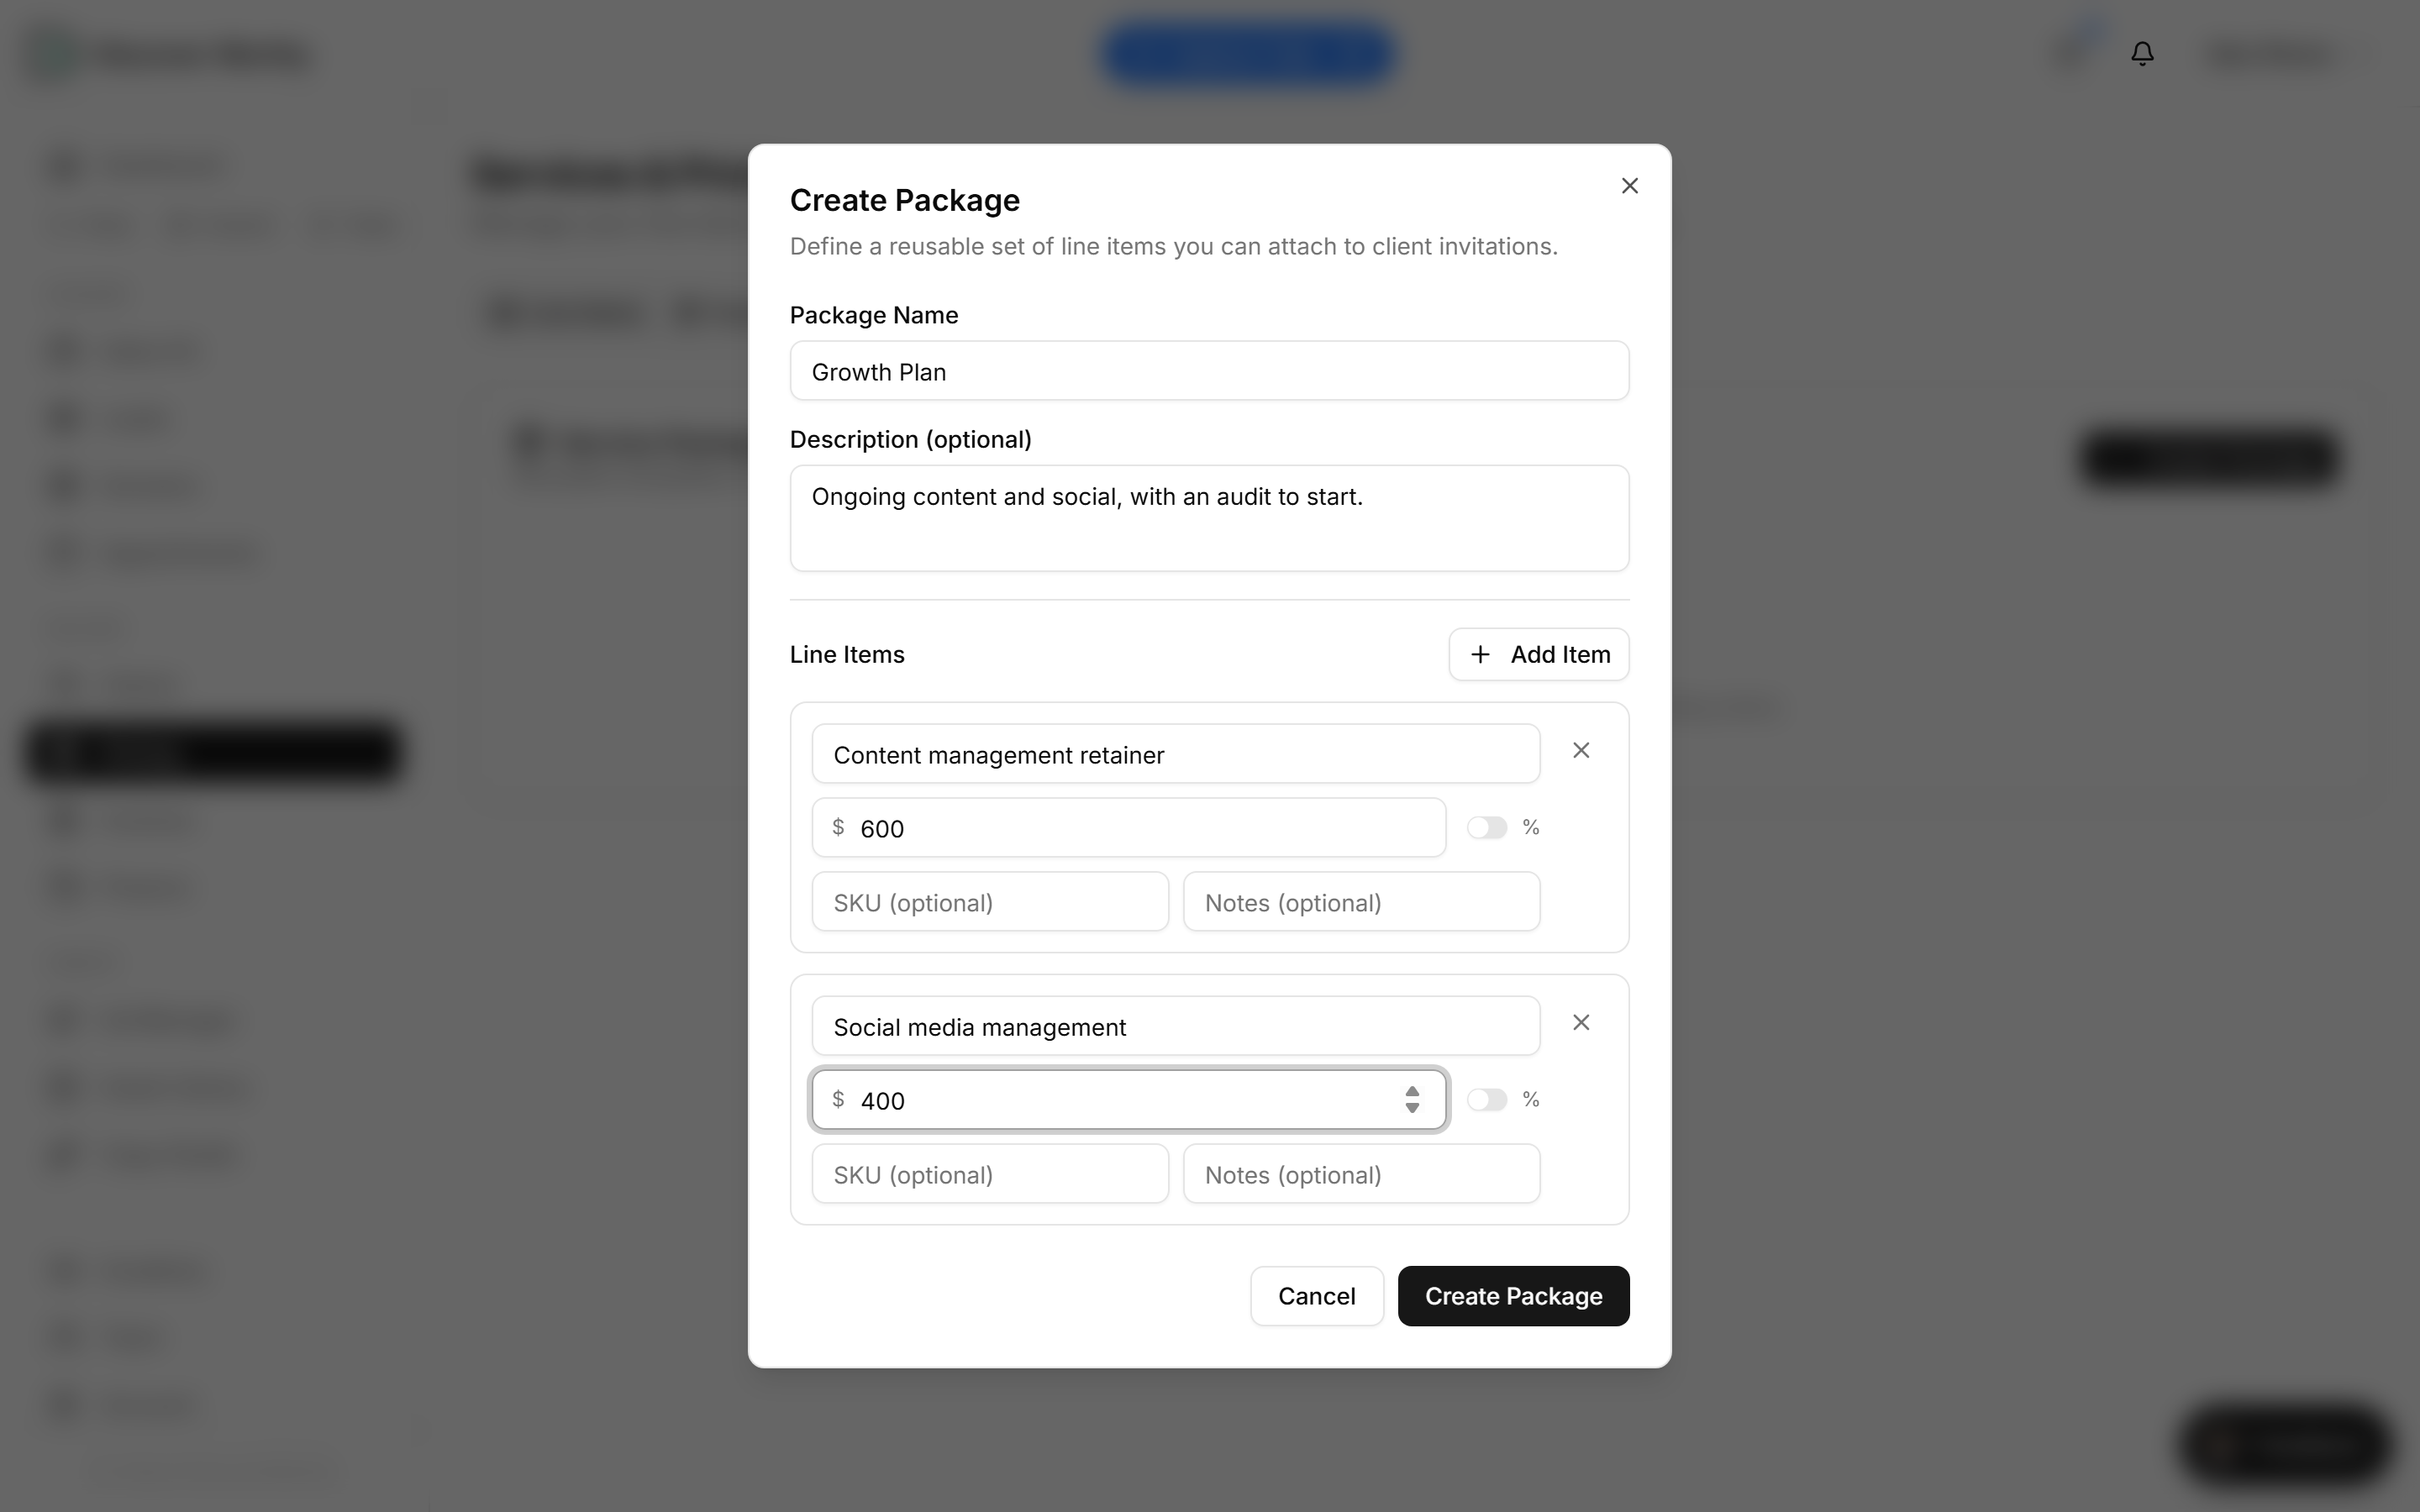
Build a package
Give it a name and, if you like, a short description. Then add its items — you can type them straight in here, or they mirror the line items you already built.
The percentage toggle beside each amount is for charges that scale with something rather than being a flat figure. Leave it off for a normal dollar amount.
- 8
What your price actually is
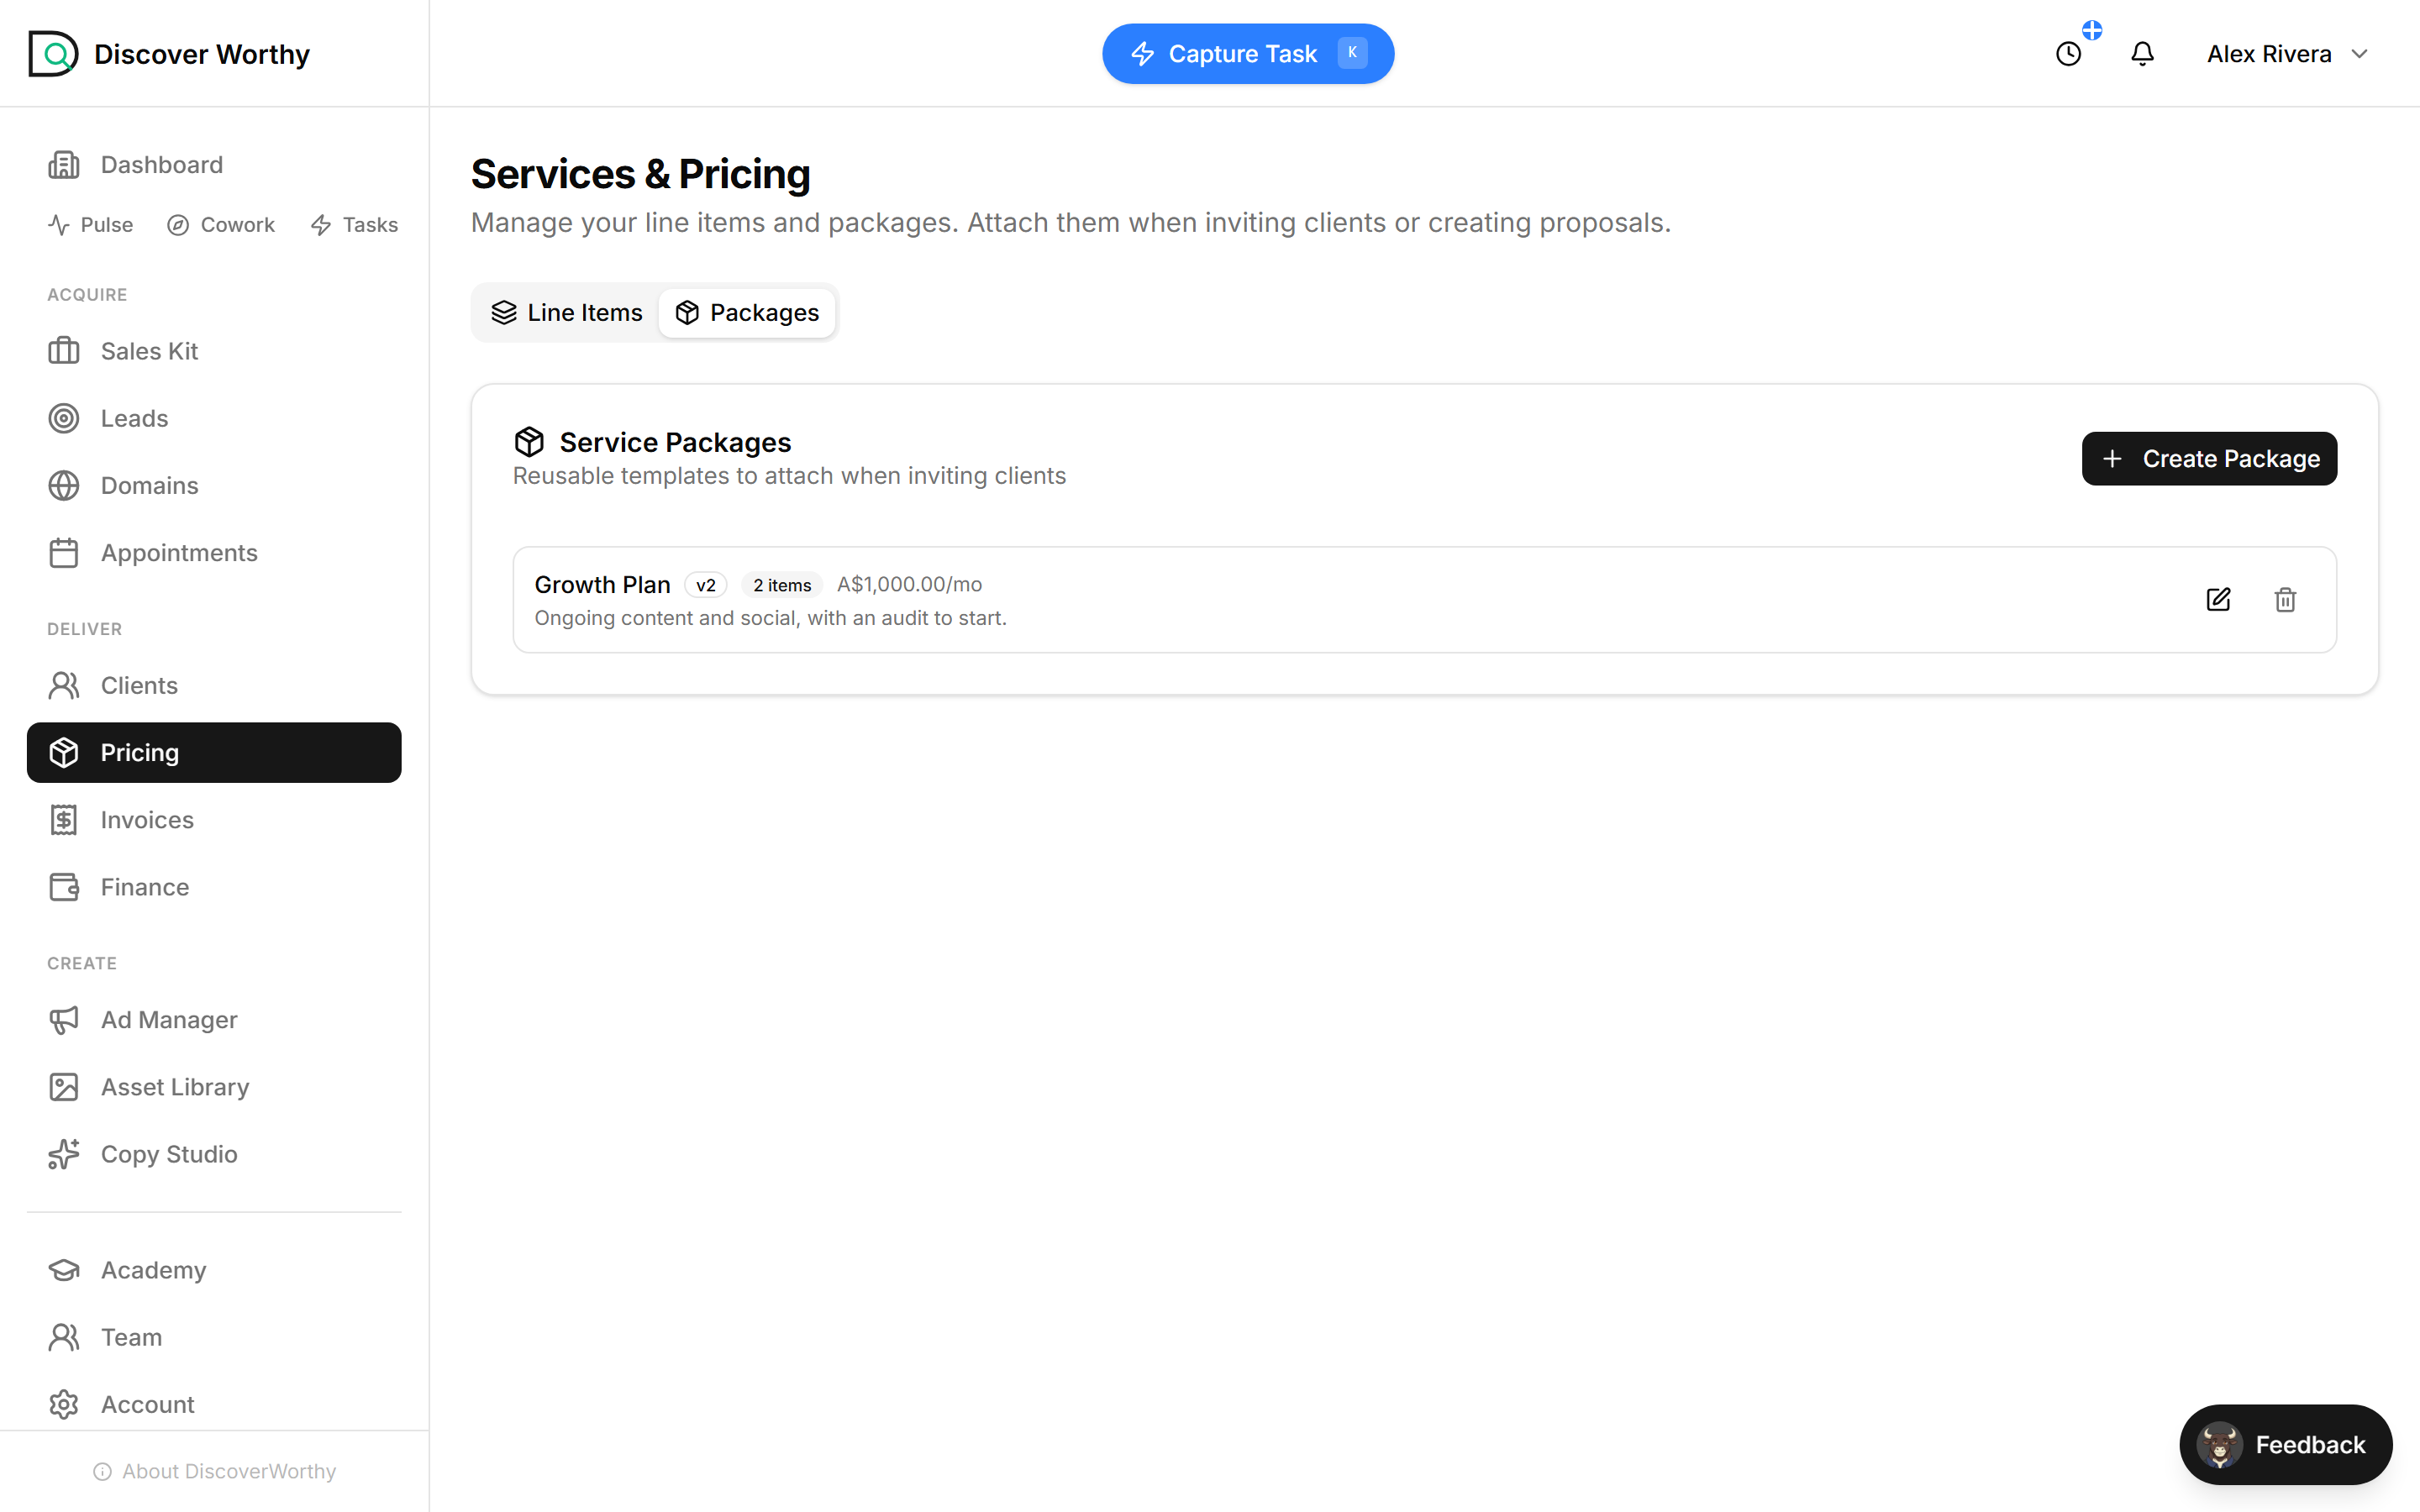
Your packages sit ready to attach the next time you invite a client, the same way a single fee did in the earlier guides.
Worth being clear about what this fee is: it is yours, and it sits on top of the DiscoverWorthy plan the client pays for separately. The client's total is your fee plus the plan; your take-home is your fee. Setting prices here is setting your margin — the plan cost underneath does not come out of it.
That take-home only shows as a real number once a client is actually being billed, which is why a brand-new client reads zero. That is the money side, and it is the next thing to understand.
A package or item is a template. Attaching it to a client copies its values onto that client, so editing the template later does not silently change what an existing client pays.
Next up
Invoices and payouts
Read your book — the recurring revenue and margin across your clients — and follow the money from a client charge through to a payout landing in your bank.
Ready to start?
Create your freelancer account and follow along.