Contents
Win the work
Track the people you are pursuing, send a branded proposal they can accept in one click, and turn a yes into a client record that is already set up.
- 1
Leads is for people, not websites
Leads and Domains look similar and are not the same list. Leads is people and companies you are pursuing — with or without a website, with or without a workspace. Domains is businesses you have actually started building something for.
Nothing on this page costs you anything or provisions anything. A lead is a note to yourself with a follow-up date, which is why it is safe to put someone here the moment you meet them.
The status column is your pipeline, and the statuses are yours to rename — New, In Contact, Qualified, Proposal, Negotiation, Won, Lost is just the starting set.
Open Pipeline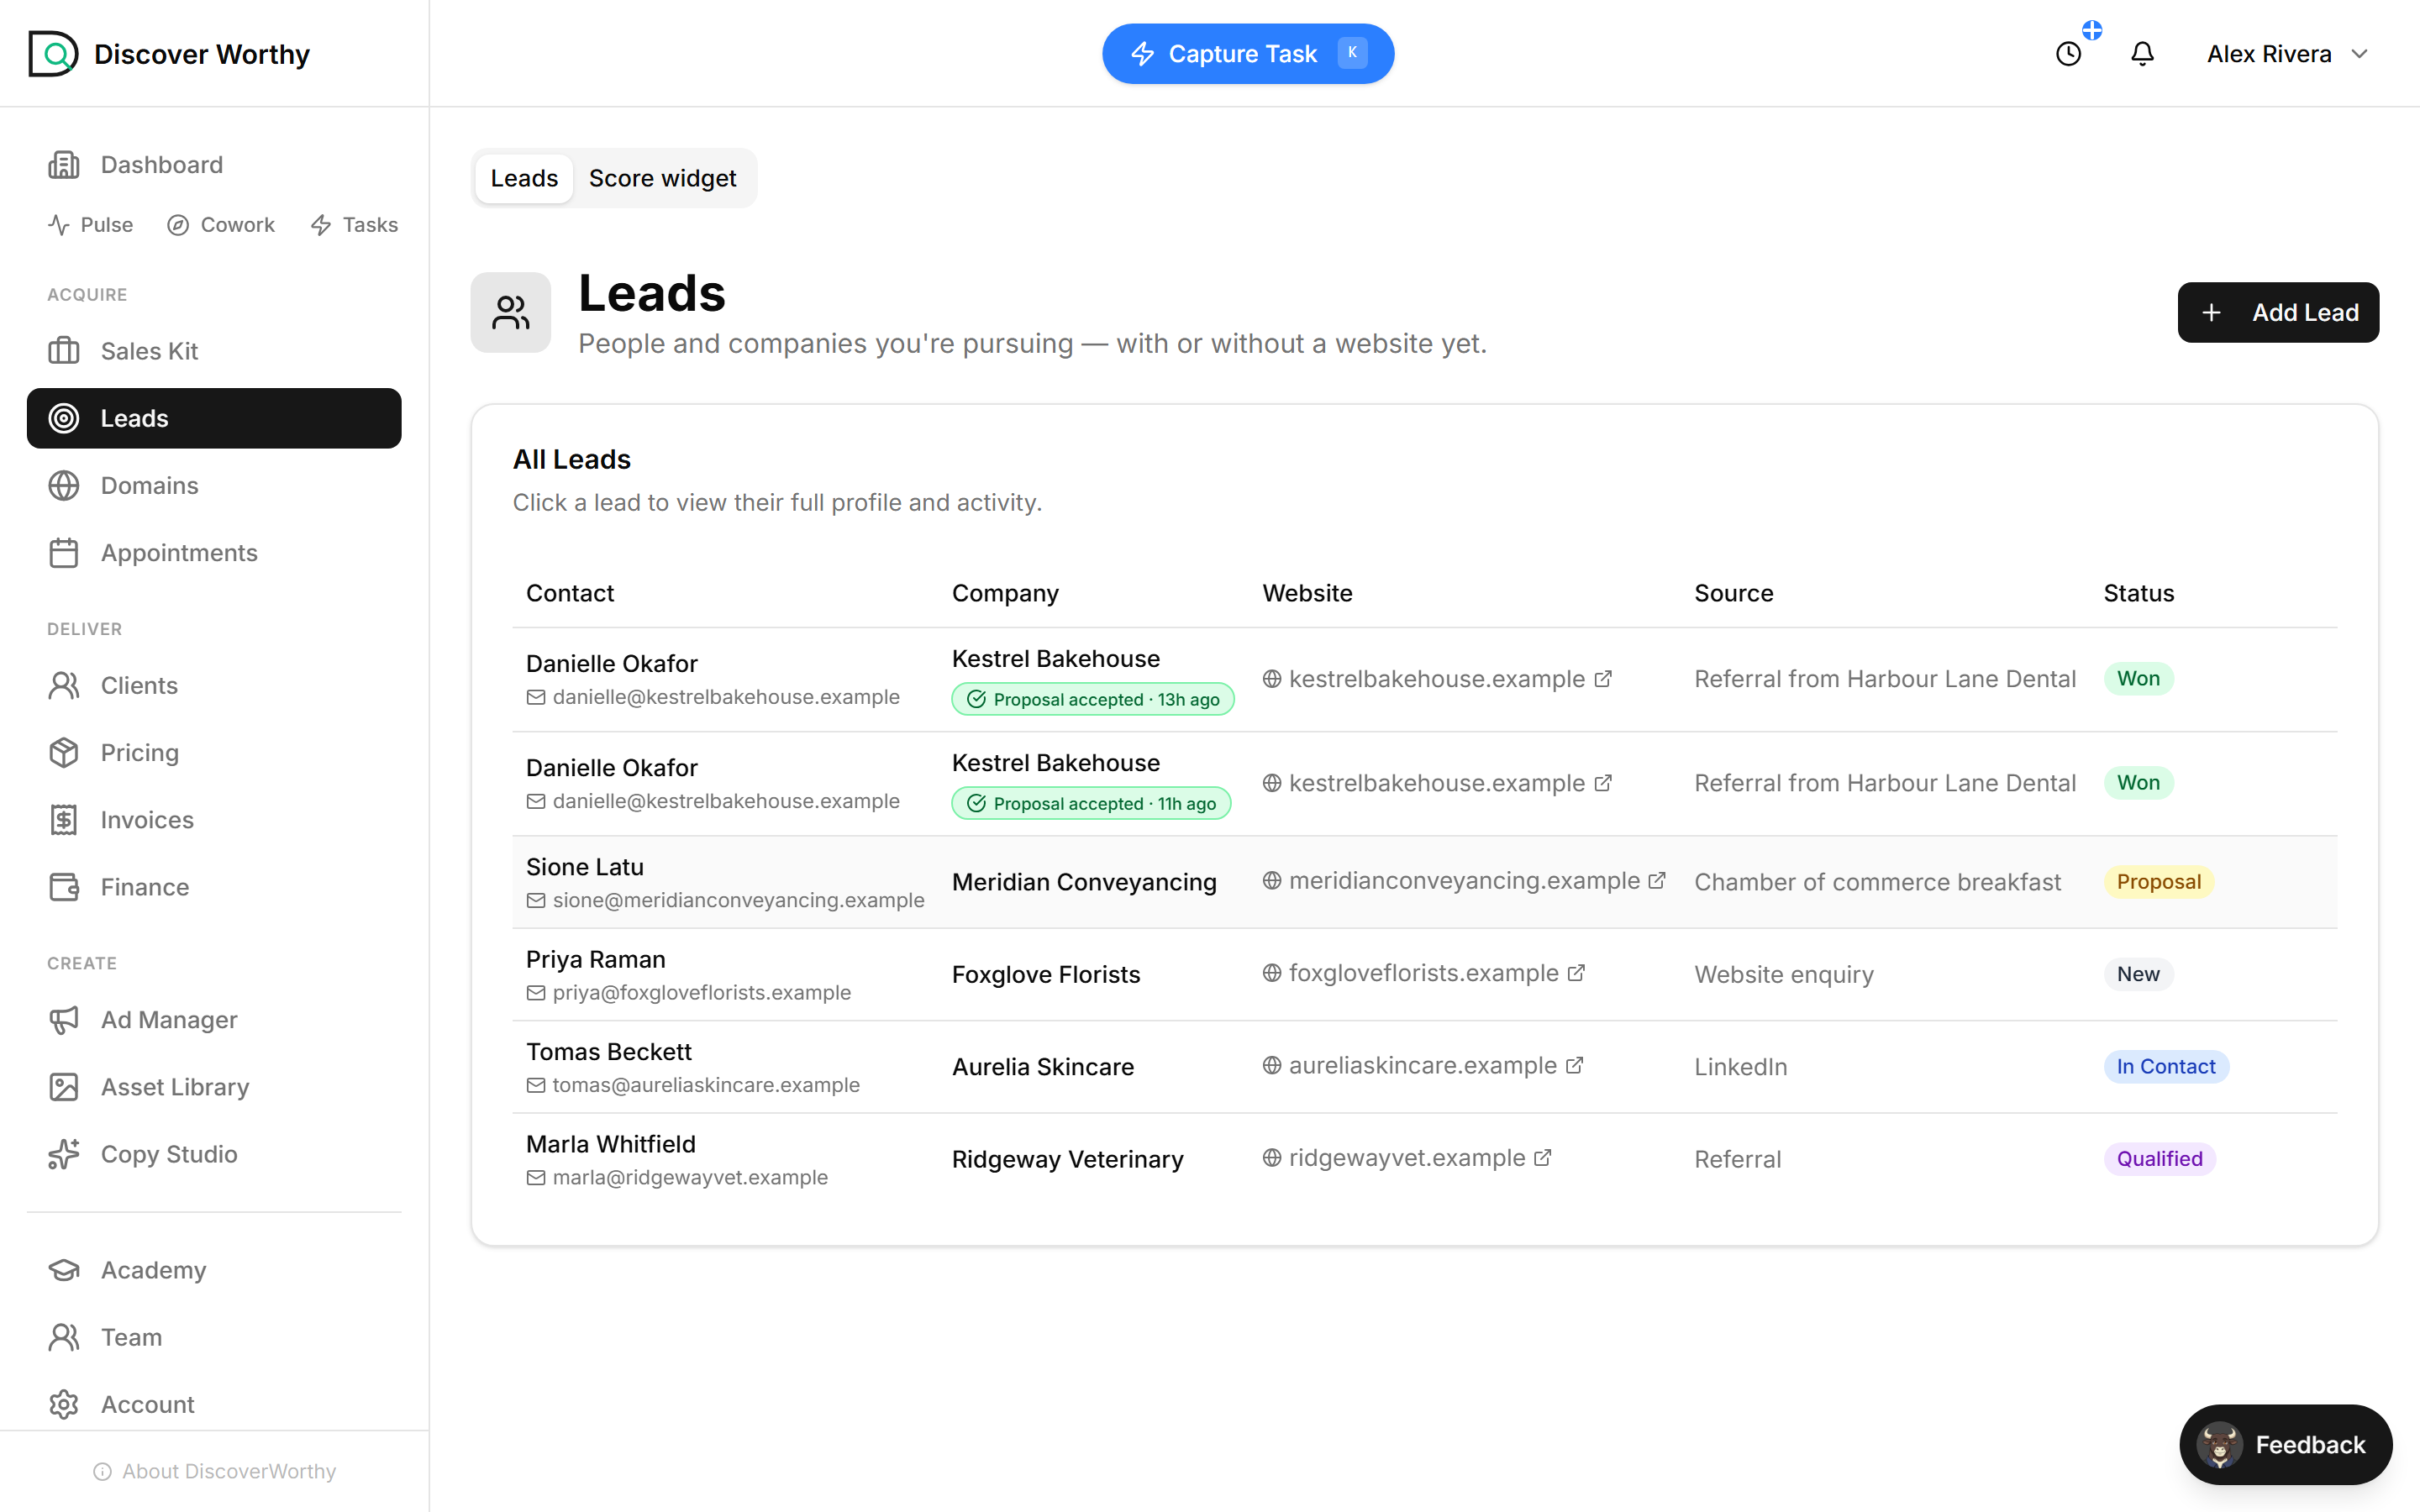
- 2
Add a lead
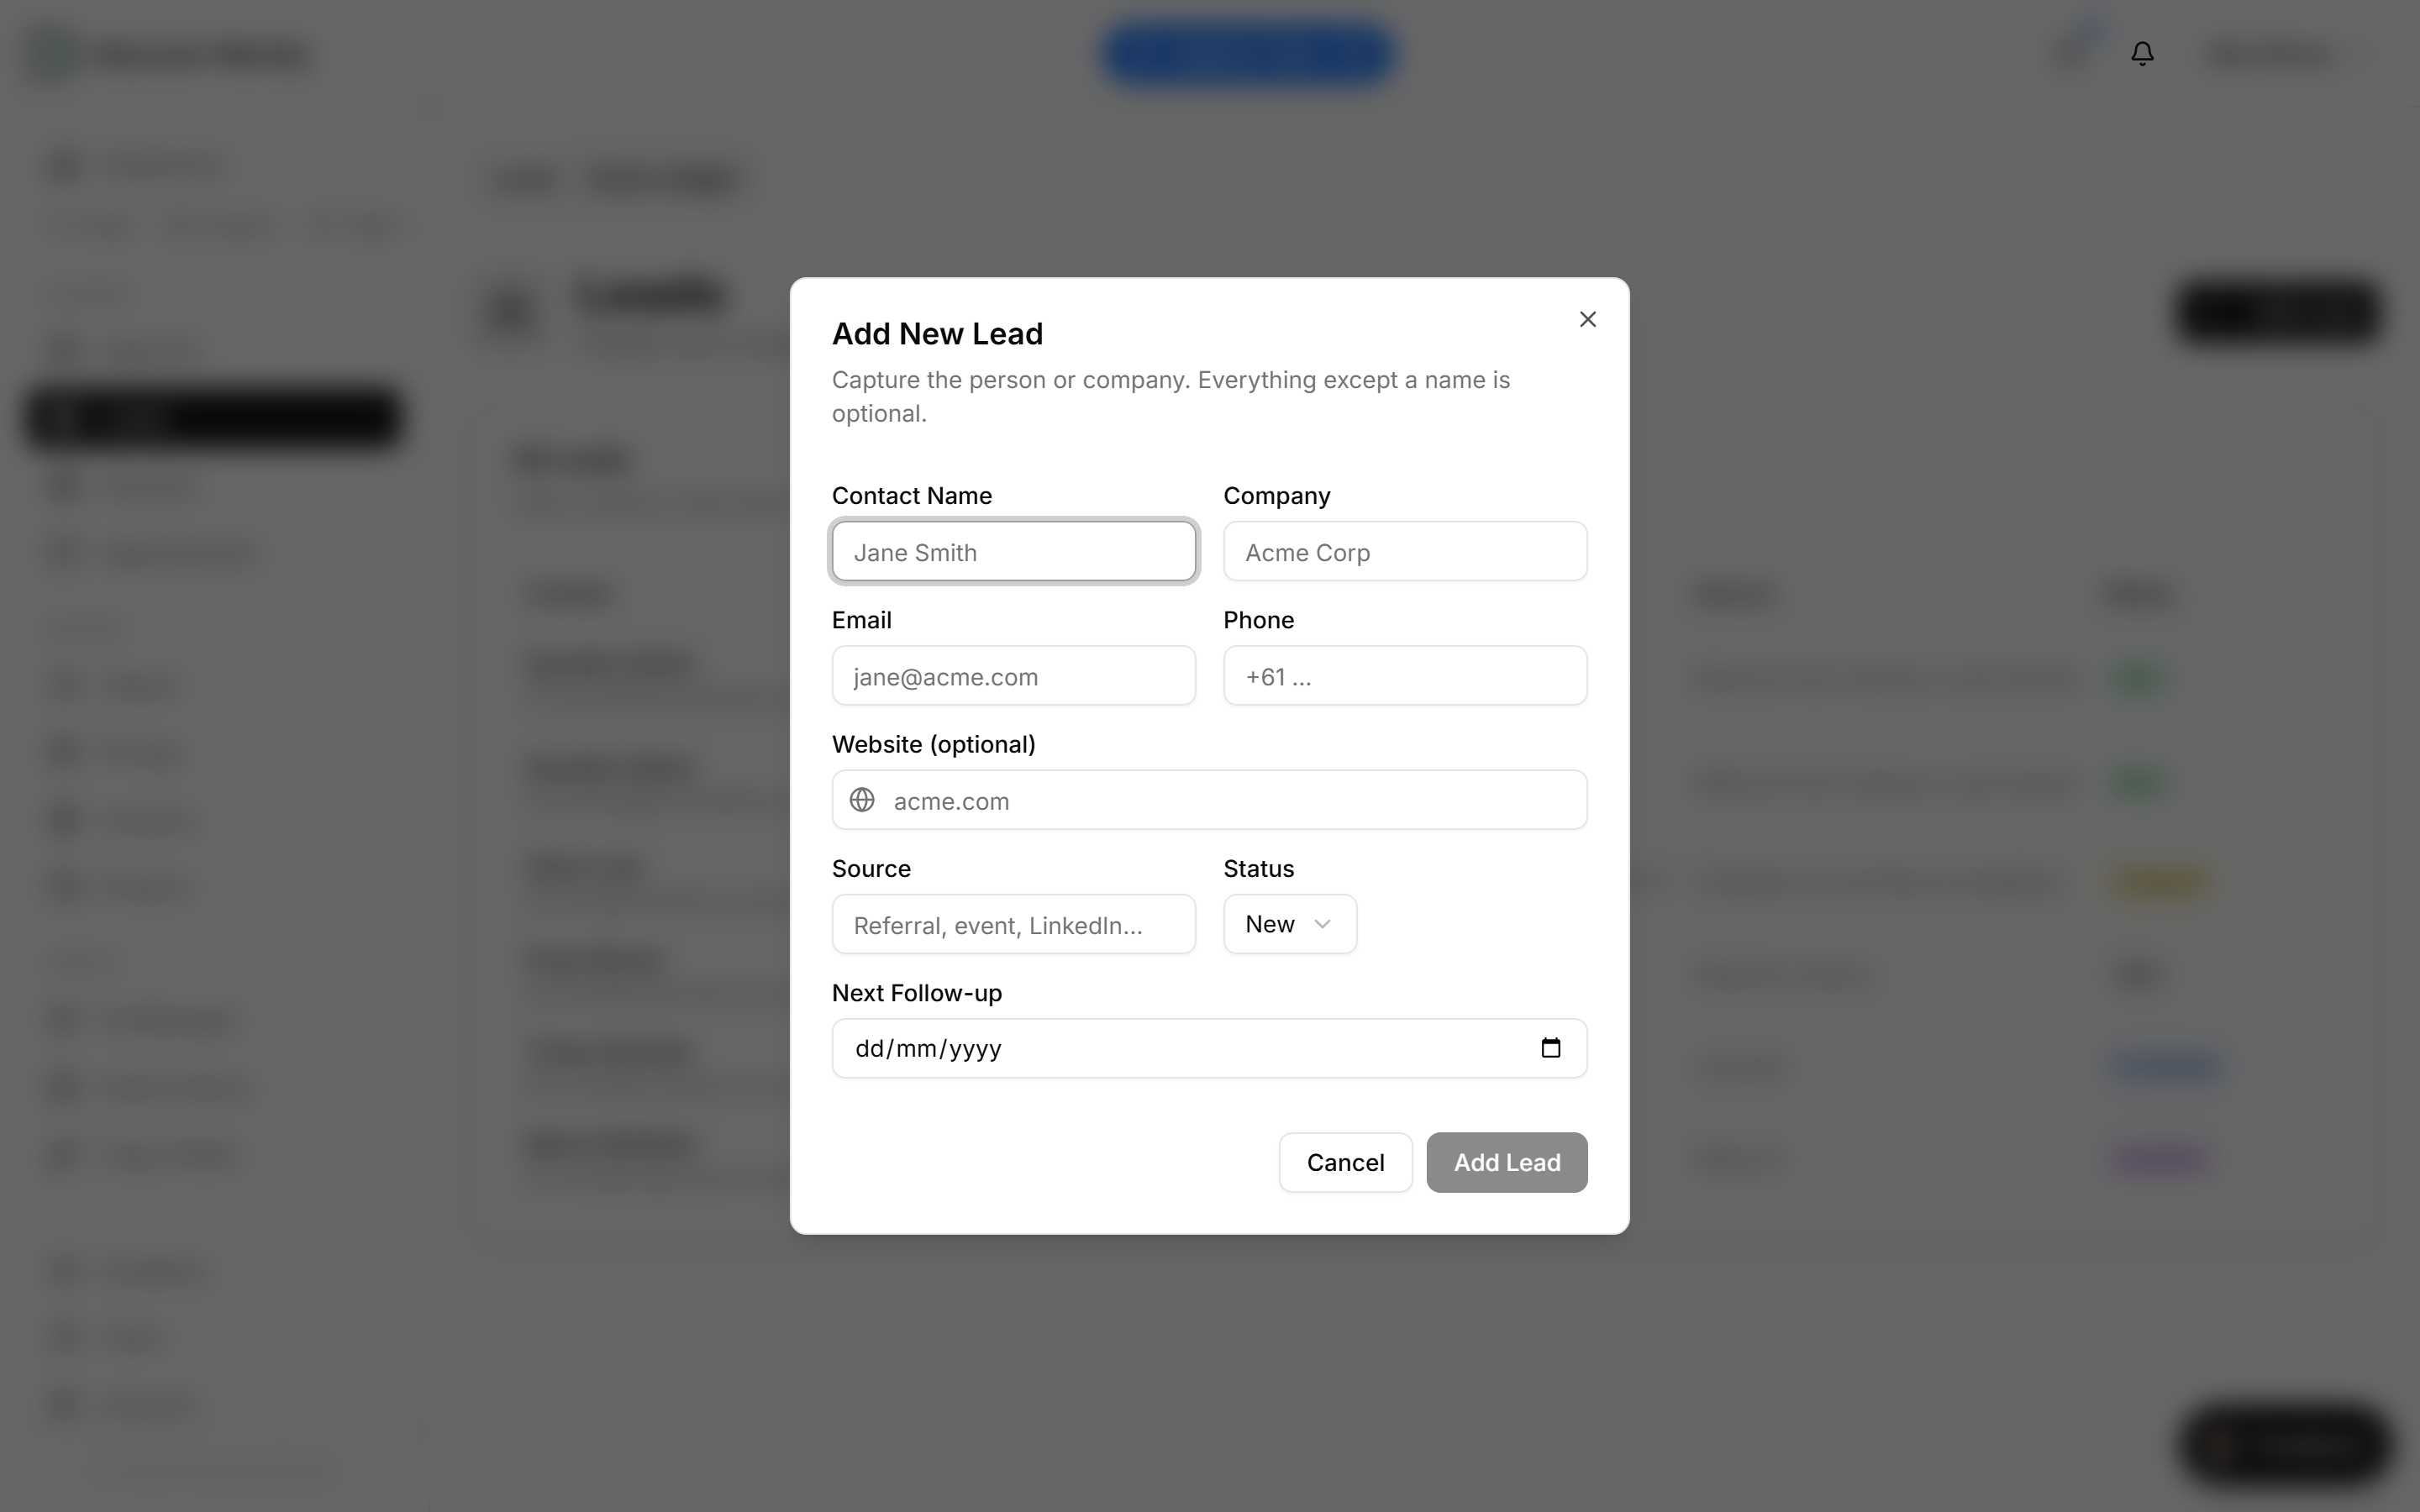
Everything except a name is optional, and that is deliberate — capture them now, fill the rest in as you learn it. A phone number and a source are usually all you have after a first conversation.
Two fields do more work than they look. Source is what tells you months later which of your channels is actually producing, and it only works if you fill it in every time. Website is what unlocks the rest of the page: the audit, the pitch PDF, and the ability to turn this lead into a client at all.
- 3
Fill in what you know
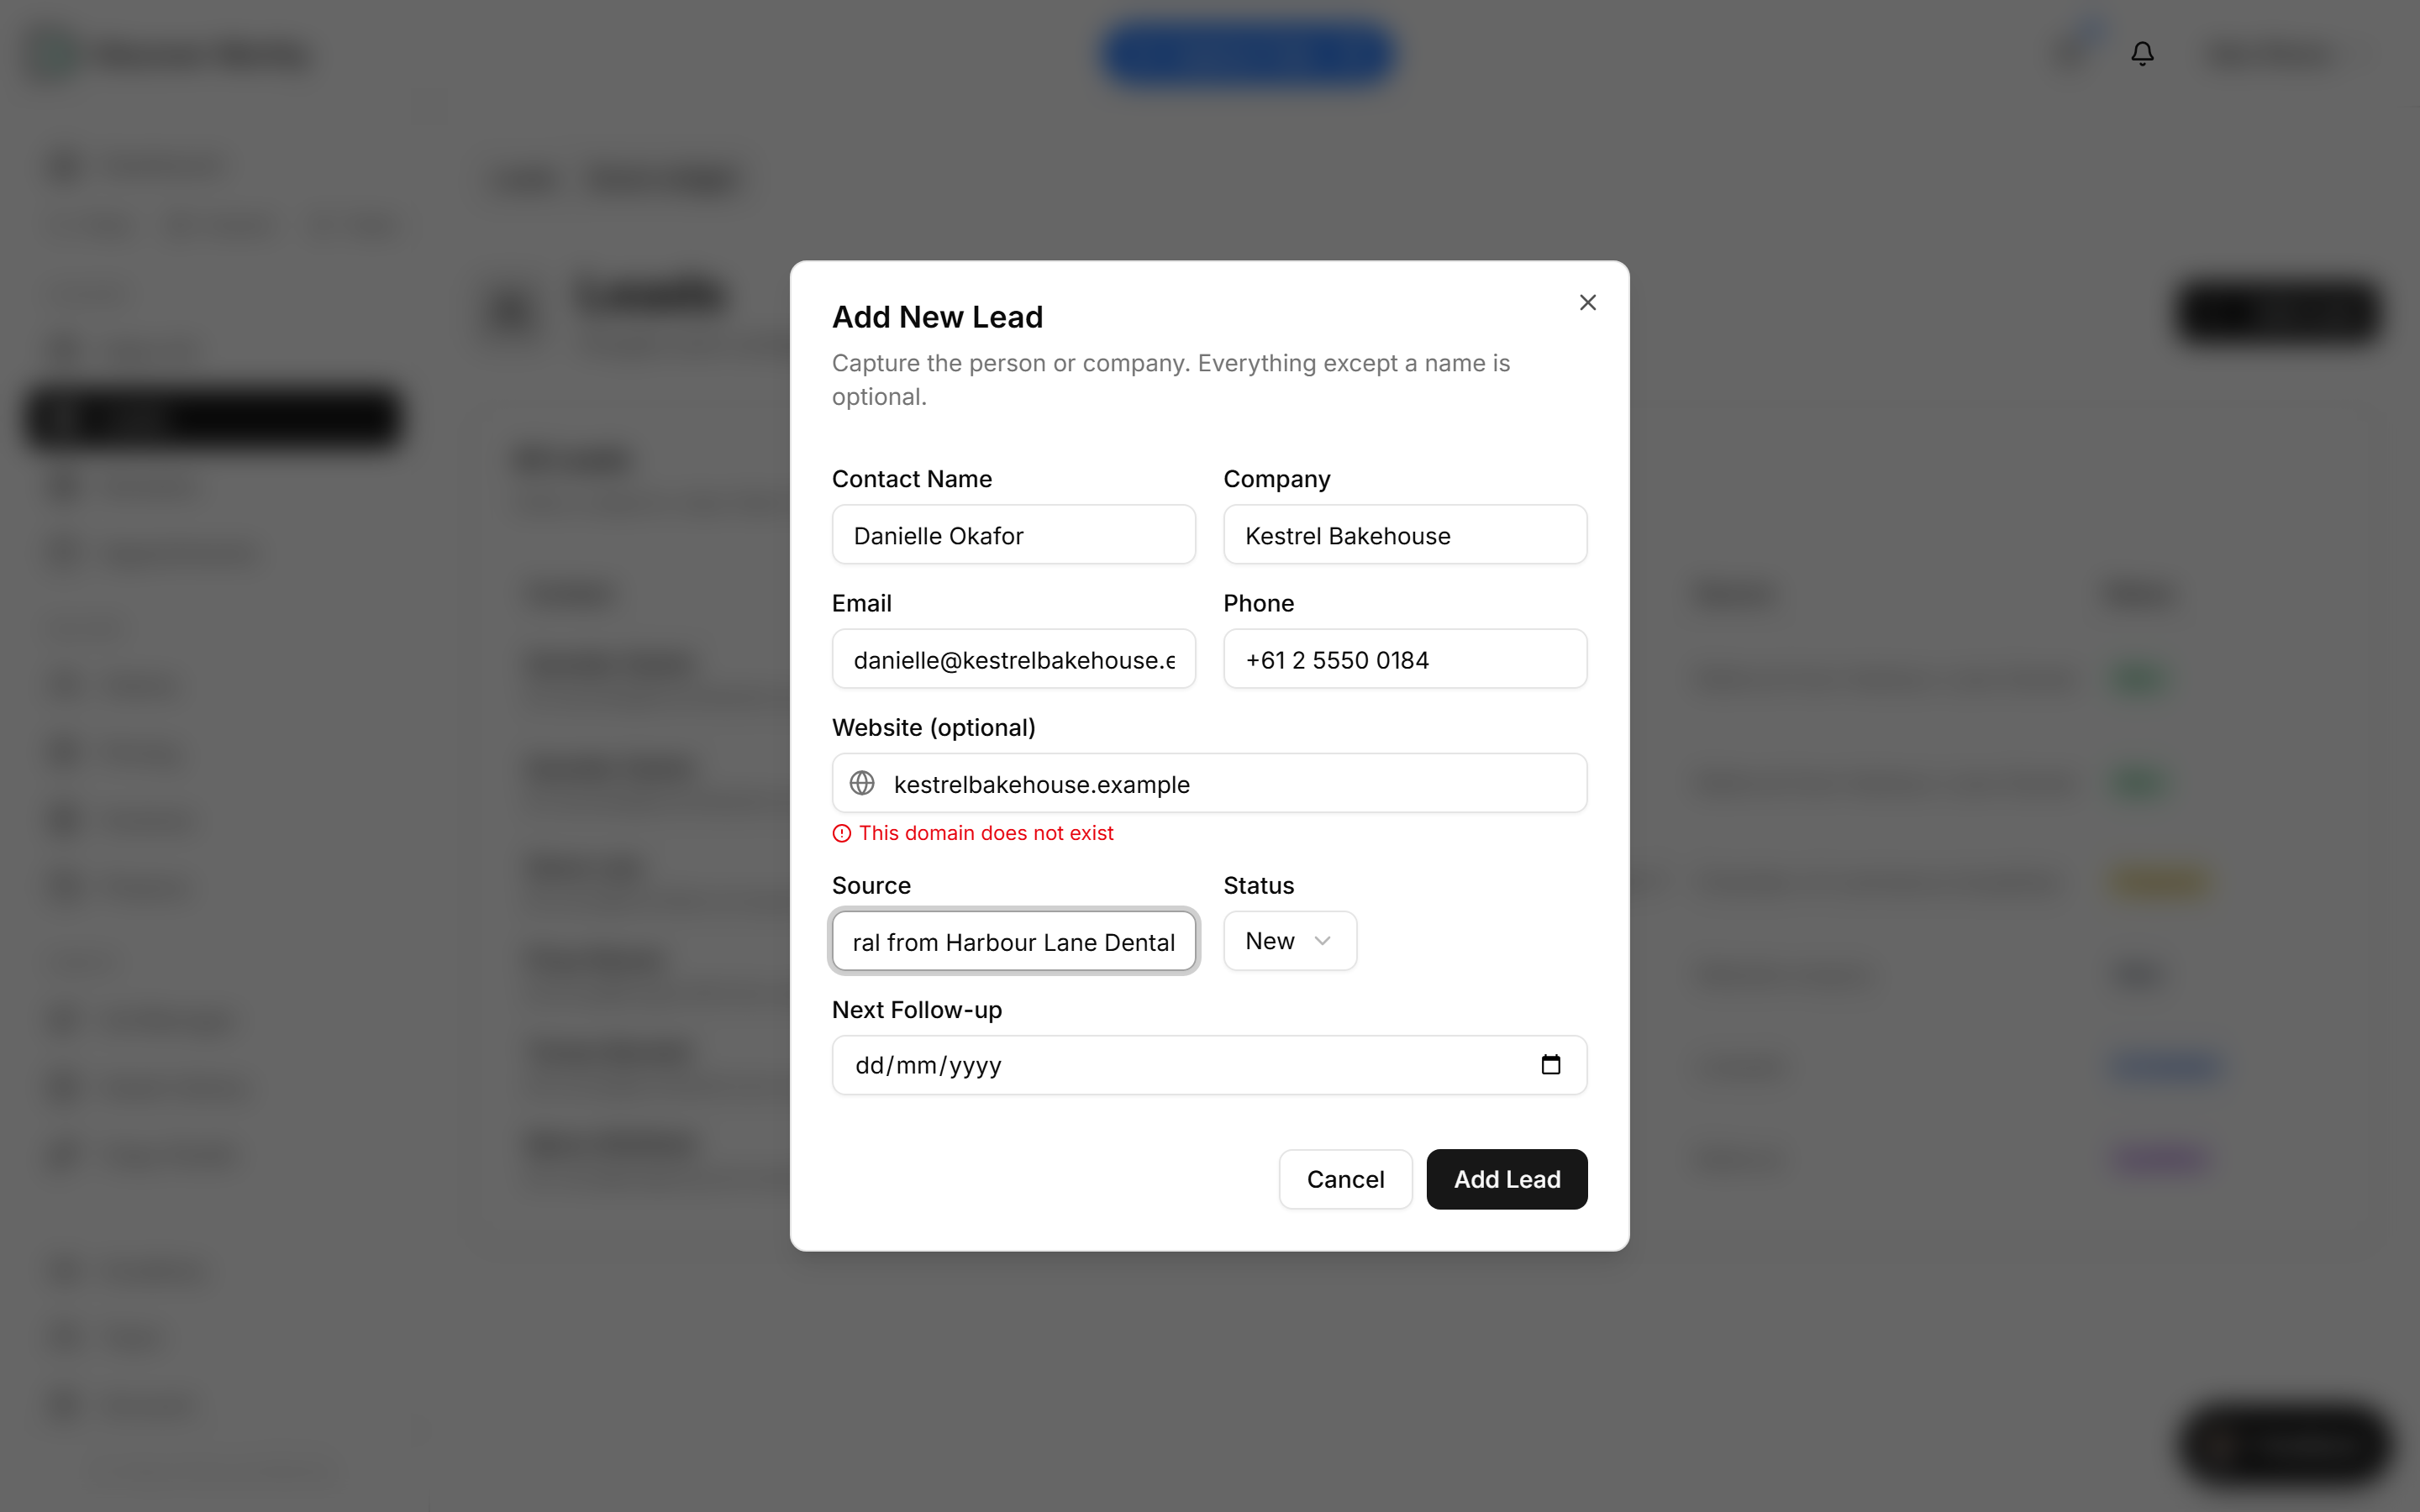
A real example: someone referred by an existing client, with a website and no work agreed yet. Status stays New, and the follow-up date is the bit worth setting honestly — it is the only thing that will bring this lead back to your attention.
- 4
What you can do with a lead
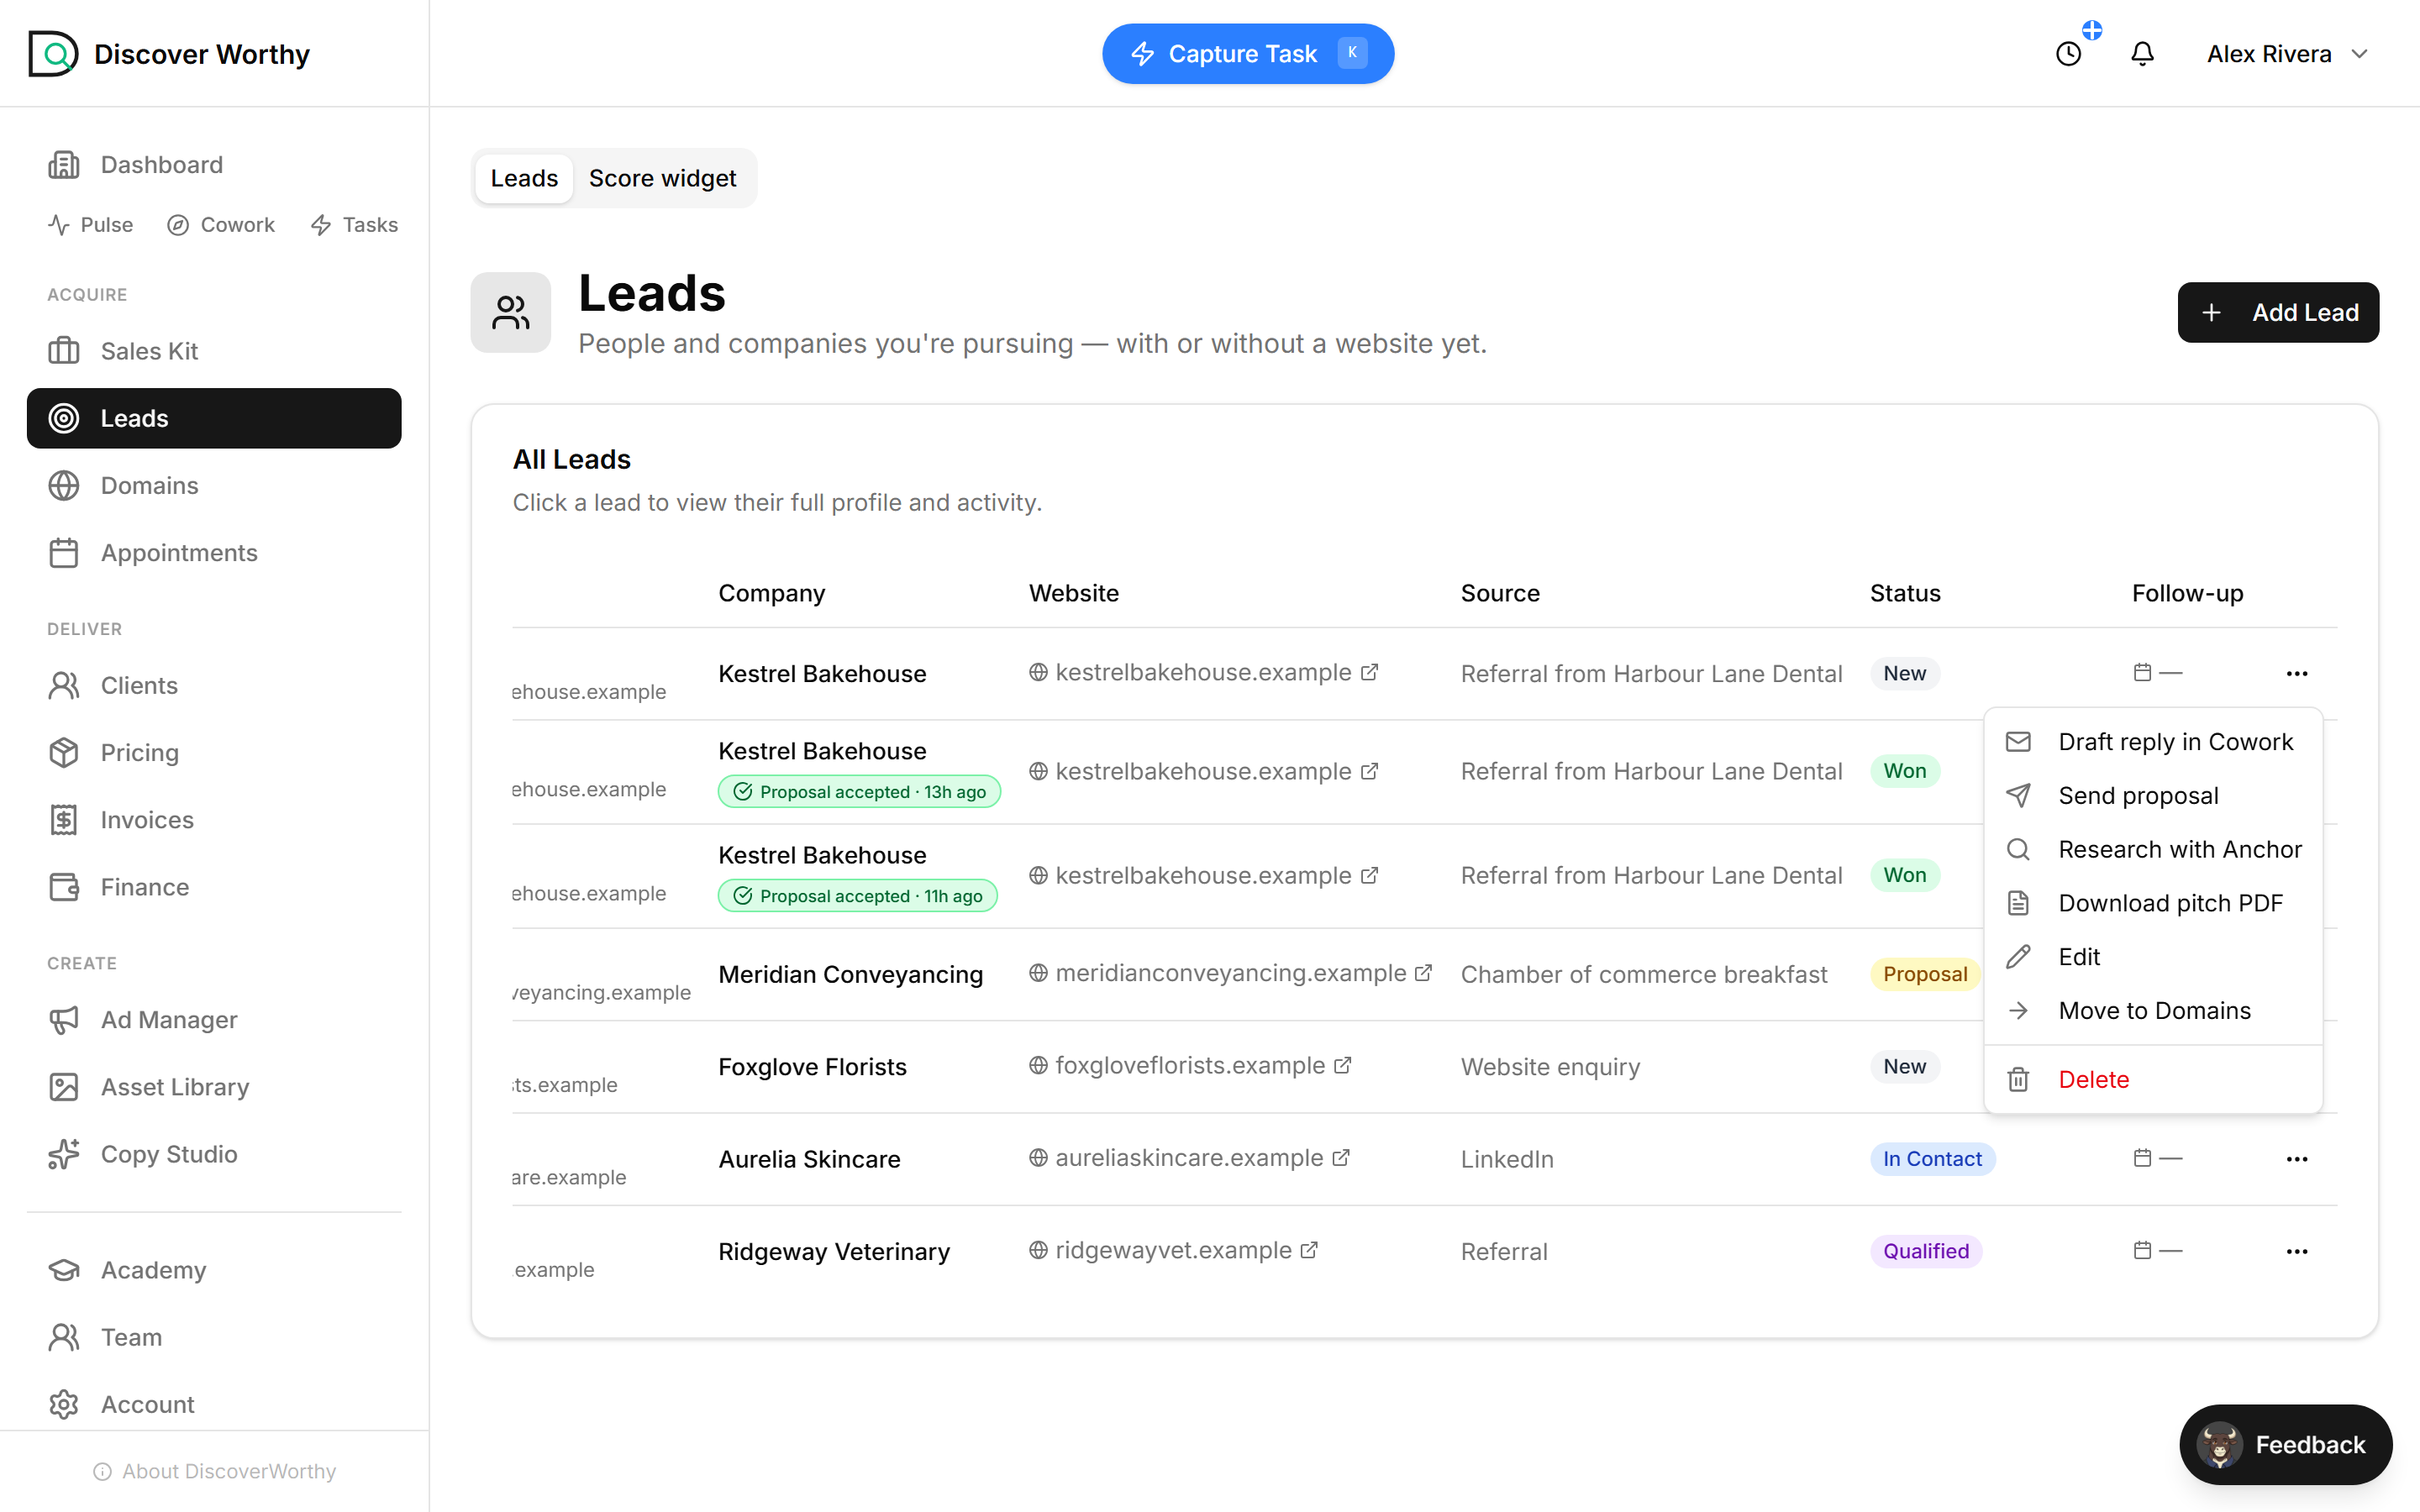
The menu on each row is the whole acquisition toolkit, and most of it is free to try before you have agreed anything.
Draft reply in Cowork writes the next email for you. Research with Anchor builds a fit dossier on their business. Download pitch PDF produces a branded audit of their current site you can attach to an email. Move to Domains promotes them once you start building.
Send proposal is the one that closes. That is the rest of this guide.
Research and the pitch PDF both need a website on the lead. Without one they are hidden rather than disabled, which is why a lead with no website looks like it has fewer options.
- 5
Build the proposal
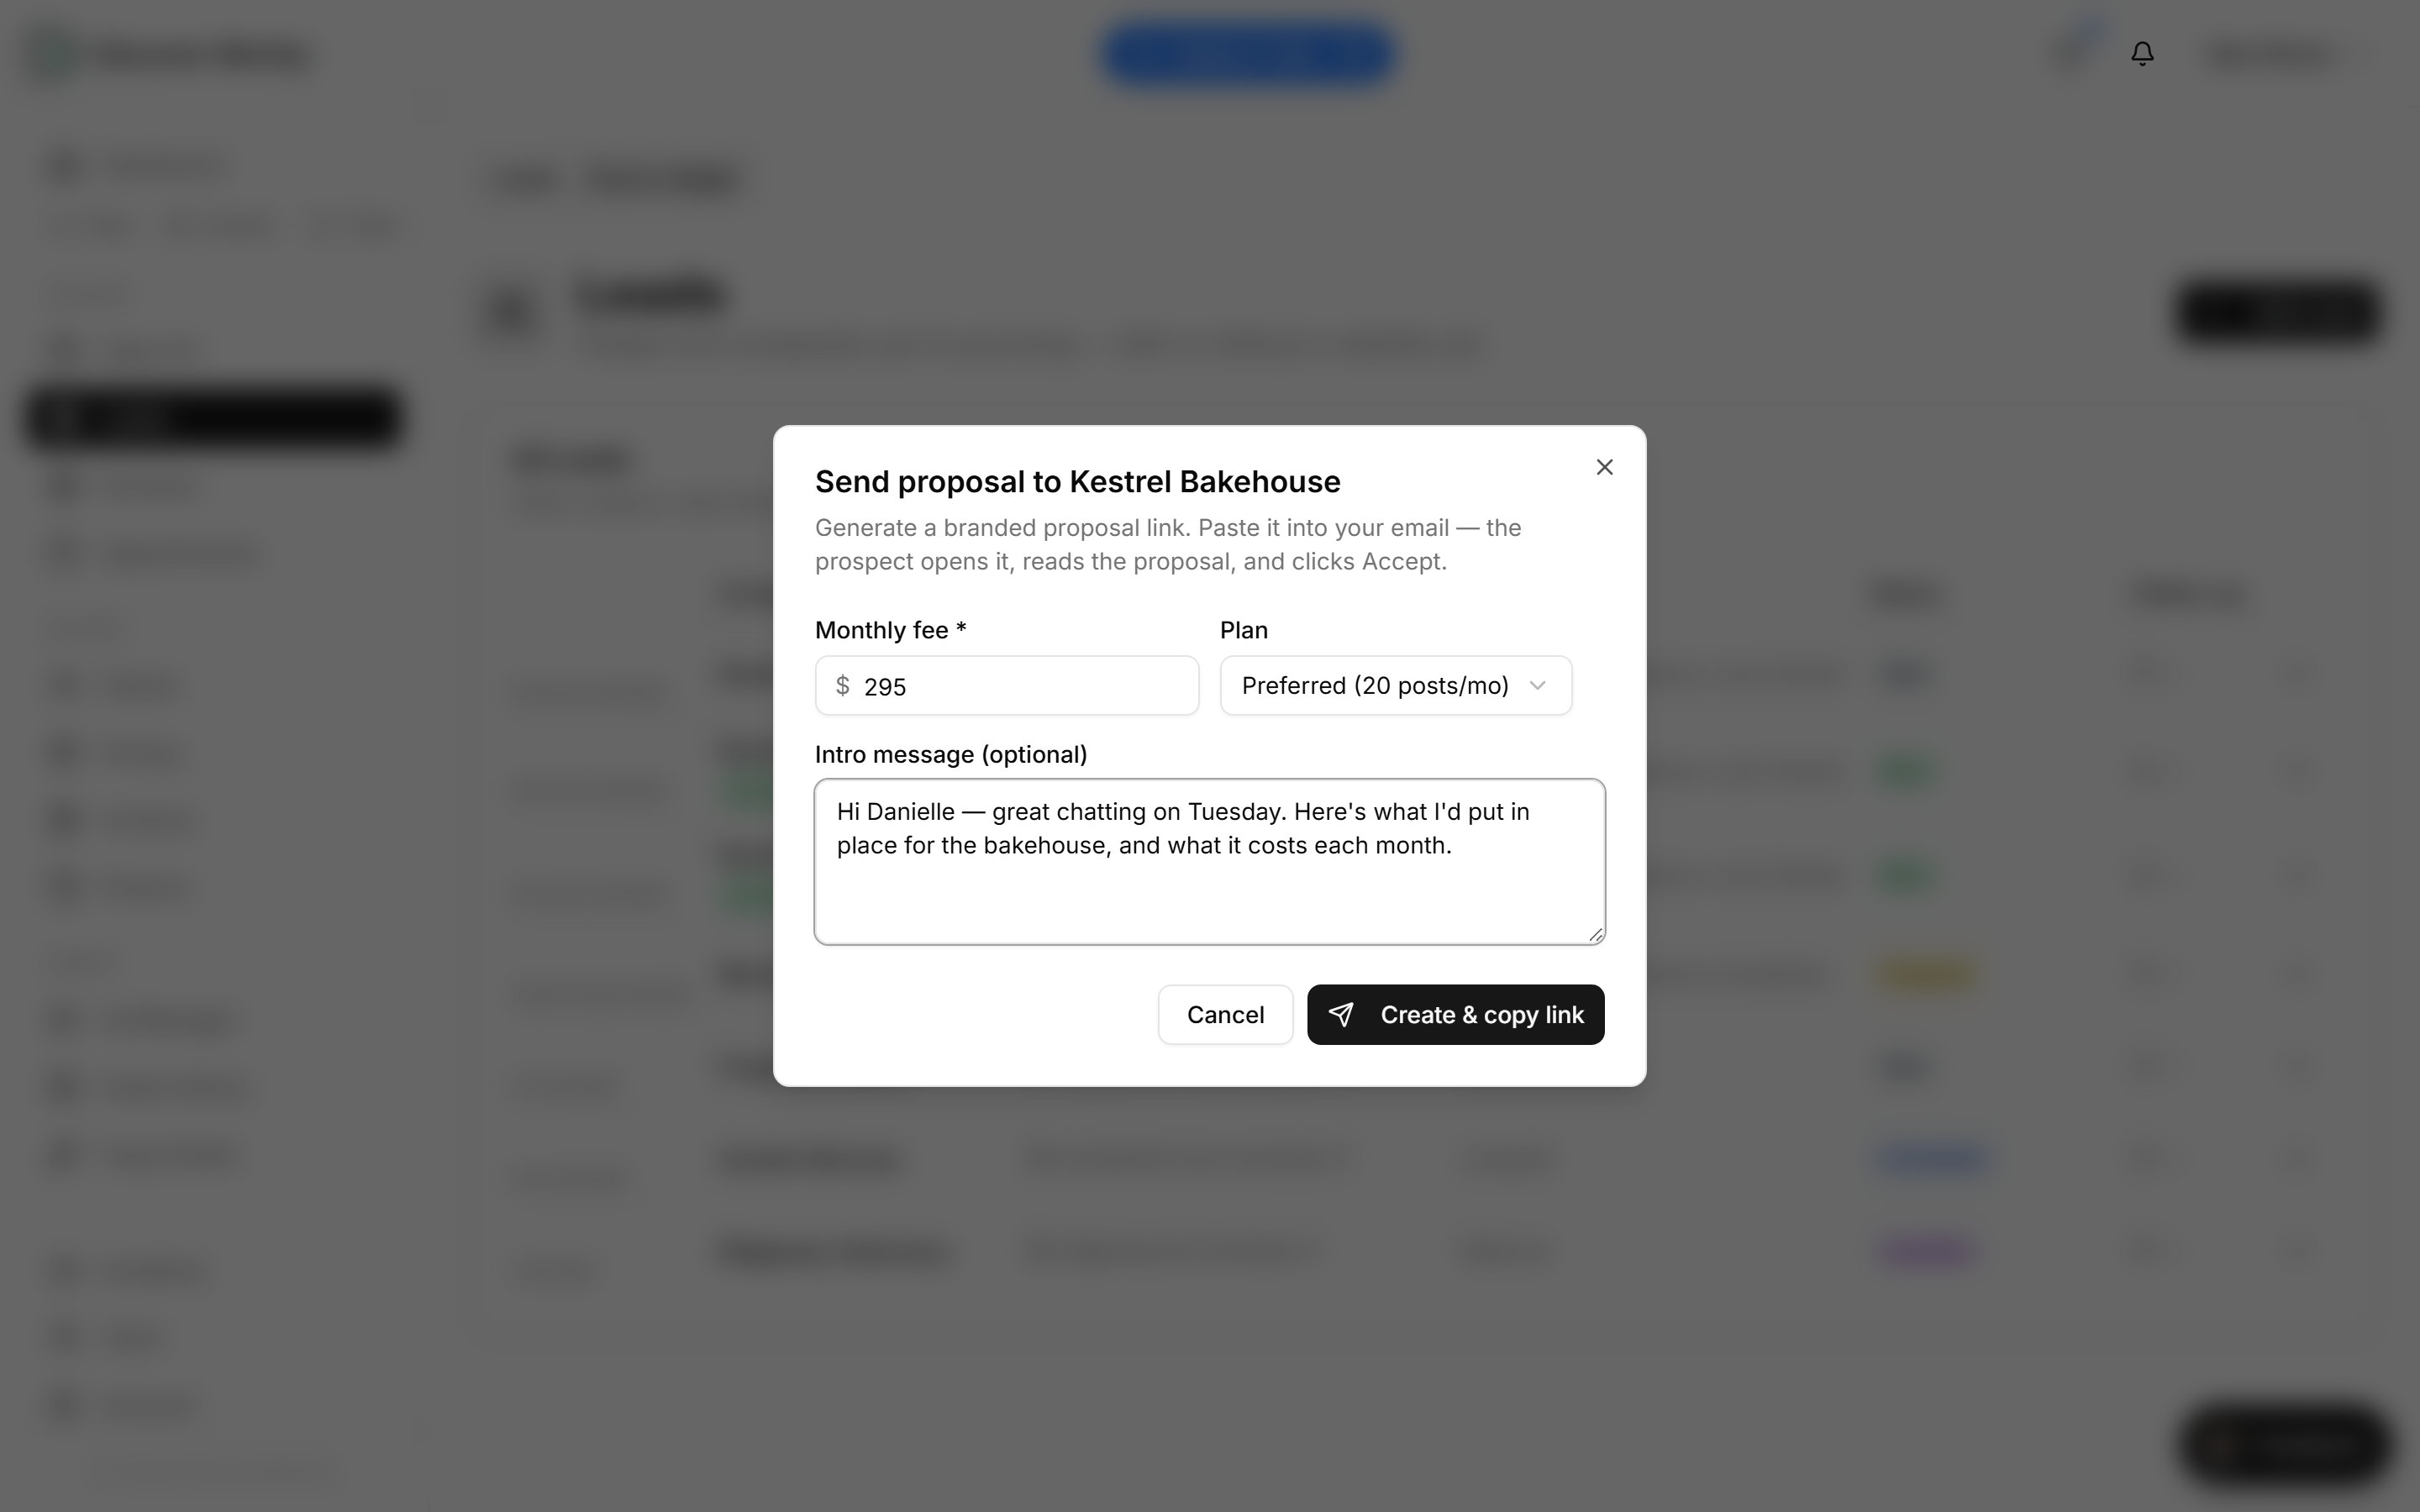
Two decisions: what you charge per month, and which plan sits underneath. The fee is what the client pays you in total — the plan is what you pay us, so the gap is your margin.
The intro message is the only writing you have to do. Everything else on the proposal — what gets published each month, what they will see, your branding — is filled in from the plan and your account.
- 6
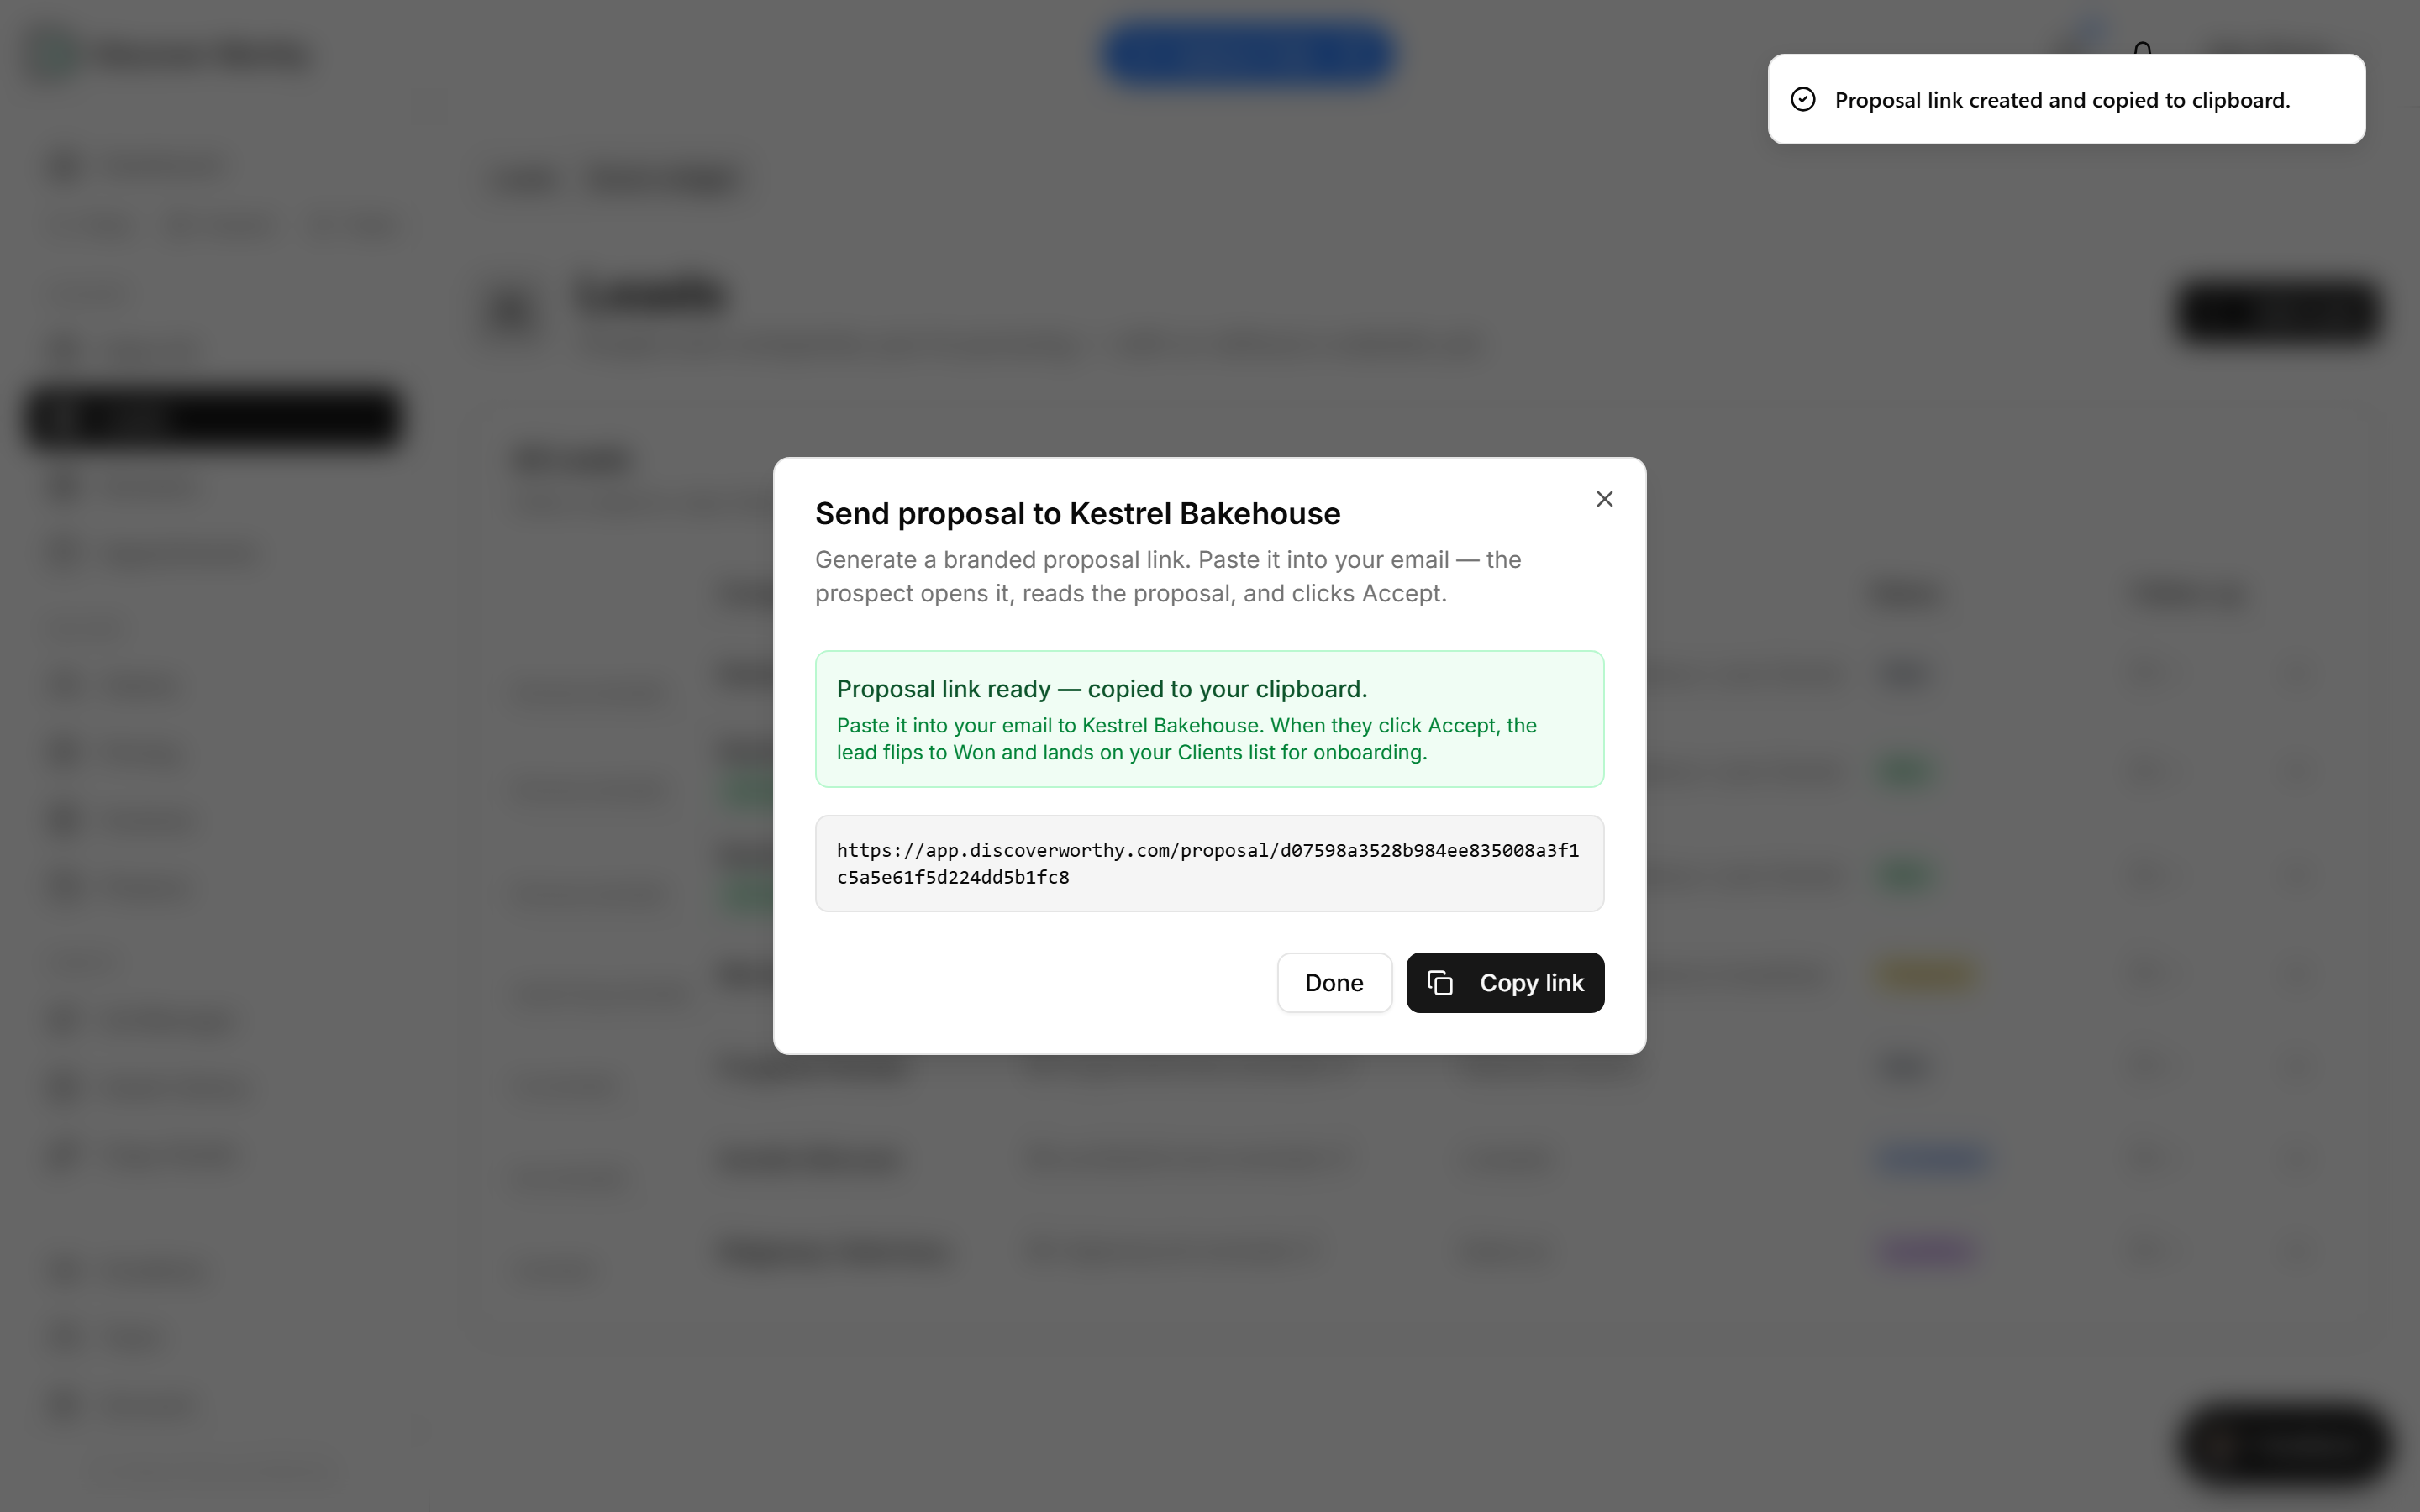
You get a link, not an email
The proposal is a link, copied to your clipboard the moment it is created. You send it yourself, in your own email, in your own words. Nothing is sent on your behalf.
That is a deliberate trade: you keep the relationship and the thread, and we skip a step that would put an unfamiliar sender in front of your prospect.
Editing later replaces the content at the same link — so if they come back asking for a different number, change it here rather than sending a second proposal.
- 7
What your prospect opens
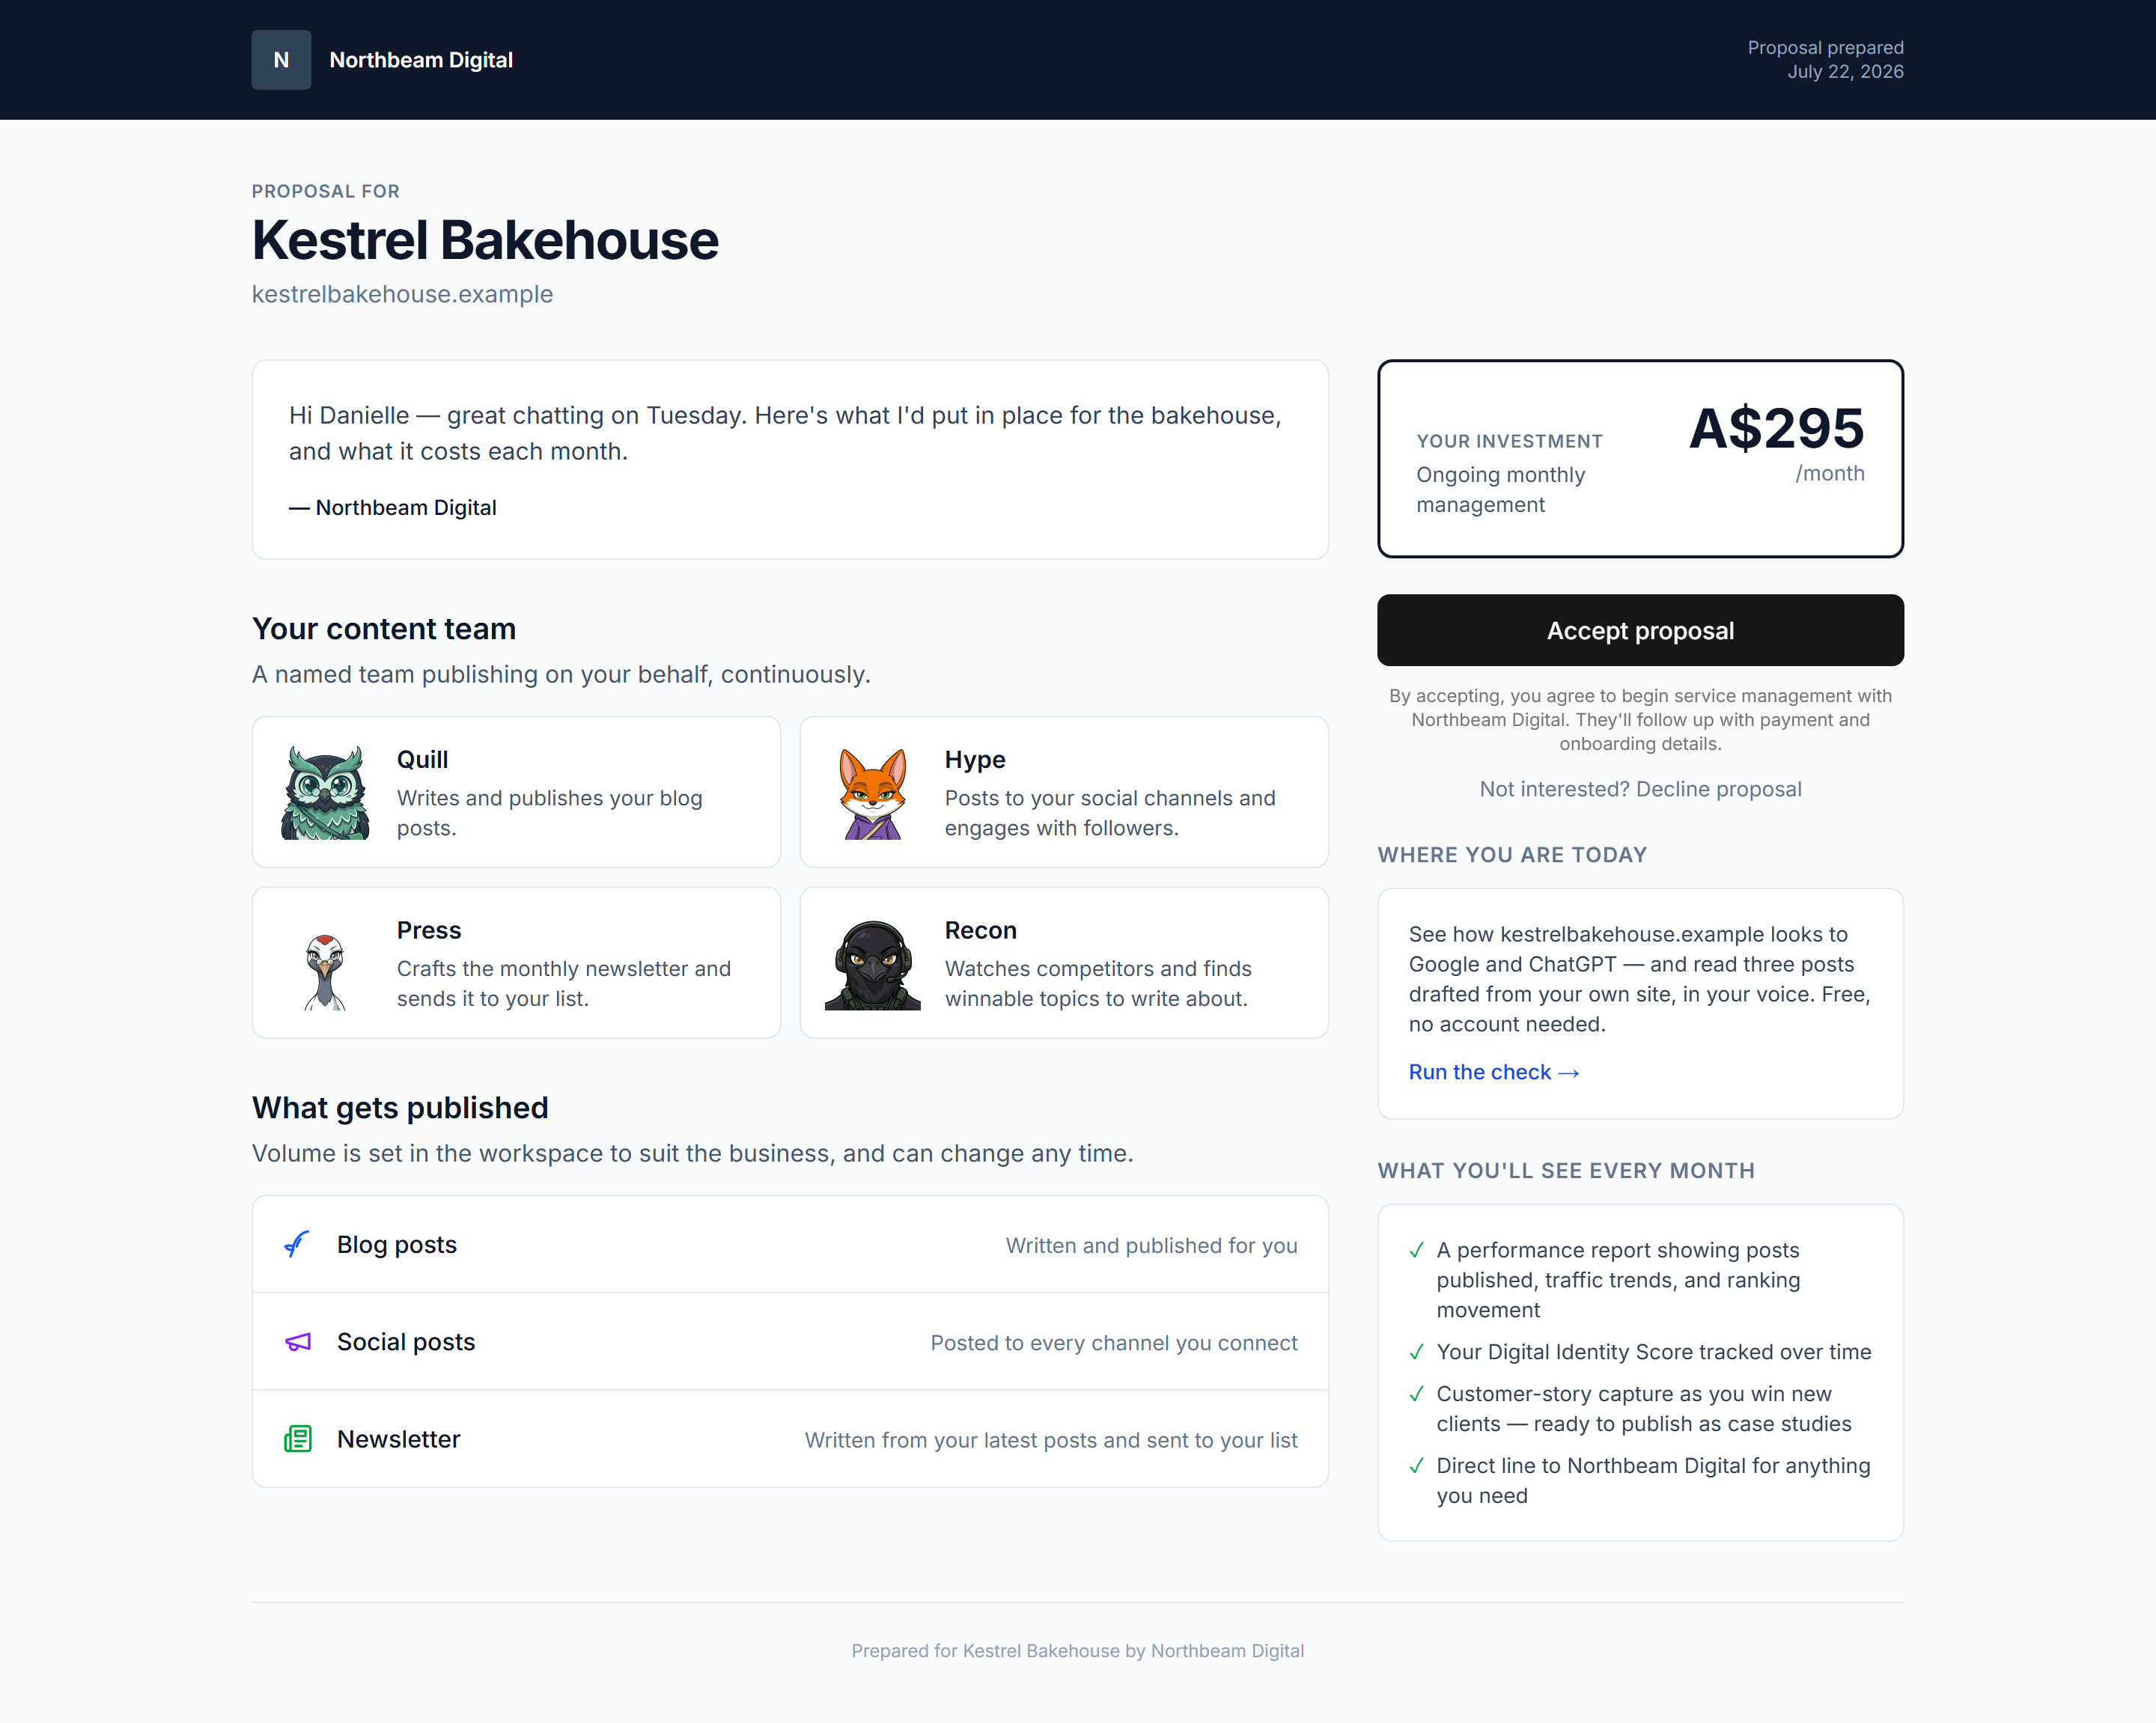
Your branding, your intro, the team that will be doing the work, what gets published, and one number. No login, no account, no attachment to download. The price and the Accept button sit at the top, not buried under the supporting material.
What it deliberately does not do is quote you a volume. How much gets published is set in the workspace and can change, so the proposal describes the work rather than committing you to a number you would then have to hold to.
Down the right is where they stand today. If their site has been scored, that is the score and the first things to fix; if not, they get a link to run the check. Either way it opens the full report — worth knowing that the strongest part of that report is not the score but the three posts drafted from their own site, in their voice. It is the closest thing to a sample of your work they can hold.
Accept and Decline are both on the page. A decline is not a dead end you have to chase by email; it comes back to you as a status.
If they click through to the report, a bar across the top keeps a way back to your proposal, and the report drops its own sign-up prompts while they are your prospect. They cannot wander off into our site mid-decision.
- 8
They accept
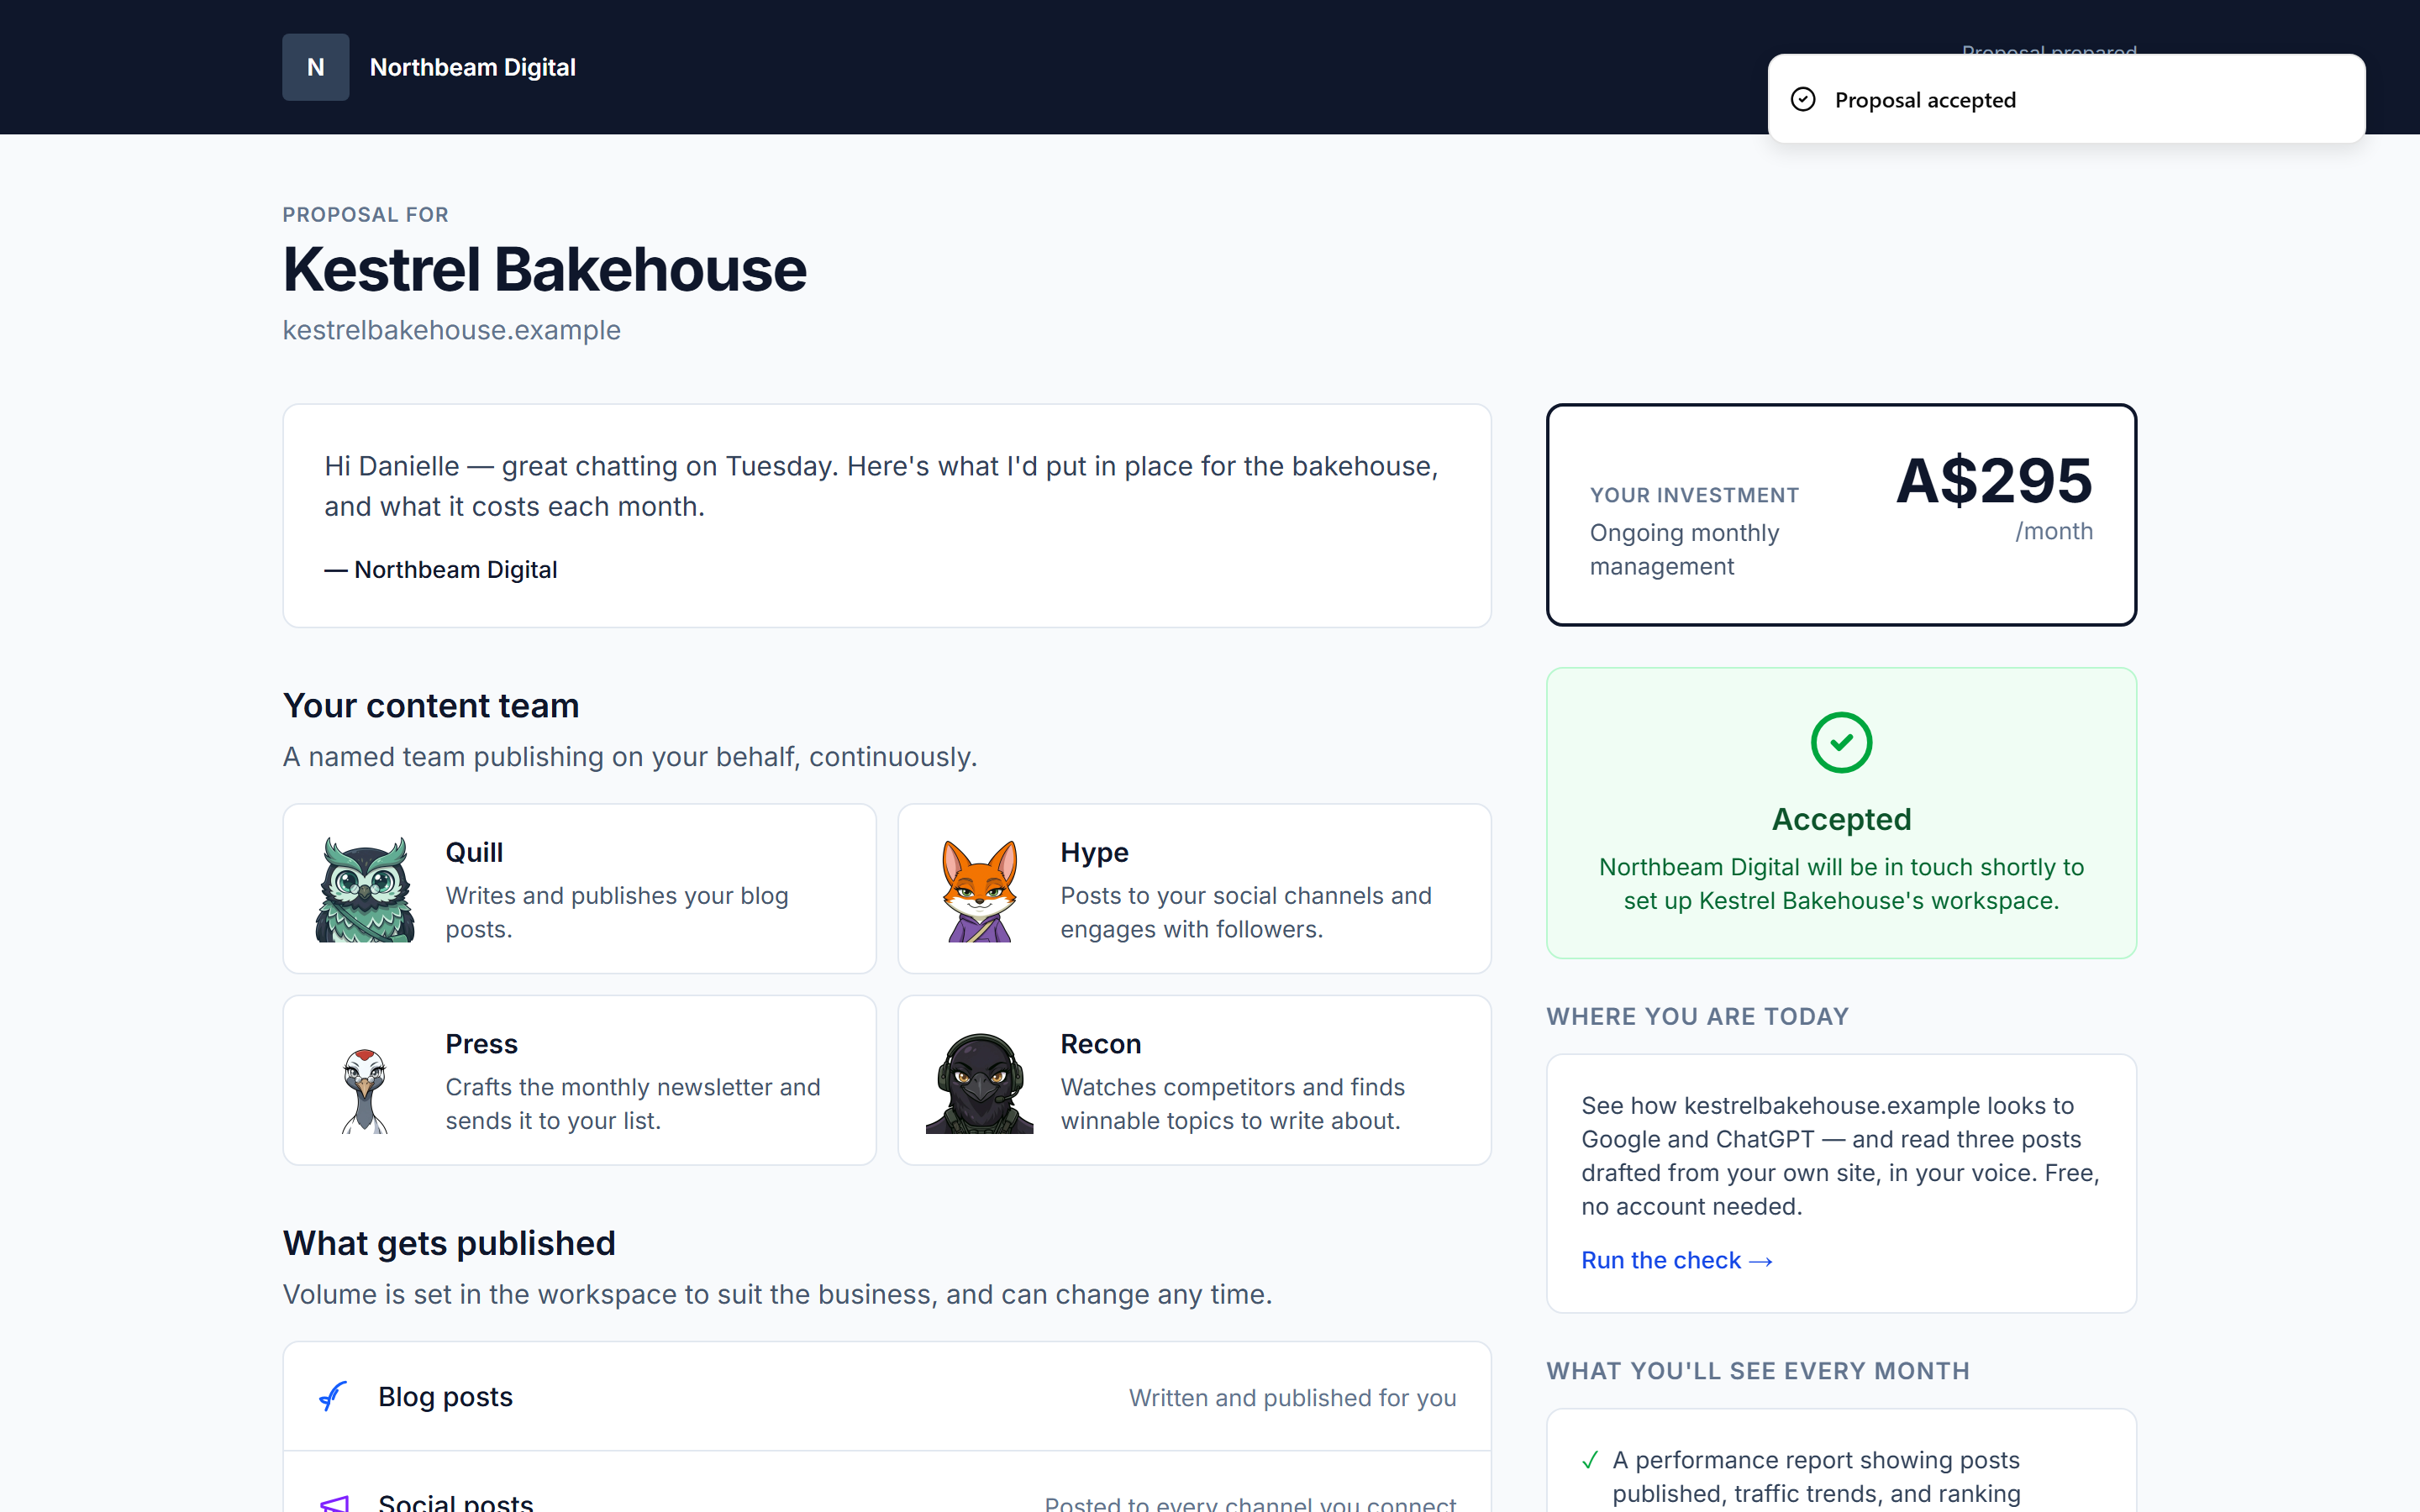
One click, no account required. They see a confirmation that you will be in touch, and you get an email telling you it landed.
- 9
What happens on your side
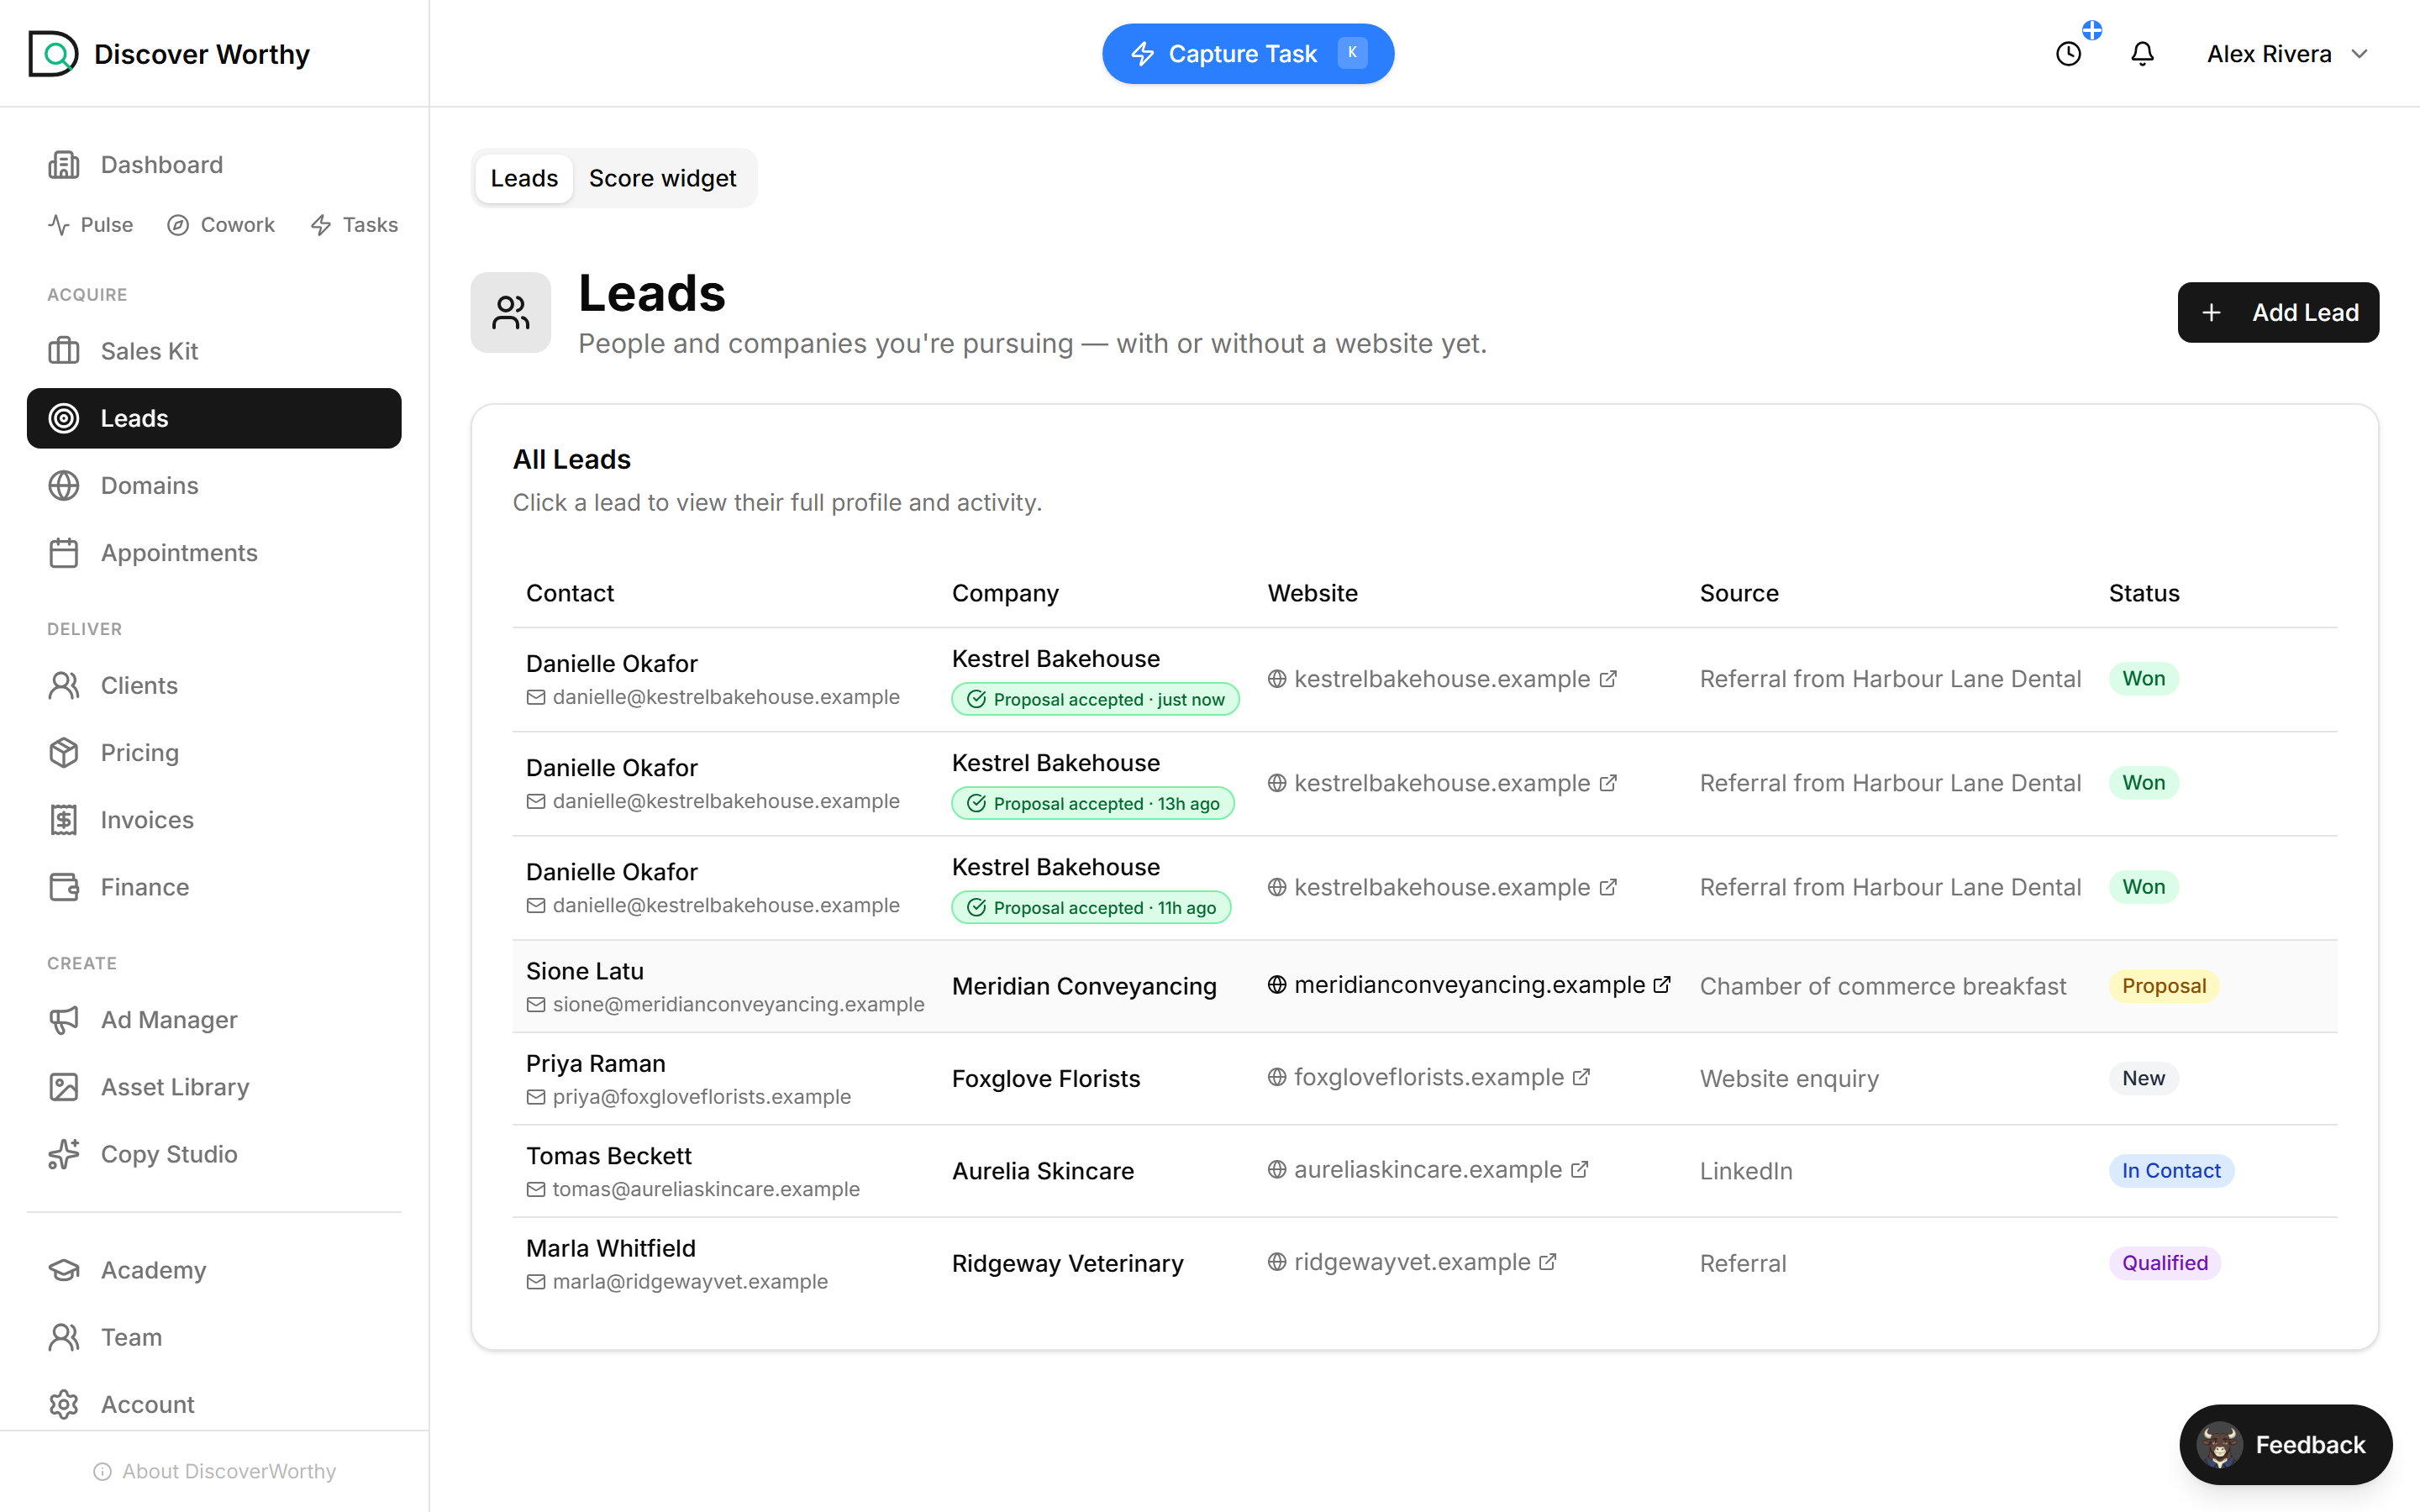
The lead flips to Won and carries an Accepted badge, so the pipeline reflects reality without you touching it.
More usefully, the acceptance does the setup: a workspace is provisioned from their website, and a client record is created carrying the price they just agreed to and the email they were proposed at. You do not re-enter any of it.
From here the client still has to take ownership of the workspace. That is the last step below, and the hand-over guide covers the other way to do it.
The lead also tells you when they OPENED the proposal, not just when they accepted. A proposal opened three times and not accepted is a different conversation from one never opened at all.
- 10
Invite them in
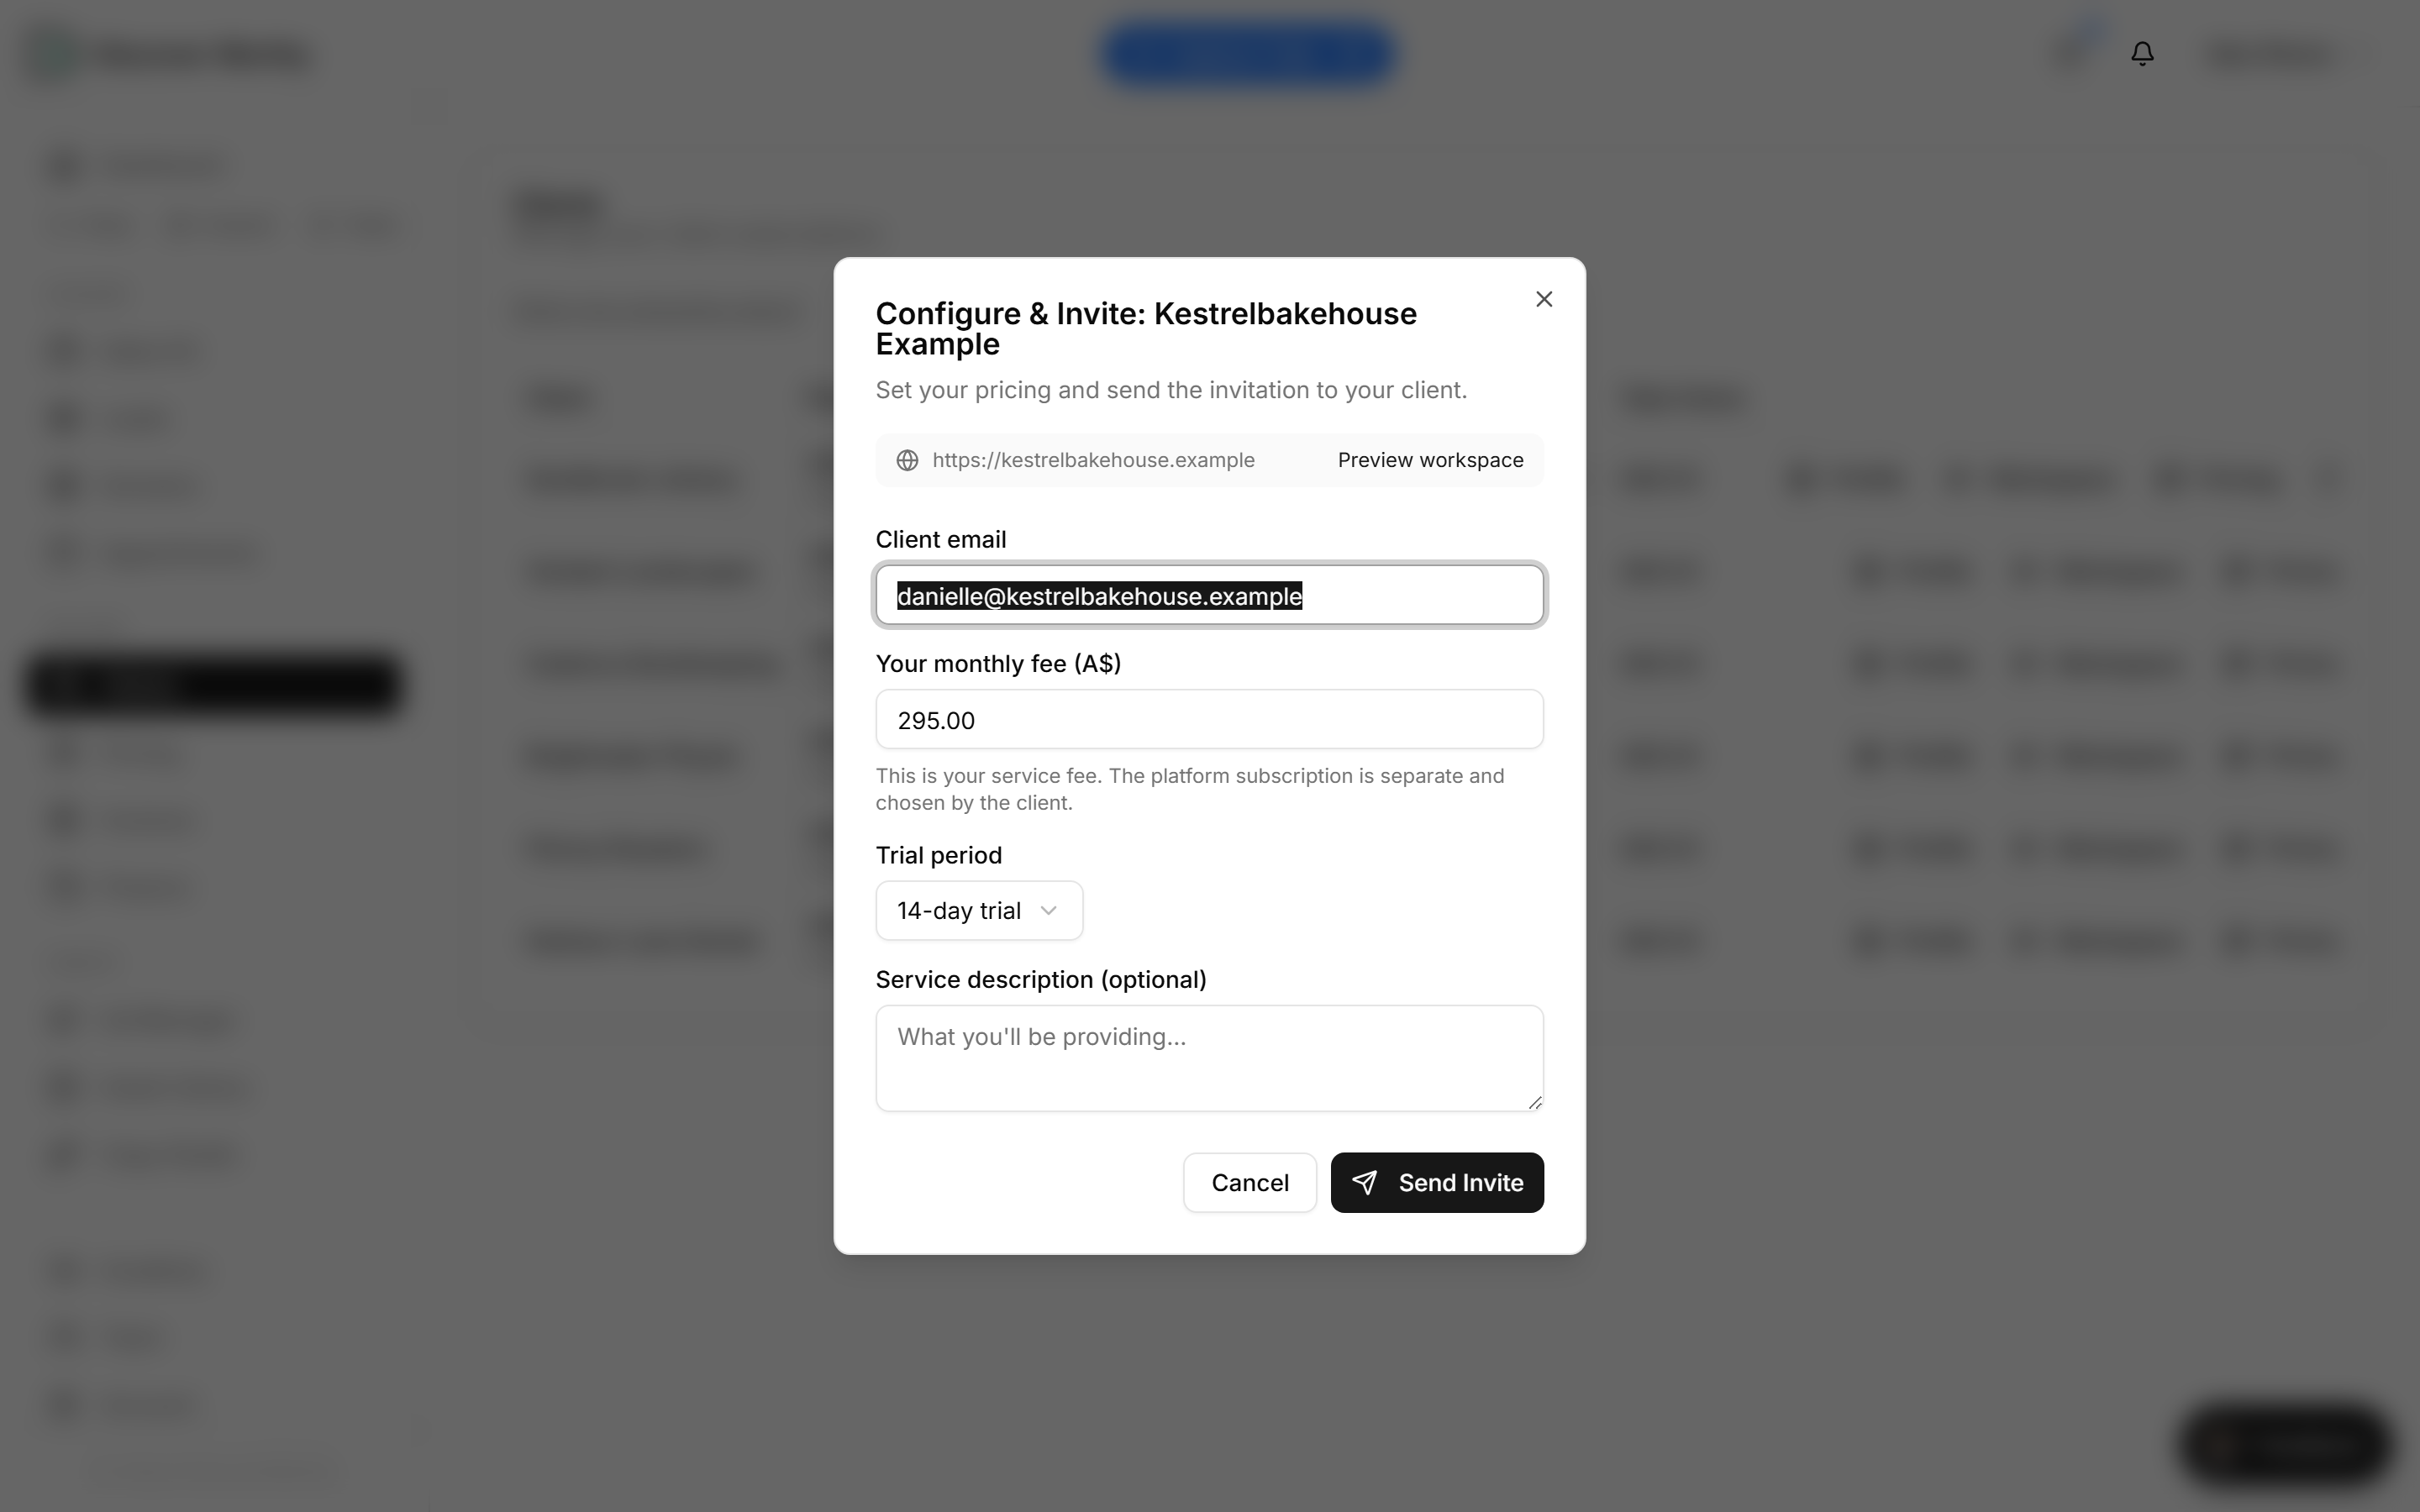
Configure & Invite is the second way to hand a workspace over: instead of sending the link yourself, you send them an email invitation from here. The price and the address they were proposed at are already filled in, because they agreed to both — change them only if something changed.
The trial period is the one decision left. It is how long they have in the workspace before the first charge, and it starts when they accept.
The alternative is the share link from the hand-over guide, which suits a client you are already in a thread with. Same destination either way: they end up owning the workspace.
Your monthly fee here is your service fee only. The platform subscription is separate and the client chooses it themselves.
Next up
Hand the workspace to your client
Share the workspace you built, let the client take ownership with their own email, and watch them move onto your Clients list.
Ready to start?
Create your freelancer account and follow along.